
How to upload your employee database to Crosschq Insights/Voice
This article covers how to manually import your employee database from the Crosschq UI. For customers wanting to auto-sync employees from your Workday HRIS, click here to learn about our Workday API integration.
Uploading an employee database to Crosschq is an important step to leverage Crosschq's Quality of Hire and/or Voice (surveying) features. Read the sections below to learn more about the upload process:
Uploading your CSV file
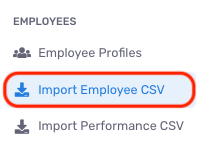
From the Insights app, navigate to the Import Employee CSV section on the lefthand menu.
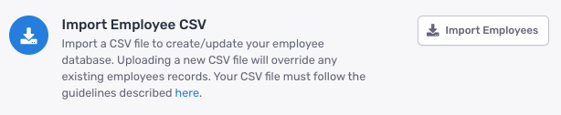
Click the Import Employees button to open up the import wizard.
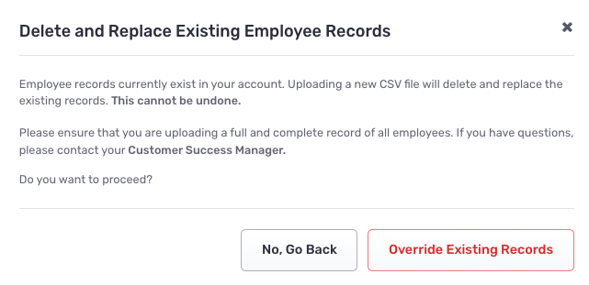
You will be notified that Crosschq overrides your employee database with your most recent employee upload. Due to this behavior, we recommend importing an employee file containing your entire employee database. Then, to maintain new hires and terminations, we also recommend that an updated employee file is imported in Crosschq at a regular cadence (e.g. biweekly, monthly, or whenever you intend to distribute new surveys to your employees).
Click Override Existing Records to proceed to the next step.
A new window will appear, prompting you to upload your employee data source.
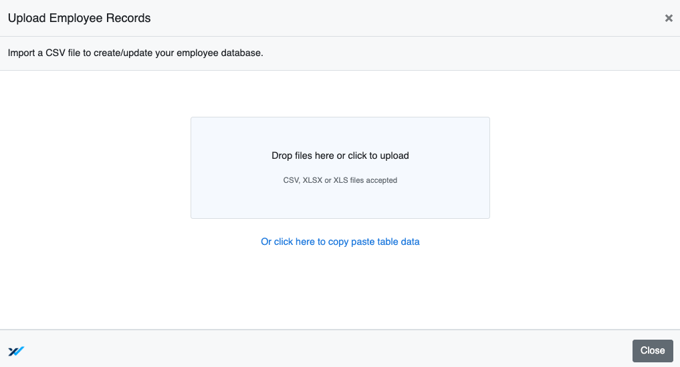
Use this template for your employee import. The template includes a "helper" row to indicate what values are accepted for each column. Alternatively, from the upload window, you can select click here to copy paste table data; this feature will allow you to paste spreadsheet data directly on the wizard without needing to upload a source file.
- At a minimum, required columns are First Name, Last Name, Email, and Hire Date.
-
The remaining columns are optional but should be used whenever possible. The more fields that you fill out will help enrich the reporting in the Insights app (like adding more filter options when viewing your data in Insights).
Once the data has loaded, you will be taken to a new window where you will map Crosschq fields with the columns from your upload. The dropdowns on the right will show you all of the columns pulled from your upload. Select the correct column that corresponds to the Crosschq field names on the left. If your import file shares an exact column match with a Crosschq field name, then the mapping will be auto-detected.
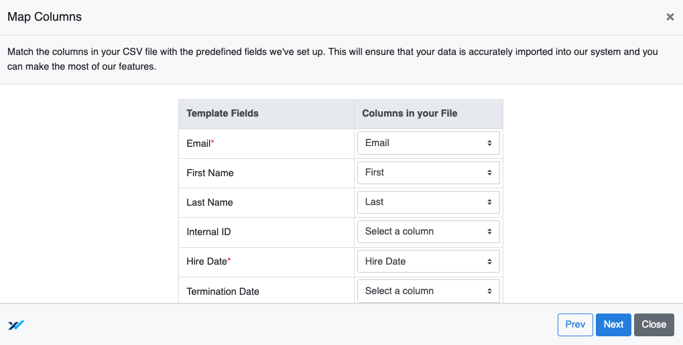
Click Next once the mappings are complete.
Afterward, you will be directed to a window to verify your employee data. Each employee will be a row of data. You can click into each field cell to make any final edits before the employees are uploaded to Crosschq.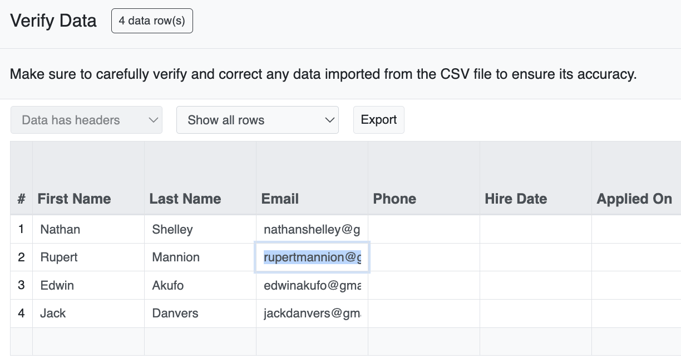 If you scroll to the right of the matrix, you will also be given the option to add more rows in case you needed to include extra employee that were not part of your initial source file.

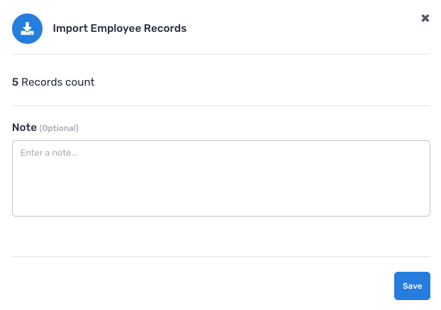
Click Submit once your employee data has been verified.
Afterward, the import window will confirm the number of records to be uploaded to Crosschq. Click Save.
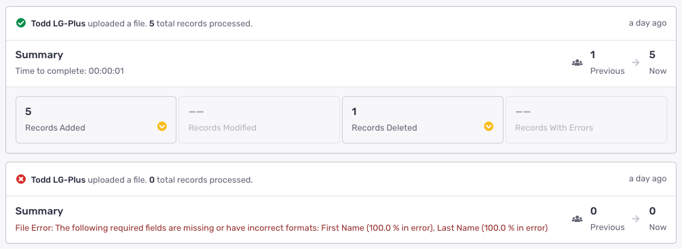
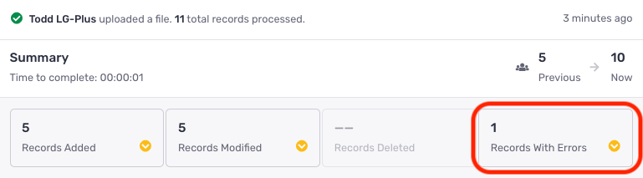
Navigate to the Import Employee CSV section to review your import status and history.
Error Thresholds
The import wizard will validate that email and hire date are correctly inputted. First name and last name will be validated post-import. We will apply the following rules for records missing first name and/or last name:
- If more than 10% of records are missing either first name or last name, the source file will not be accepted, and you will see an error in the import history. Make sure to review your file for missing data, and re-upload once corrected.
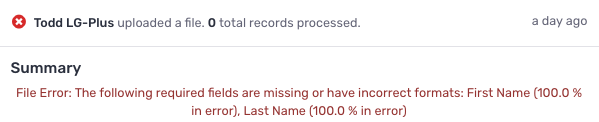
- If less than 10% of records are missing either first name or last name, the source file will will be accepted. However, only the records populated with first and last name will be uploaded. The import history will flag any records with errors, and you will need review the errors to correct and re-upload the employee file.
Import file rules
Please follow these rules when setting up your import file:
- The file format and extension must be CSV, and it cannot have a password.
- The file header row (first row) can only contain text characters (do not use invisible control characters like Shift-In).
- Dates entries (for example, the Hire Date column) should match one of these formats:
- MM/DD/YYYY
- YYYY-MM-DD
- M/D/YYYY
- The emails provided in the Email column must be unique. Emails in the Manager Email Address column must be the valid email of an employee.
- Termination Type should be filled with one of the following: voluntary, involuntary.
- Employees will be considered terminated when their records have an End Date or when the record is no longer available/not included in subsequent uploads.
- Org Level, Employment Type, Pay Type, Termination Disposition, and Marital Status, have fixed values in our database mapping table. However, if a user tries to upload a value not included in the mapping table, it will not cause an error as the new value will be dynamically added to the mapping table. For example, if a user enters "I don't know" in the Marital Status field, that employee's record will show "I don't know".
- Gender and Ethnicity, on the contrary, also have fixed values in our database mapping table. But, if a user tries to upload a value not included in the mapping table, that unique value will map to "other" in the database. For example, if a user enters "I don't know" in the Ethnicity field, that employee's record will show "other".