Getting Started
There are a few things to be aware of before configuring SSO for your account:
Provisioning Users
When a user who does not already exist in your Crosschq account logs in for the first time via SSO, we will automatically create a Crosschq account for them, and we will give them Viewer permissions (this is the lowest level of account permissions in the application). A Crosschq administrator can change user permissions later within Crosschq if needed.
Users who already exist in your Crosschq account will keep the permissions that were already assigned to them.
*NOTE: remember to assign your users to the Crosschq application within Azure.
Duplicate Users
Users who have existing Crosschq accounts need to log in via SSO using their existing Crosschq email address. If a user logs in with an email address that we do not recognize, we will create a new account for them, which could lead to users having multiple Crosschq accounts.
If your users’ SSO email addresses do not match their Crosschq email addresses, be sure to add and verify their SSO email addresses to Crosschq before they attempt to log in via SSO.
If any members of your team inadvertently create duplicate Crosschq user accounts, please reach out to support@crosschq.com for assistance resolving the issue.
*NOTE: remember to assign your users to the Crosschq application within Azure.
Password Deletion
Once SSO is fully enabled for your organization's Crosschq account we will completely remove any existing Crosschq passwords from our database. If you decide at a later date to remove the SSO integration, all users will need to reset their passwords.
Deactivating Users
Deactivating a user in Azure does not deactivate their user account in Crosschq. Crosschq user sessions are set to expire after 24 hours, so a user may still be able to access Crosschq during that time period.
To immediately prevent users from being able to log into Crosschq, we recommend deactivating the user account in Crosschq at the same time you deactivate a user in Azure.
How to configure SSO with Azure
Initially, your organization should soft-enable SSO. This will put your Crosschq account in a hybrid state in which users can log in either using SSO or through the regular Crosschq login page using an email address and password. This allows your organization to test SSO without inadvertently locking out users if there’s a problem with the setup.
Once your organization has confirmed SSO is behaving as expected, you can flip the switch within Crosschq to fully enable SSO. At that point, SSO is your organization’s only way of logging into Crosschq.
Follow the steps below to set up Azure in your organization:
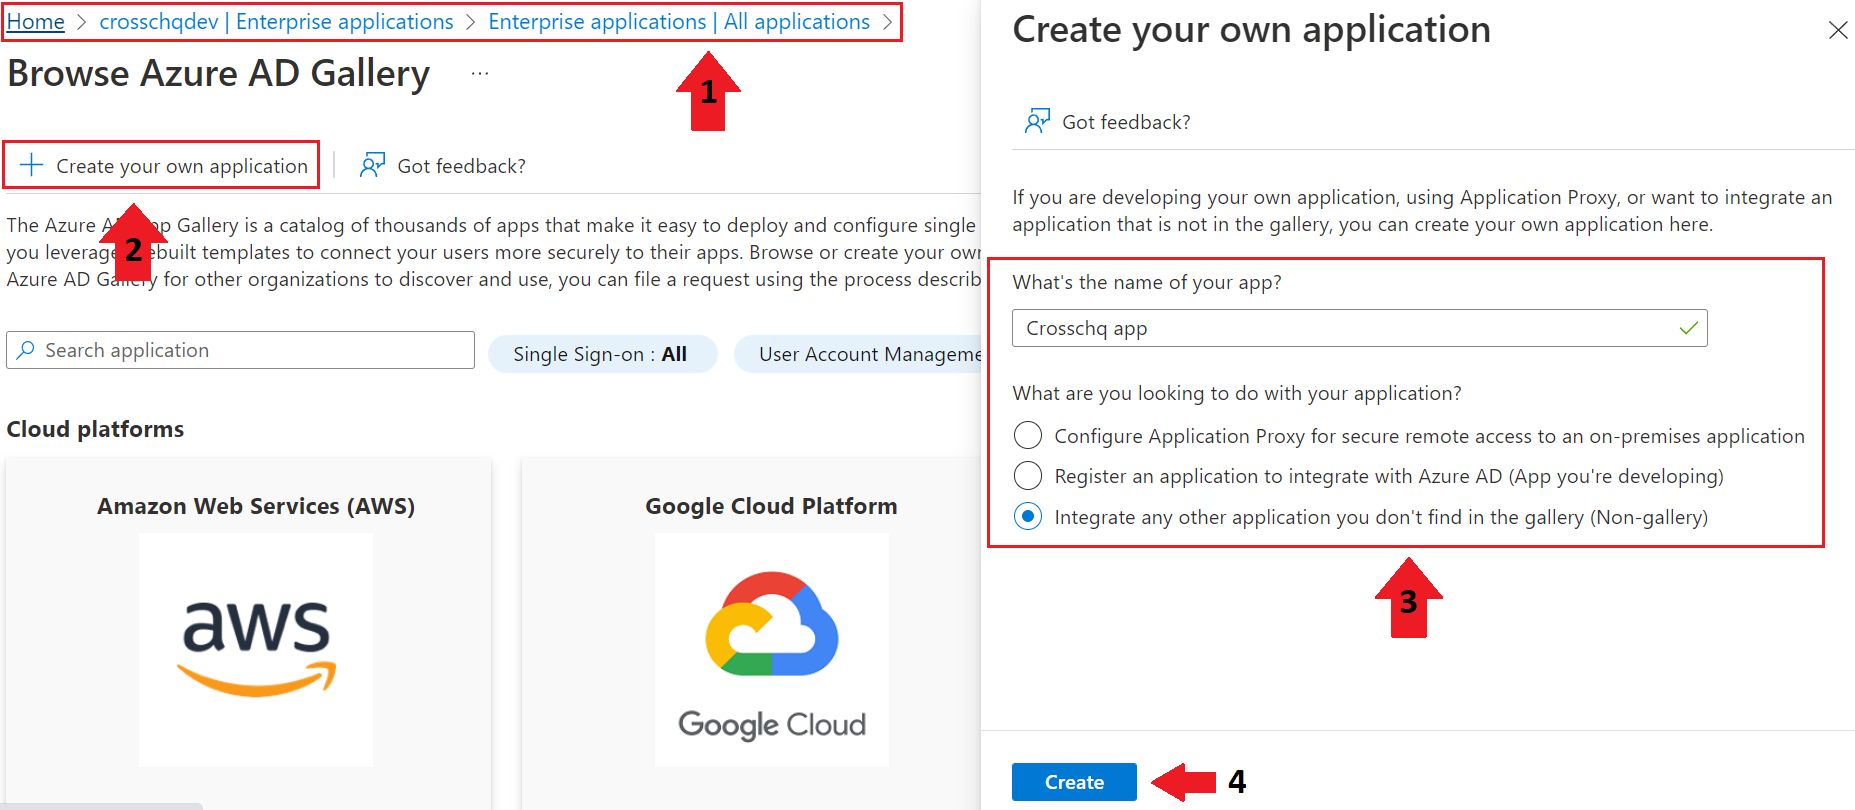
Login into your Azure Active Directory and access Manage Azure Active Directory. Access the Enterprise Applications section to create a new enterprise application.
- Select new application > Create your own application.
- Add "Crosschq app" as the name of your new application and select the Integrate any other application you don't find in the gallery (Non-gallery) option. Then click Create; you will be redirected to the application profile.
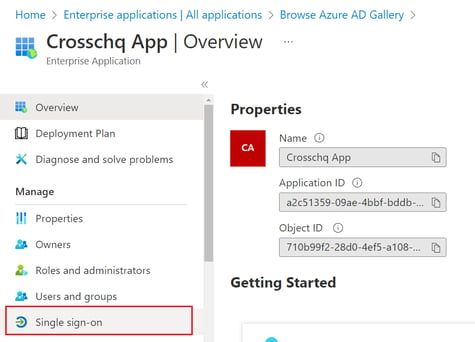
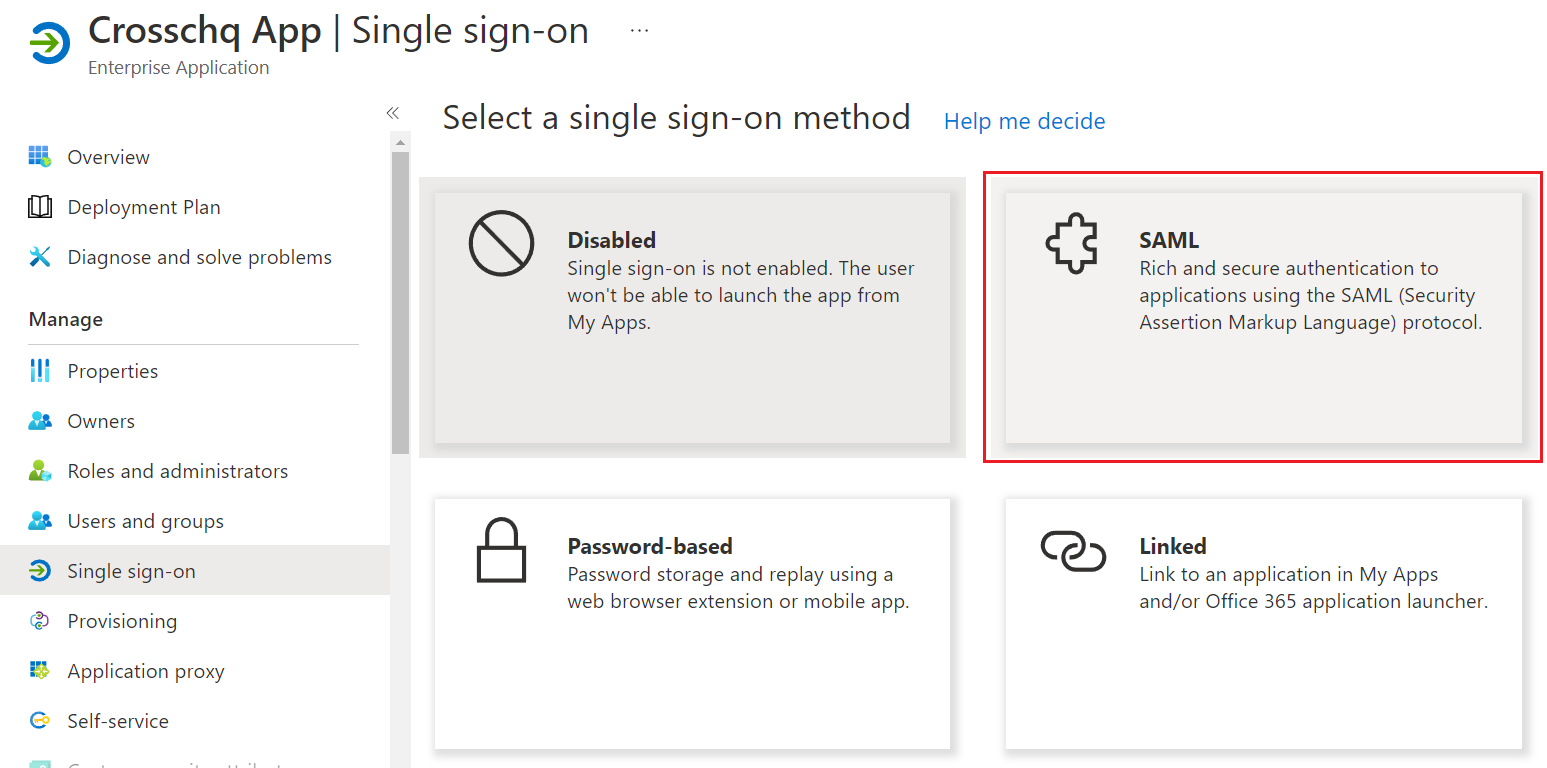
- Within the application profile, click single sign-on to set up SSO in your application and select SAML.
- Step 1: Select the Edit icon within the Basic SAML Configuration section. A new section will appear. Paste the following values for each field and click Save:
- Setup IdentityID: urn:crosschq:crosschq.com:saml:sp
- Reply URL: https://id.crosschq.com/saml2/acs/
- Sign on URL: https://id.crosschq.com/saml2/redirect/
- Relay State: https://id.crosschq.com/saml2/redirect/
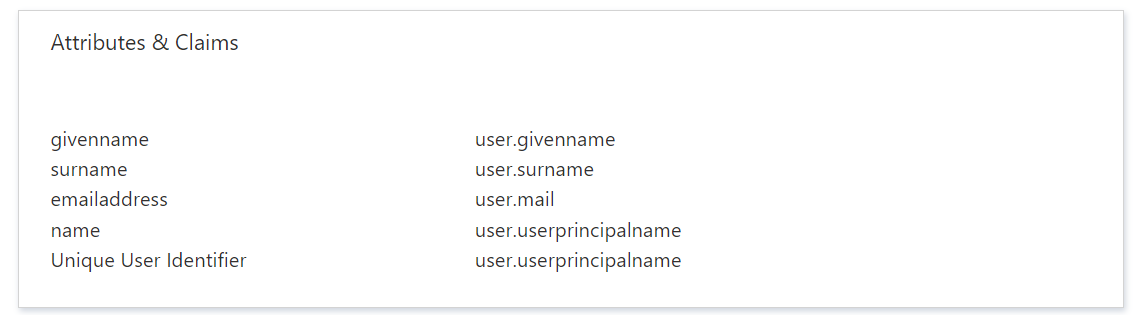
- Step 2: Crosschq expects the SAML assertions in a specific format, which requires you to add custom attribute mappings to your SAML token attributes configuration. The following image shows the default attributes:
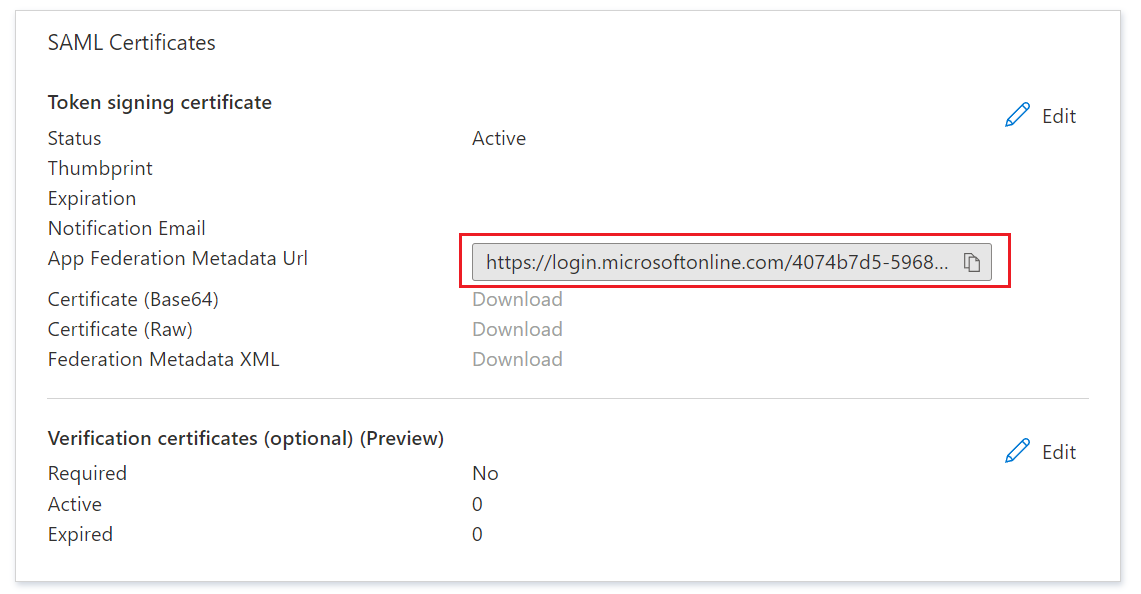
- Step 3: Copy the App Federation Metadata Url that you will find in the SAML Certificates section. This URL will be used in the next step to set up SSO within Crosschq.
*note: Remember to use the "copy" icon to ensure that the URL has been copied correctly.
Next, log into your Crosschq administrator account and go to Organization Settings > Security > Authentication > locate the Single Sign-On section and click Begin Configuration.
Use the drop-down menu to select Azure AD and paste the App Federation Metadata Url.
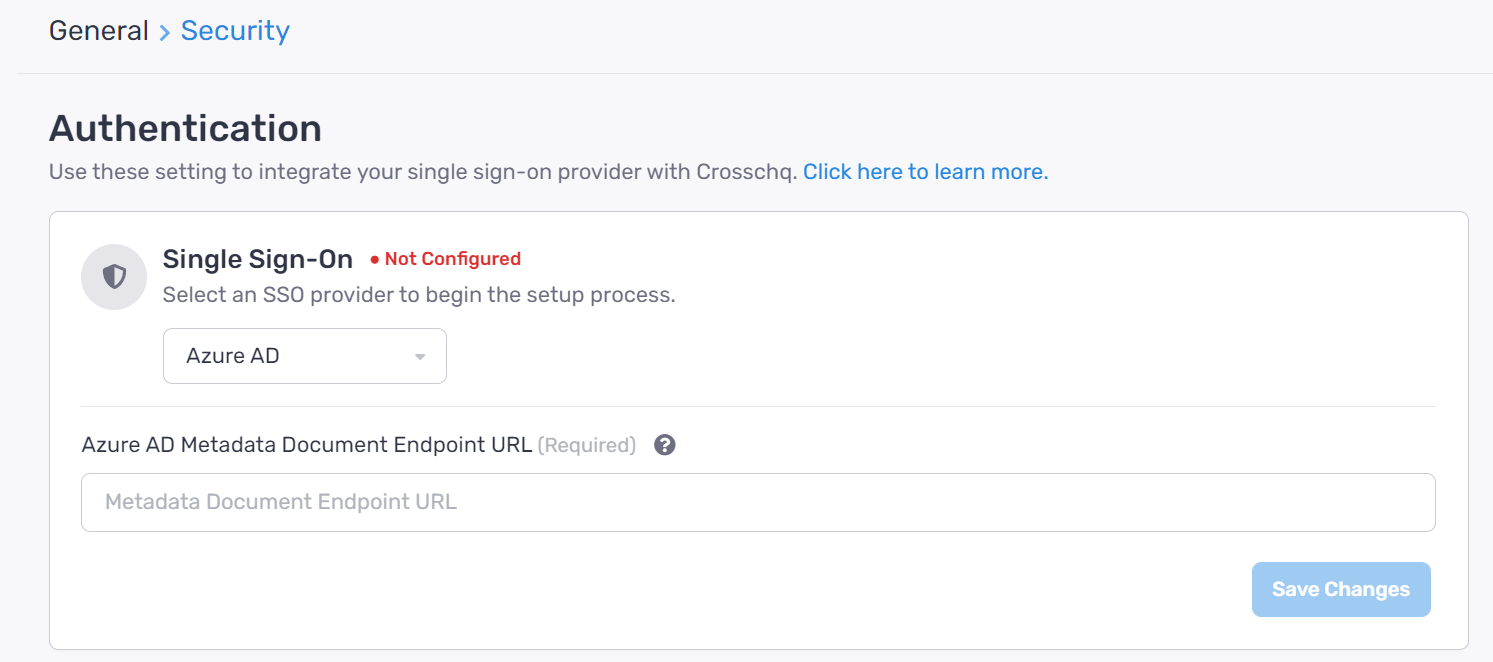
Click Save Changes and select Soft-Enable SSO to begin testing your SSO configuration.

We recommend keeping your account in a soft-enabled state only as long as is necessary to test SSO functionality. While you are in this soft-enabled state, you will see your Single Sign-On Status reflected as In testing.
Note: In soft-enabled mode, users can authenticate either via SSO or with their username and password for Crosschq, However, users cannot switch back and forth. Once a user has logged in via SSO they can only use SSO going forward.
Once the organization hard enables SSO, ALL users must use SSO to authenticate.
Finalize Configuration and Move to Fully Enabled State
You can fully enable SSO by checking the box and clicking Save Changes:
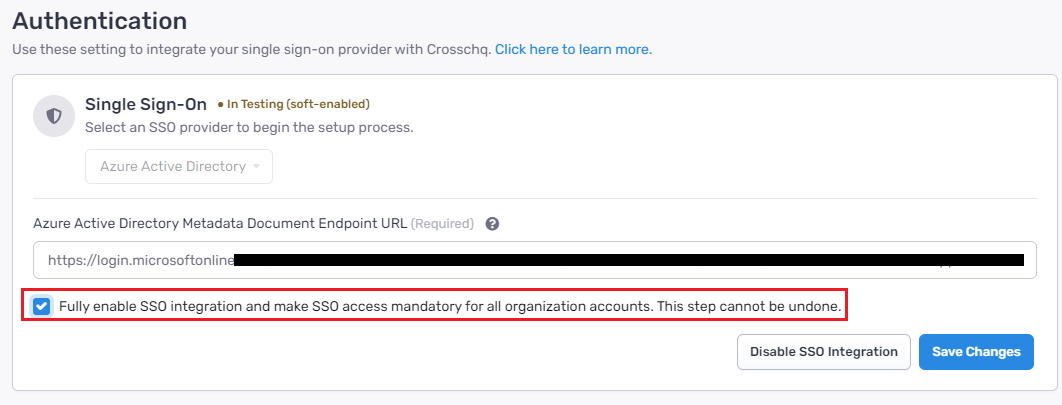
Then within the pop-up window, select the button to fully enable SSO. Your Single Sign-On Status will update to Configured.
Signing into Crosschq with Azure
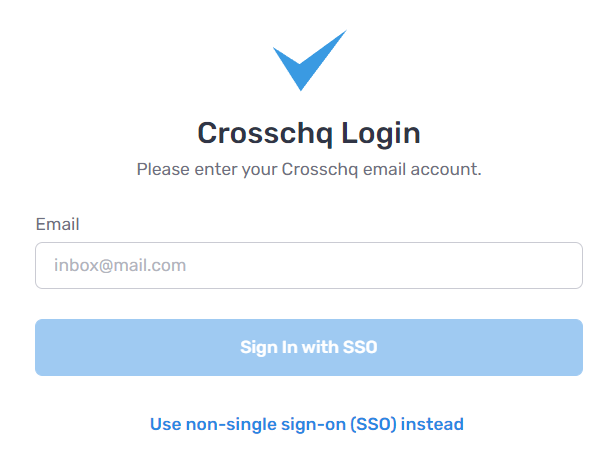
In the Crosschq login page, click the login with single sign-on (SSO) link
Enter your email and click Sign In with SSO.