How to Sync Your Employee Data Automatically with BambooHR
Employee report files can be synced to Crosschq using a BambooHR API. To set up the integration in Crosschq, you will need to be a Crosschq admin user.
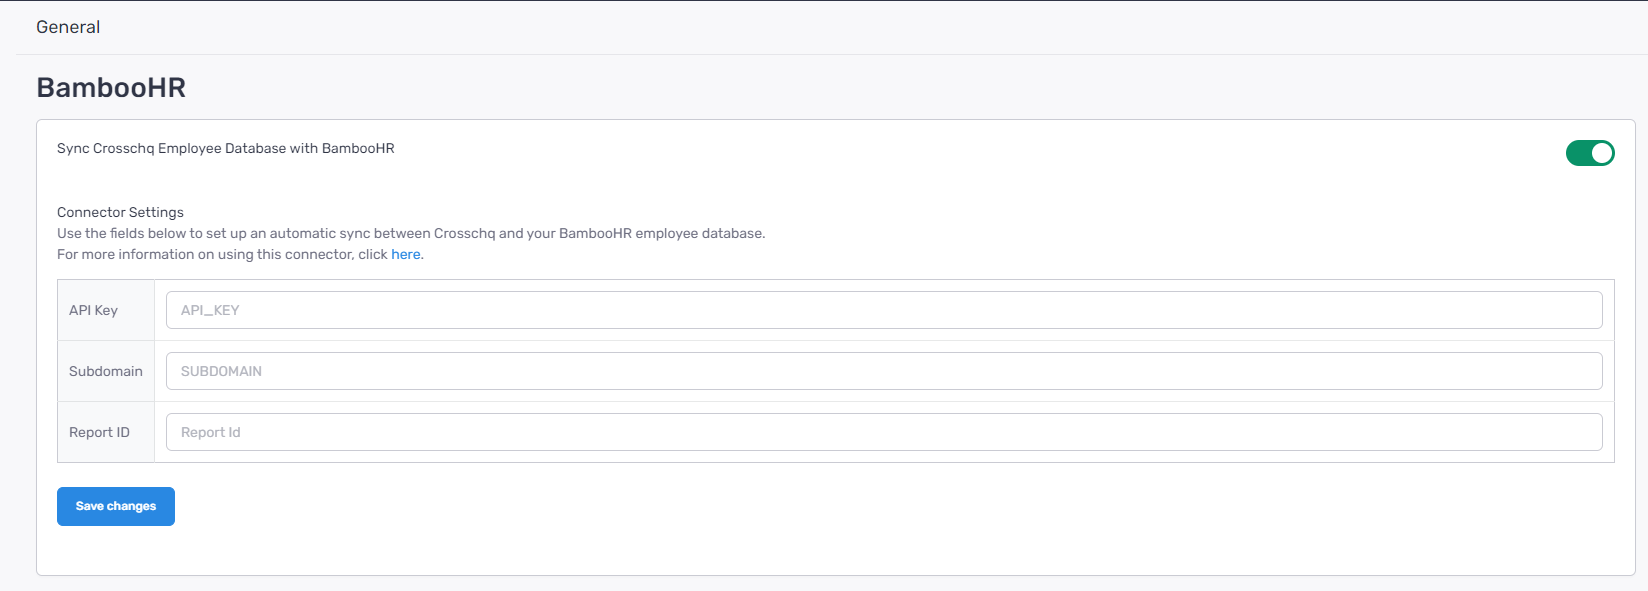
To begin, login to your Crosschq account, and navigate to Organization Settings > Connectors. Locate the BambooHR listing in the main panel, then click the Manage button.

Enable the connector by switching on the toggle at the top-right corner. The toggle should turn green.
The following information will need to be collected from BambooHR: API Key, Subdomain, and Report ID.
You can find each of these fields in BambooHR by following the steps below:
Step 1: Generate API Key
On a separate browser tab, login to BambooHR. To generate the API key, go to your user settings in the bottom-left corner of the page, click on API Keys, and then click Add New Key.


In the subsequent popup window, enter a name that allows you to identify the key, and click the Generate Key button.

Copy the API key that appears and paste it in the API Key field from the Crosschq connector settings.

Step 2: Copy the subdomain
To obtain the subdomain, go to your BambooHR instance and copy the text before '.bamboohr' in the URL. In the example below, the subdomain would be 'sandbox'.
https://.bamboohr.com/home/

Paste the subdomain in the Subdomain field in the Crosschq connector settings.
Step 3: Create a custom BambooHR report
To create a custom Report within BambooHR go to the Report option on the left-hand panel, then click New Report.

To start, enter a name for your report and choose the type of report you want to create. In this case, you'll create an Employee Report.

Next, choose the fields. On the field selection screen, search for or scroll through the available fields to add to your report. Employee name and email are hard requirements in order to create an employee record in Crosschq. Including additional descriptive fields will allow you to segment your data more granularly with Crosschq's apps. We recommend at a minimum to include the following:
| Module | Fields |
| Personal | Employee # |
| Status | |
| Last Name | |
| First Name | |
| Birth Date | |
| Gender | |
| Marital Status | |
| Address Line 1 | |
| Work Phone | |
| Mobile Phone | |
| Work Email | |
| Home Email | |
| Job | Hire Date |
| Ethnicity | |
| Employment Status | |
| Termination Type | |
| Termination Reason | |
| Regrettable or Non-Regrettable | |
| Pay type | |
| Location | |
| Division | |
| Department | |
| Job Title | |
| Job Level | |
| Calculated | Last name, First name |
| Supervisor email | |
| Supervisor ID | |
| Supervisor name | |
| Termination Date |
Apply Required Filters
This step is mandatory for the report to work properly with Crosschq.
To begin, click the “Filter” button at the top of the report setup screen and set the following filters:
-
-
Status: Set this to All
This ensures active and terminated employees are included if needed.
-
Work Email: Set this to “is not blank”
Crosschq requires a work email for each employee record to sync properly.
-
Without these filters, Crosschq will not be able to pull the required employee data.

To finish, click Save.
Under the your saved reports, locate the report that you just created. Hover over the link to access the report, and note the ID that is appended at the end of the URL: https://.bamboohr.com/api/v1/reports/{id}

Enter the Report ID under the Report ID field in the Crosschq connector settings.
Save connector settings in Crosschq
Once you have entered the API key, subdomain, and report ID in Crosschq, click Save Changes to establish the connection with BambooHR.
Data Mapping and Sync Settings
After saving the connection, the Data Mapping section will be unlocked. In here you can map the fields from the BambooHR report with the fields in Crosschq.

Select edit mapping. Each column from your BambooHR Report will be displayed on the left side, while the corresponding fields within the Crosschq Intelligence Cloud will appear on the right side.
Crosschq will attempt to automatically match the fields from your report to the corresponding fields in the Crosschq Intelligence Cloud. If any fields cannot be matched automatically, a yellow warning will appear, prompting you to perform a manual match.

Utilize the dropdown menus to either select an existing field from the Crosschq database or to create a custom field directly within the same menu.

If you have any extra fields in your report that you prefer not to include in the upload, you can easily exclude them by unchecking the corresponding checkbox:

Below is the list of BambooHR fields that support auto-mapping in Crosschq.
| BAMBOO HR | CROSSCHQ | ||
| Module | Fields | Json Report | Crosschq Column |
| Personal | Employee # | employeeNumber | Employee ID |
| Status | status | Employment Status | |
| Last Name | lastName | Employee Last Name | |
| First Name | firstName | Employee First Name | |
| Birth Date | dateOfBirth | Date Of Birth | |
| Gender | gender | Gender | |
| Marital Status | maritalStatus | Marital Status | |
| Adress Line 1 | addressLineOne | Home Address | |
| Work Phone | workPhone | Workphone | |
| Mobile Phone | mobilePhone | Employee Personal Phone Number | |
| Work Email | Employee Email | ||
| Home Email | homeEmail | Employee Personal Email | |
| Job | Hire Date | hireDate | Employee Hire Date |
| Ethnicity | ethnicity | Ethnicity | |
| Employment Status | employmentStatus | Employment Type | |
| Termination Type | employmentStatusTerminationType | Termination Type | |
| Termination Reason | employmentStatusTerminationReason | Termination Reason | |
| Regrettable or Non-Regrettable | employmentStatusRegrettableOrNonRegrettable | Termination Disposition | |
| Pay type | compensationPayType | Pay type | |
| Location | jobInformationLocation | Location | |
| Division | jobInformationDivision | Corporate Division | |
| Department | jobInformationDepartment | Department | |
| Job Title | jobInformationJobTitle | Job Title | |
| Job Level | jobLevel | Org Level | |
| Calculated | Last name, First name | lastNameFirstName | Employee Full Name |
| Supervisor email | supervisorEmail | Manager Email | |
| Supervisor ID | supervisorId | Manager Id | |
| Supervisor name | supervisorName | Manager Name | |
| Termination Date | terminationDate | Termination Date | |
After you have mapped all your fields, click on Confirm and Sync Data. This action will initiate the synchronization process, allowing your data from BambooHR to seamlessly transfer into Crosschq.
Afterward, the Sync Settings section will be unlocked.

Clear existing database values when encountering a blank BambooHR field
This setting determines how the importer should treat any blank fields present in your report. If this option is turned off, Crosschq will disregard records that contain empty fields. Conversely, if enabled, Crosschq will remove the data from the corresponding field in the current database.
Remove existing records and replace with data from BambooHR
When this option is enabled, the current employee database in Crosschq will be completely replaced each time a synchronization is performed.
Crosschq Voice set up
Below are additional settings if your org leverages Crosschq's Voice app.
To initiate Voice campaigns based on the Hire or Start date of your employees in BambooHR, you must first complete the prerequisite steps outlined above, which include creating a report and enabling Crosschq's access to that report.
If you have already completed these steps, you can activate the Voice integration by navigating to Organization Settings > Connectors > BambooHR. Once there, scroll down to the App Settings section, where you will find the option to toggle Voice on.
