Follow the steps below to connect Bullhorn with Crosschq:
Enable the Bullhorn integration
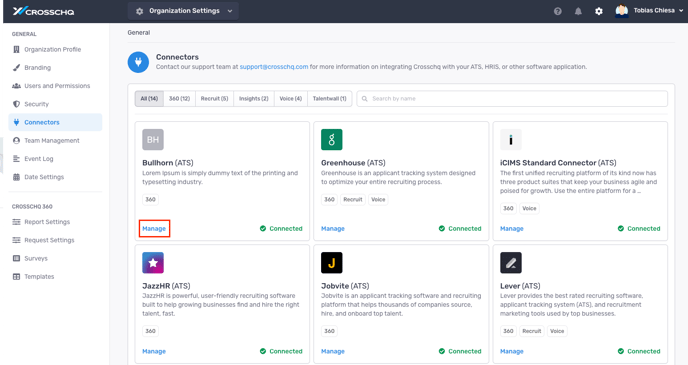
Search for the Bullhorn connector from Organization Settings > Connectors. Click Manage from the Bullhorn section.
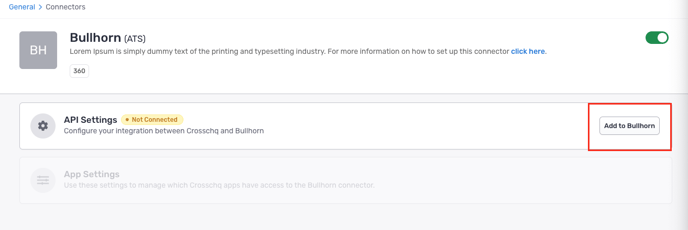
On the next page, turn on the Bullhorn connector by clicking the toggle on the right. The toggle should turn green.

Configure API settings
Locate the API Settings section and select "Add to Bullhorn". You will be asked to log into your Bullhorn account.
You should see a confirmation that the integration is now successfully connected.

Configure app settings
Once your API settings are saved, you can configure additional settings for specific Crosschq Apps.

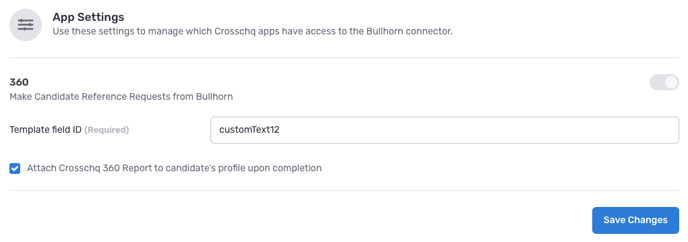
360 settings
When you enable Attach Crosschq 360 Report to candidate's profile upon completion, Crosschq will upload completed reference reports to the candidate's profile in Bullhorn if the reference was initiated from the ATS.
Furthermore, you will need to include the ID of the Template field. Follow the guidelines below to get more information about the Template field.
Recruit settings
The additional Recruit settings allow you to export prospects from Crosschq to Bullhorn. Enable Automatically export new prospects to Bullhorn to send any new prospects over to your Bullhorn instance.
Additional 360 configuration
Add Crosschq as a stage in an interview plan
Within Bullhorn, go to Menu > Admin > Field Mapping.
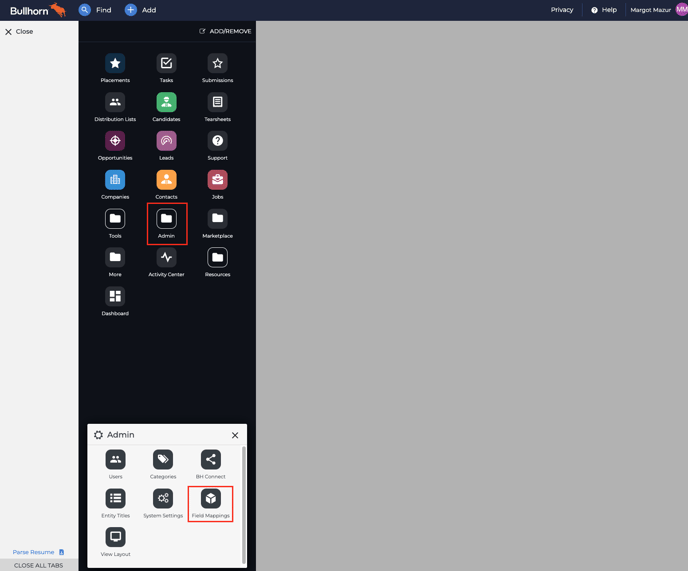
Next, locate the Job Submission tab and search for the field called "Status".

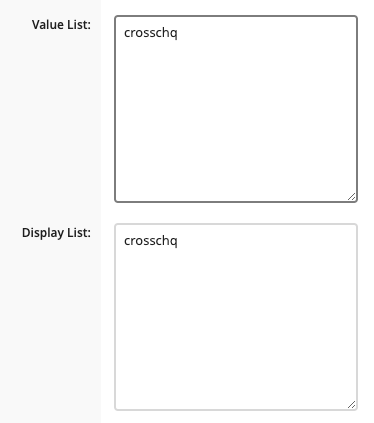
Access the field configuration and add "crosschq" within the Value List field and the Display List field. This will add a stage called "Crosschq" to your interview plan.
Note: If you prefer to choose a different name for this stage, reach out to support@crosschq.com for assistance.
Configure Crosschq templates
Templates are reference request configurations that are used to trigger requests from ATS connectors. You have to set up your Crosschq templates to be able to send Crosschq requests from an ATS.
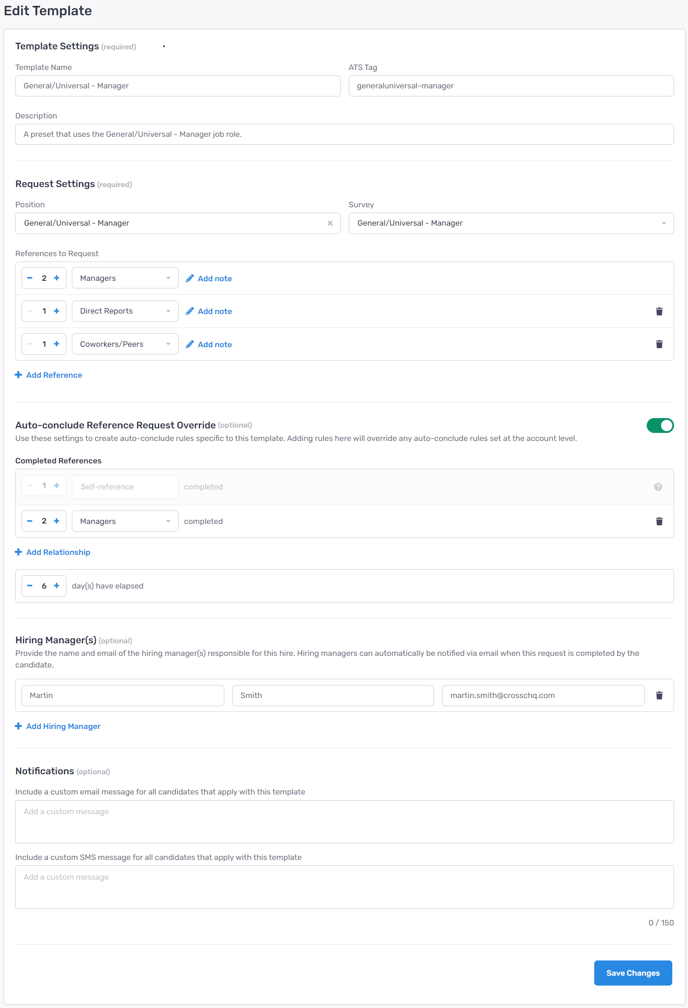
Within Crosschq, go to Organization Settings > Templates. Select Create New Template.
Enter the required information such as template name, add in an ATS Tag for that template, and create a description of the template.
Within the Request Settings, add in the position, select the appropriate survey, and configure the number/type of references you want to be associated with this request. Please note, the relationship type can either be specified or you can select any relationship type and let the candidate determine the type of reference. Additionally, you can add customized notes to each specific reference request, i.e. "Please provide a manager reference from X company."
From there, add in optional hiring manager information. Finally, you can create custom emails or text messages associated with each template by filling out the custom notifications section. When you are done, select Create Template.
At any point, if you need to edit or delete a template, select the three dots next to the template and you can manage from there.

After creating your templates, the next step is to integrate them into Bullhorn for use.
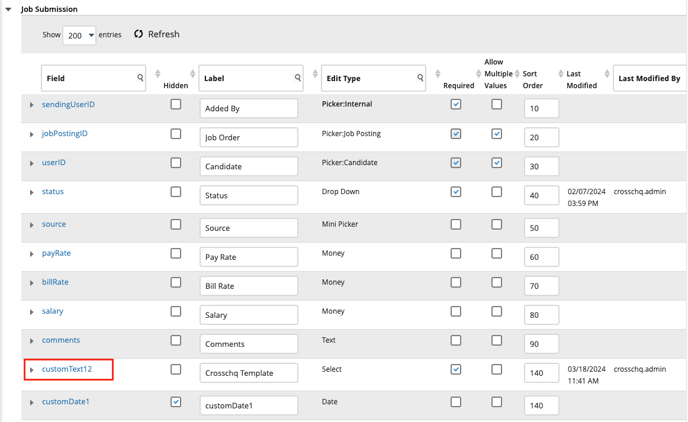
Within Bullhorn, go to Menu > Admin > Field Mapping
Next, locate the Job Submission tab and create a new field.
Note: If you are unable to create a new field, you can either modify an unused field or contact Bullhorn support for assistance.
Here are the guidelines to complete the fields:
- Display: Crosschq Template
- Edit Type: Select
- Required: Yes
- Hidden: No
- Allow Multiple Values: Single
- Sort Order: 140
- Value List: enter the tags of all the Crosschq Templates that you have created within Crosschq. If you are adding more than one tag, make sure to separate them with commas. (For example - senior-executive, marketing-manager, sales)
- Display List: empty
- Default Value: empty
- Description: add the desired description
- Hint: add the desired hint
Scroll down and select Save.


Next, copy the ID of the field you've created and navigate back to Crosschq to paste it into the Template field:
In Bullhorn:
In Crosschq:
Select Save Changes.
Requestors and Hiring Managers
Crosschq will pull the reference requestor and hiring managers from Bullhorn
Crosschq will automatically designate the Bullhorn user who moves the candidate to the Crosschq stage as the Requestor. Additionally, the job owner and candidate owner will be recognized as the Hiring Managers.
Sending a Crosschq from Bullhorn
When creating a submission for the candidate, select the Crosschq Template using the field you have created in the steps above.
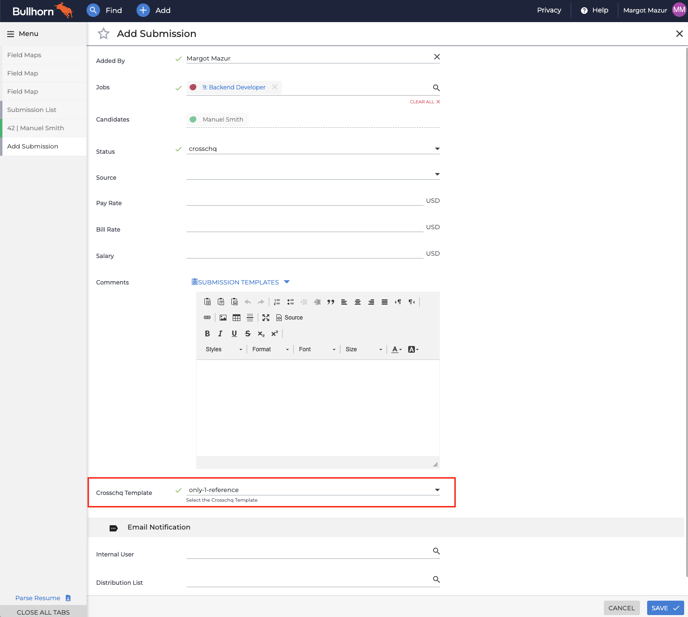
After selecting the Crosschq Template for the candidate, proceed to advance the submission to the "Crosschq" stage. This action will automatically initiate the reference request to your candidate.

Viewing a Crosschq report
A comment will automatically be added to the candidate record whenever there is a change in the status of the reference request (self-assesment completed, reference survey completed, request canceled, request completed, etc).
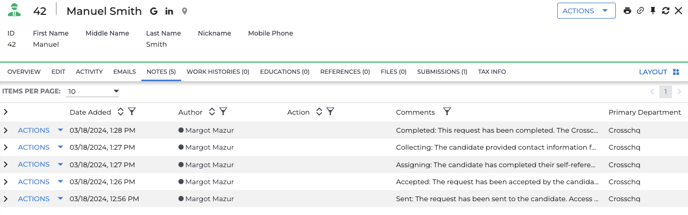
Crosschq will attach a PDF version of the report within the Files section.

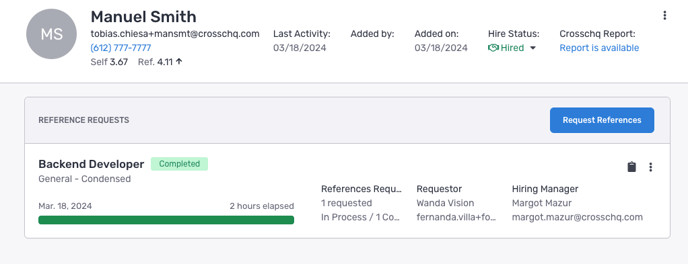
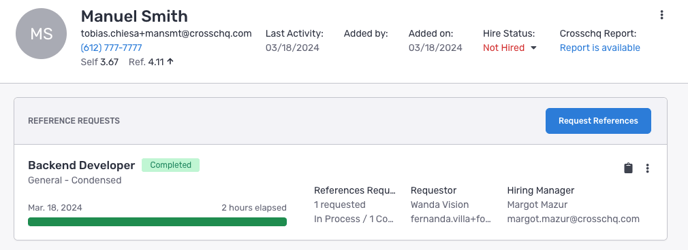
Hiring status
The hiring status of the candidate in Crosschq will be automatically synchronized with their hiring status in Bullhorn.