![Crosschq Logo 534x115.png]](https://support.crosschq.com/hs-fs/hubfs/Crosschq%20Logo%20534x115.png?height=40&name=Crosschq%20Logo%20534x115.png)
The Crosschq MCP (Model Context Protocol) lets your team connect Crosschq to an AI assistant, such as Claude or ChatGPT. Once connected, users can ask questions about their Crosschq data directly in the chat, without opening the platform.
There are two Crosschq MCP connectors, one per product:
- Crosschq Interview: Access your Interview data.
- Crosschq ApplicantX: Access your fraud detection data.
In This Article
- Before You Start
- Granting MCP Access to Users
- Connecting to ChatGPT
- Using the Crosschq MCP
- Troubleshooting
Before You Start
To use the Crosschq MCP, you need the following:
- MCP enabled for your organization. The MCP is not enabled by default. Your organization must have Crosschq Interview or ApplicantX, and MCP access must be activated on our end for each product you want to connect. Reach out to your Customer Success Manager or our Support team to request it.
- A Crosschq user with MCP permissions. See Granting MCP Access to Users below.
- A supported AI assistant account. Claude or ChatGPT. Custom connectors may require a paid plan, depending on the assistant.
You also need the MCP server URL for each product you want to connect:
Some AI assistants also ask for an OAuth Client ID. Use crosschq-mcp.
Each product is a separate connector. To use both Interview and ApplicantX, add both URLs.
Granting MCP Access to Users
Once the MCP is enabled for your organization, all Super Admins and Admins have MCP access by default, with all available MCP permissions.
Super Admins and Admins can also grant or remove MCP access for any other user in the organization:
- Go to Organization Settings > Users and Permissions.
- Click the user to open their Roles and permissions.
- Make sure the Interview or ApplicantX app is turned on for the user.
- Under Permissions, select the MCP access level (see the table below).
- Click Save changes.
.png?width=343&height=341&name=image%20(31).png)
Write access always includes Read access. A user cannot have Write access only.
The ApplicantX permission in user settings only controls MCP access to fraud data. It does not give the user access to a separate ApplicantX app in the platform.
Connecting to Claude
Custom connectors are available on all Claude plans. Free plans are limited to one custom connector. On Team and Enterprise plans, only Owners can add custom connectors, and each user then connects individually.
Step 1: Add the Connector
Free, Pro and Max plans: Each user adds the connector.
Team and Enterprise plans: Your Claude Owner adds the connector once, from Organization settings > Connectors > Add > Custom > Web. If your Owner already added it, skip to Step 2.
- In Claude, go to Customize > Connectors.
- Click + Add, then Add custom connector.
- Enter a Name for the connector, for example "Crosschq Interview" or "Crosschq ApplicantX".
- Enter the MCP server URL for the product (see Before You Start), then click Continue.
.png?width=670&height=556&name=image%20(86).png)
.png?width=670&height=556&name=image%20(87).png)
- Under Authentication, select Sign in now.
- Under OAuth client, select Use your own OAuth client and enter
crosschq-mcp. Leave the client secret blank. - Click Add.
.png?width=670&height=556&name=image%20(89).png)
Step 2: Connect and Authorize
- Go to Customize > Connectors and find the Crosschq connector. It has a Custom label.
-1.png?width=670&height=330&name=image%20(33)-1.png) Open the connector and click Connect.
Open the connector and click Connect..png?width=670&height=329&name=image%20(34).png)
- Log in to Crosschq with your user account.
- Review the permissions requested and click Authorize.
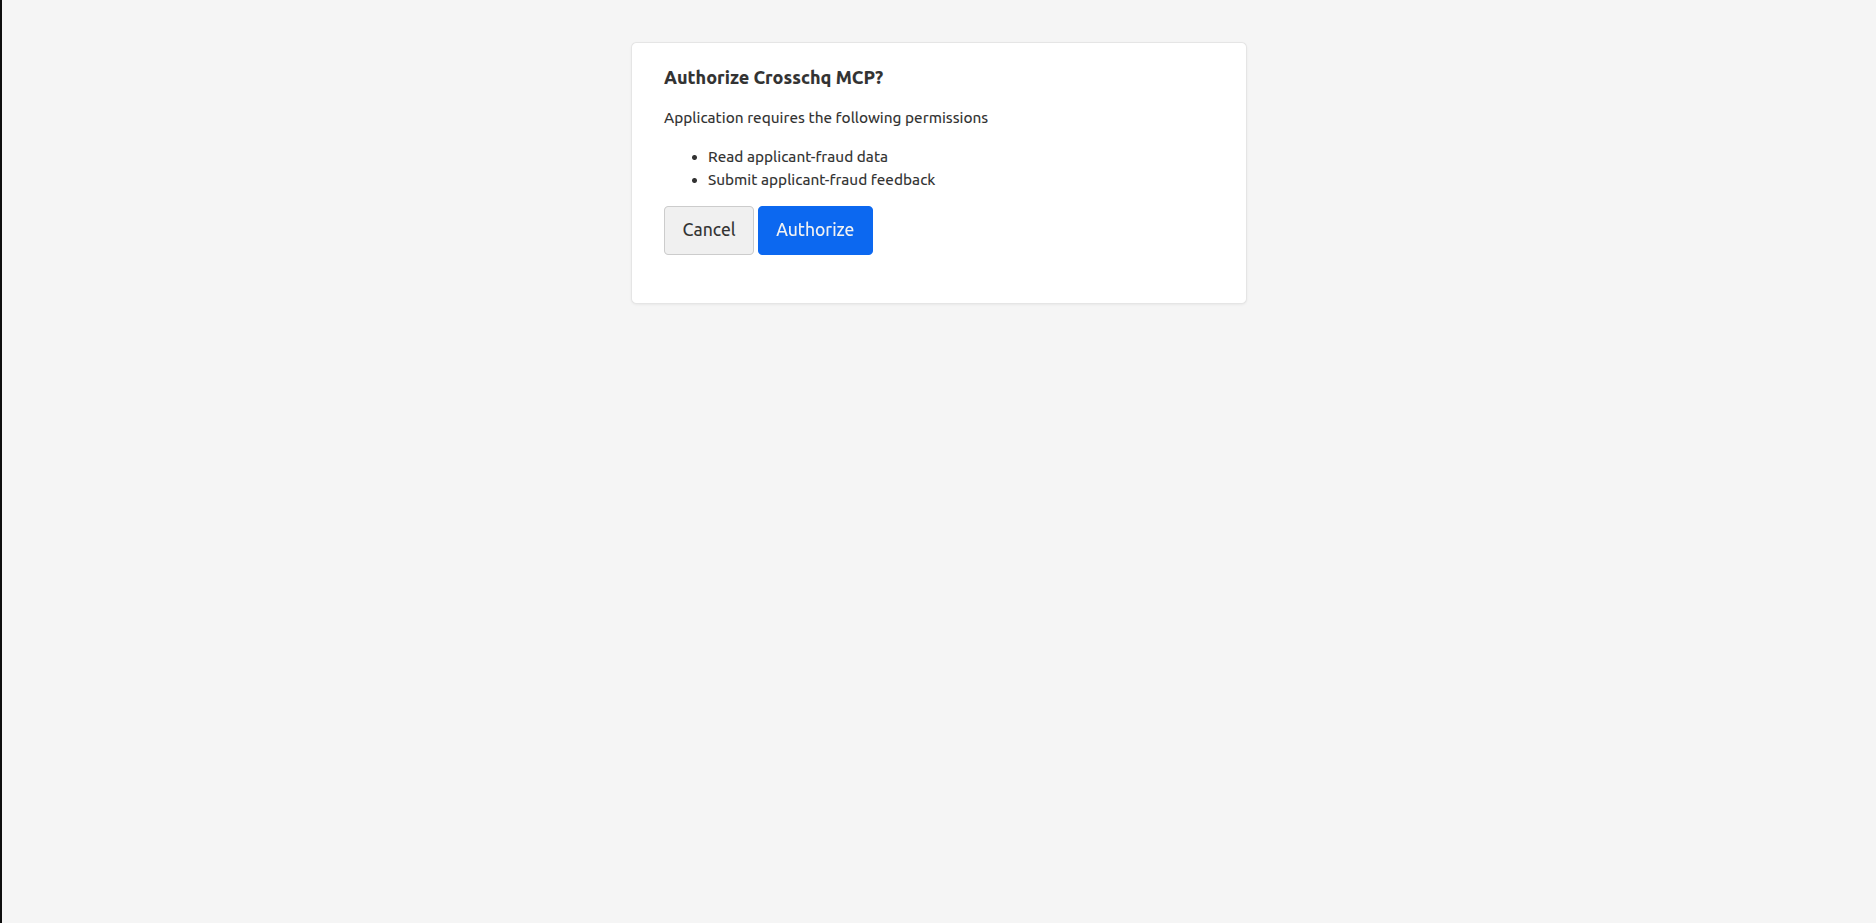
Once authorized, the connector shows as Connected, along with the list of tools it can use.
.png?width=670&height=330&name=image%20(35).png)
Log in to Crosschq with a user that has MCP permissions for the product you are connecting. Otherwise, the connection returns an access denied error.
Connecting to ChatGPT
To add a custom MCP connector in ChatGPT, you need to turn on Developer mode first.
Step 1: Enable Developer Mode
- In ChatGPT, click your name at the bottom left and select Settings.
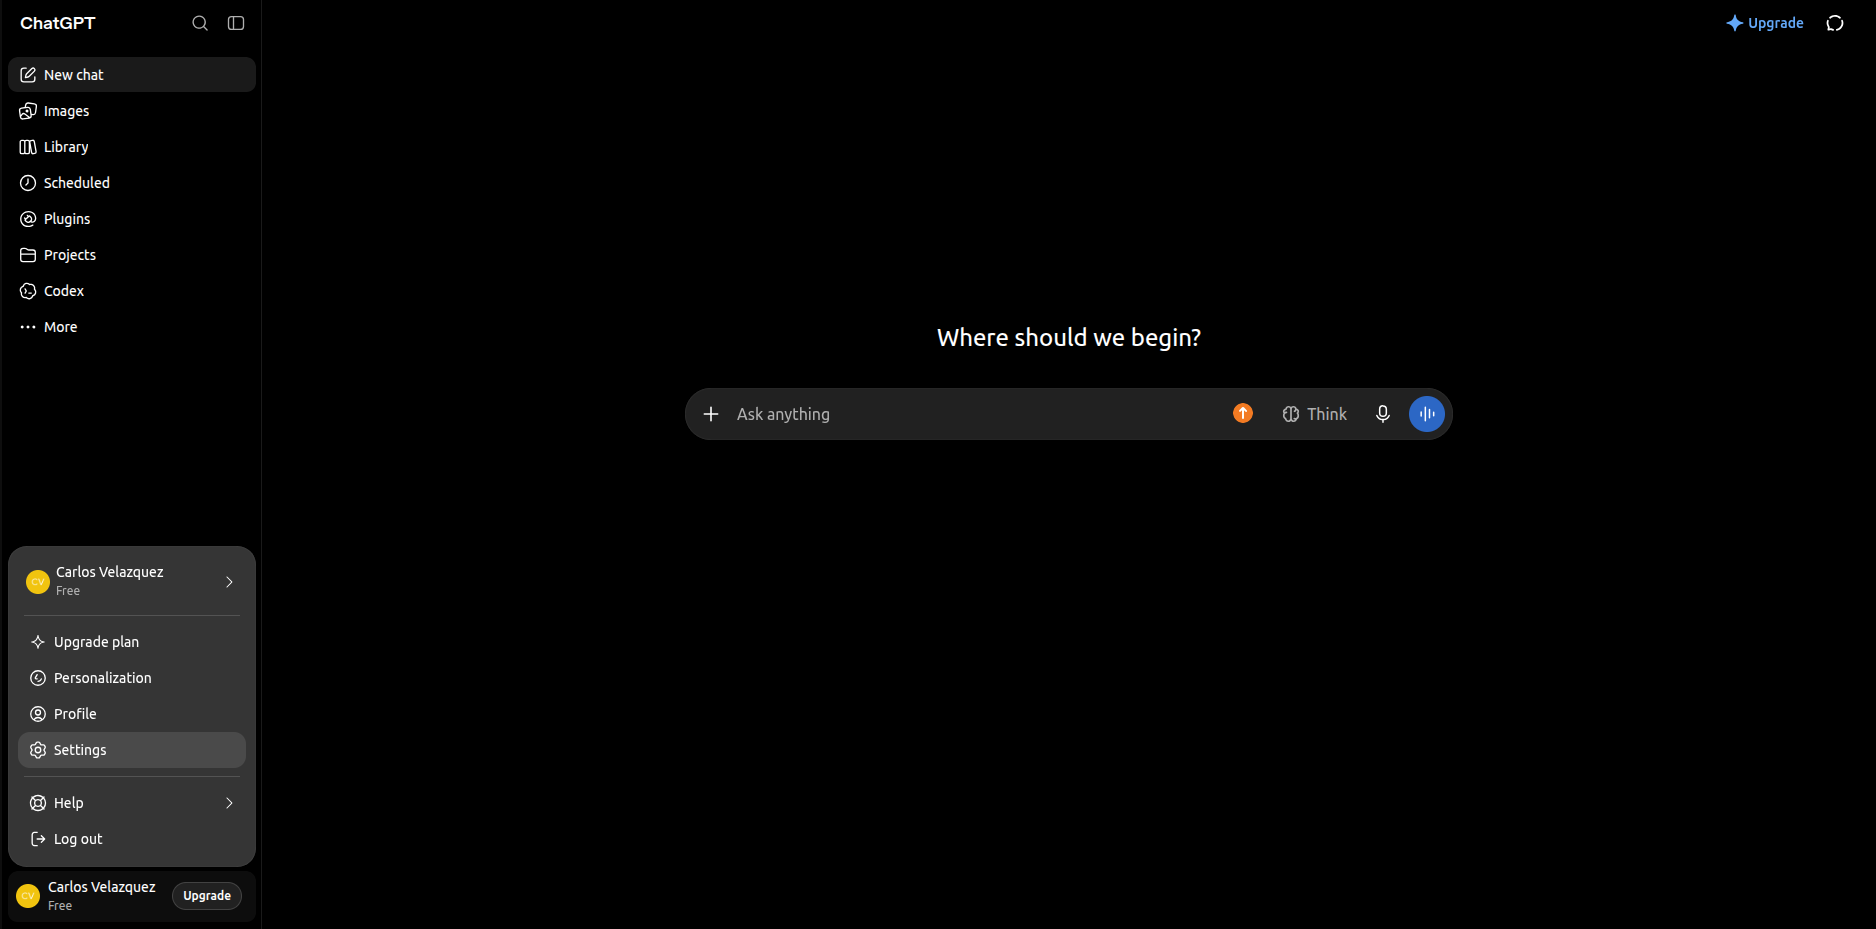
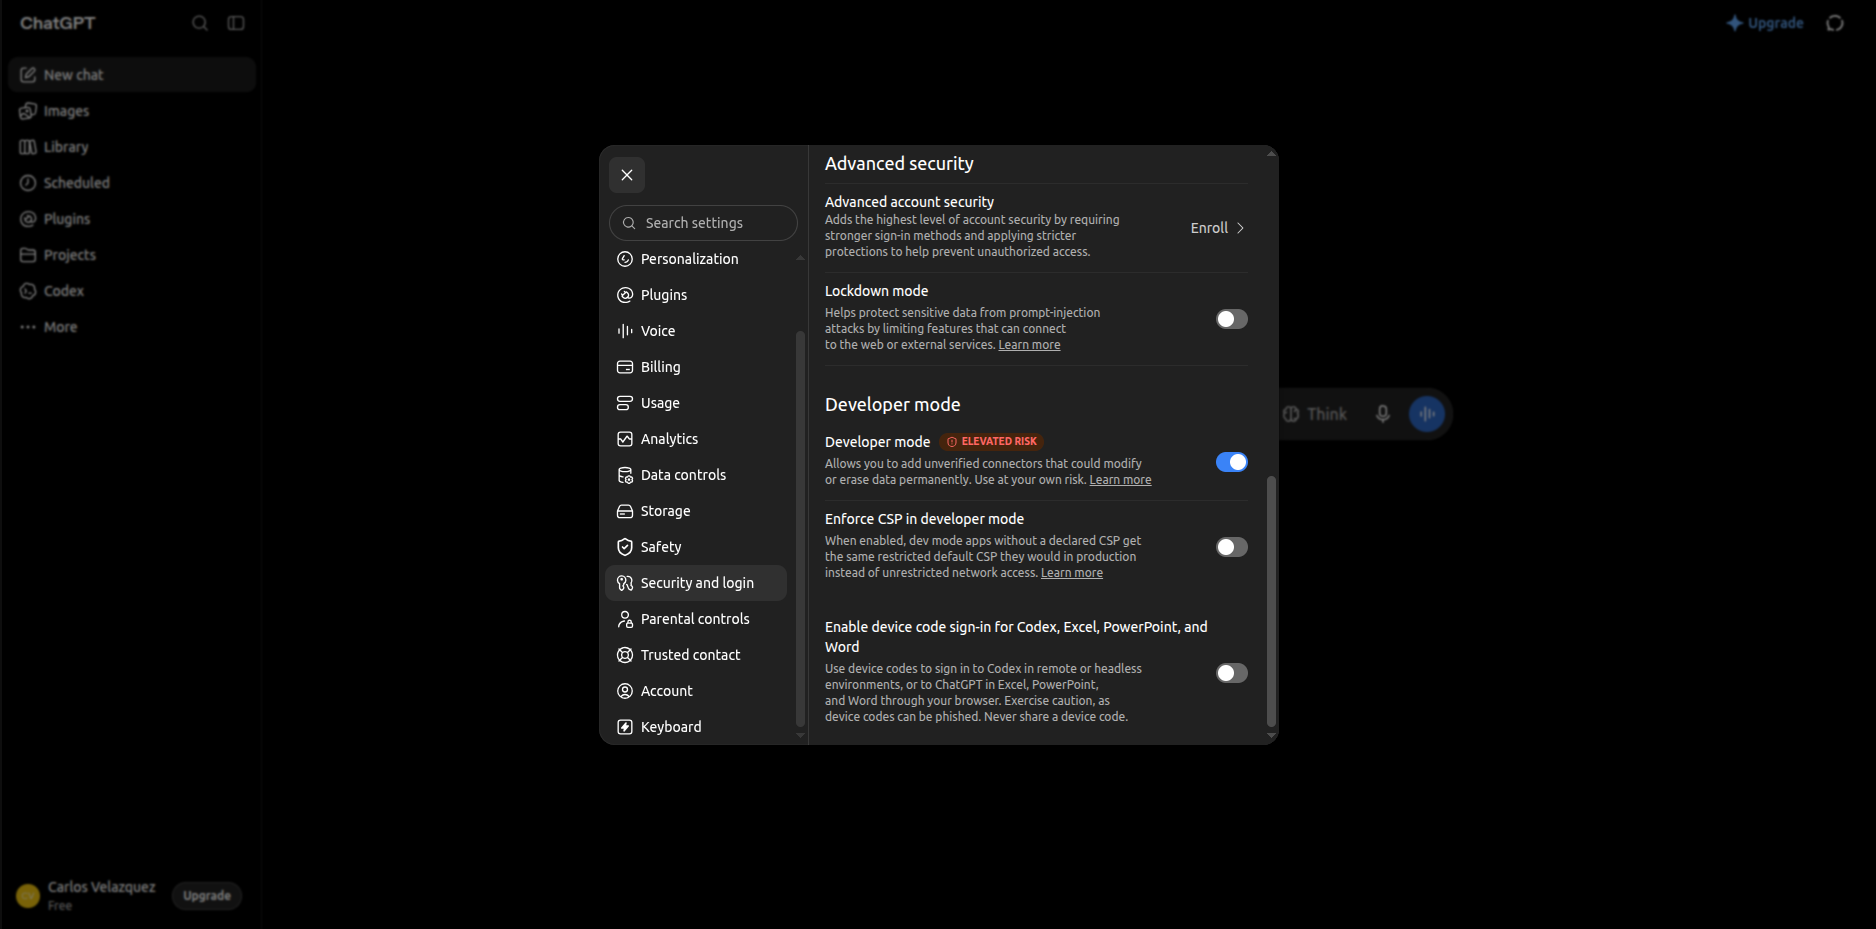
- Go to Security and login and turn on Developer mode.
Step 2: Create the Connector
-
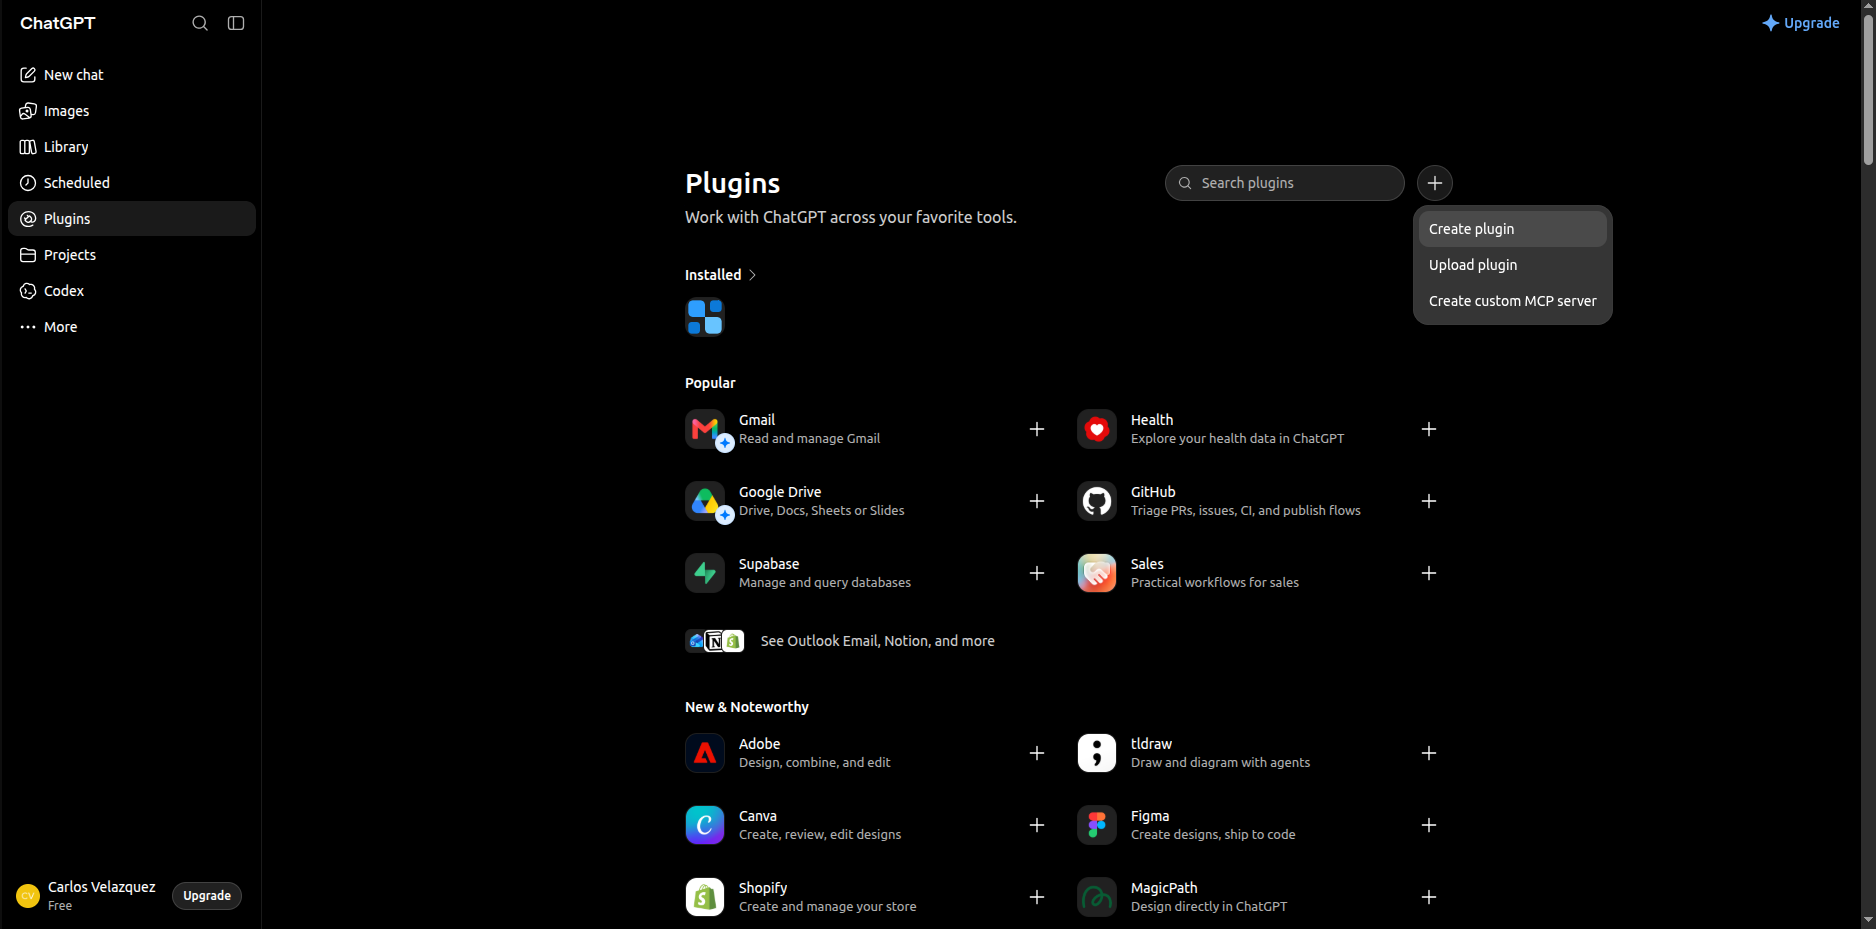
Close the settings window and click Plugins in the left menu.
-
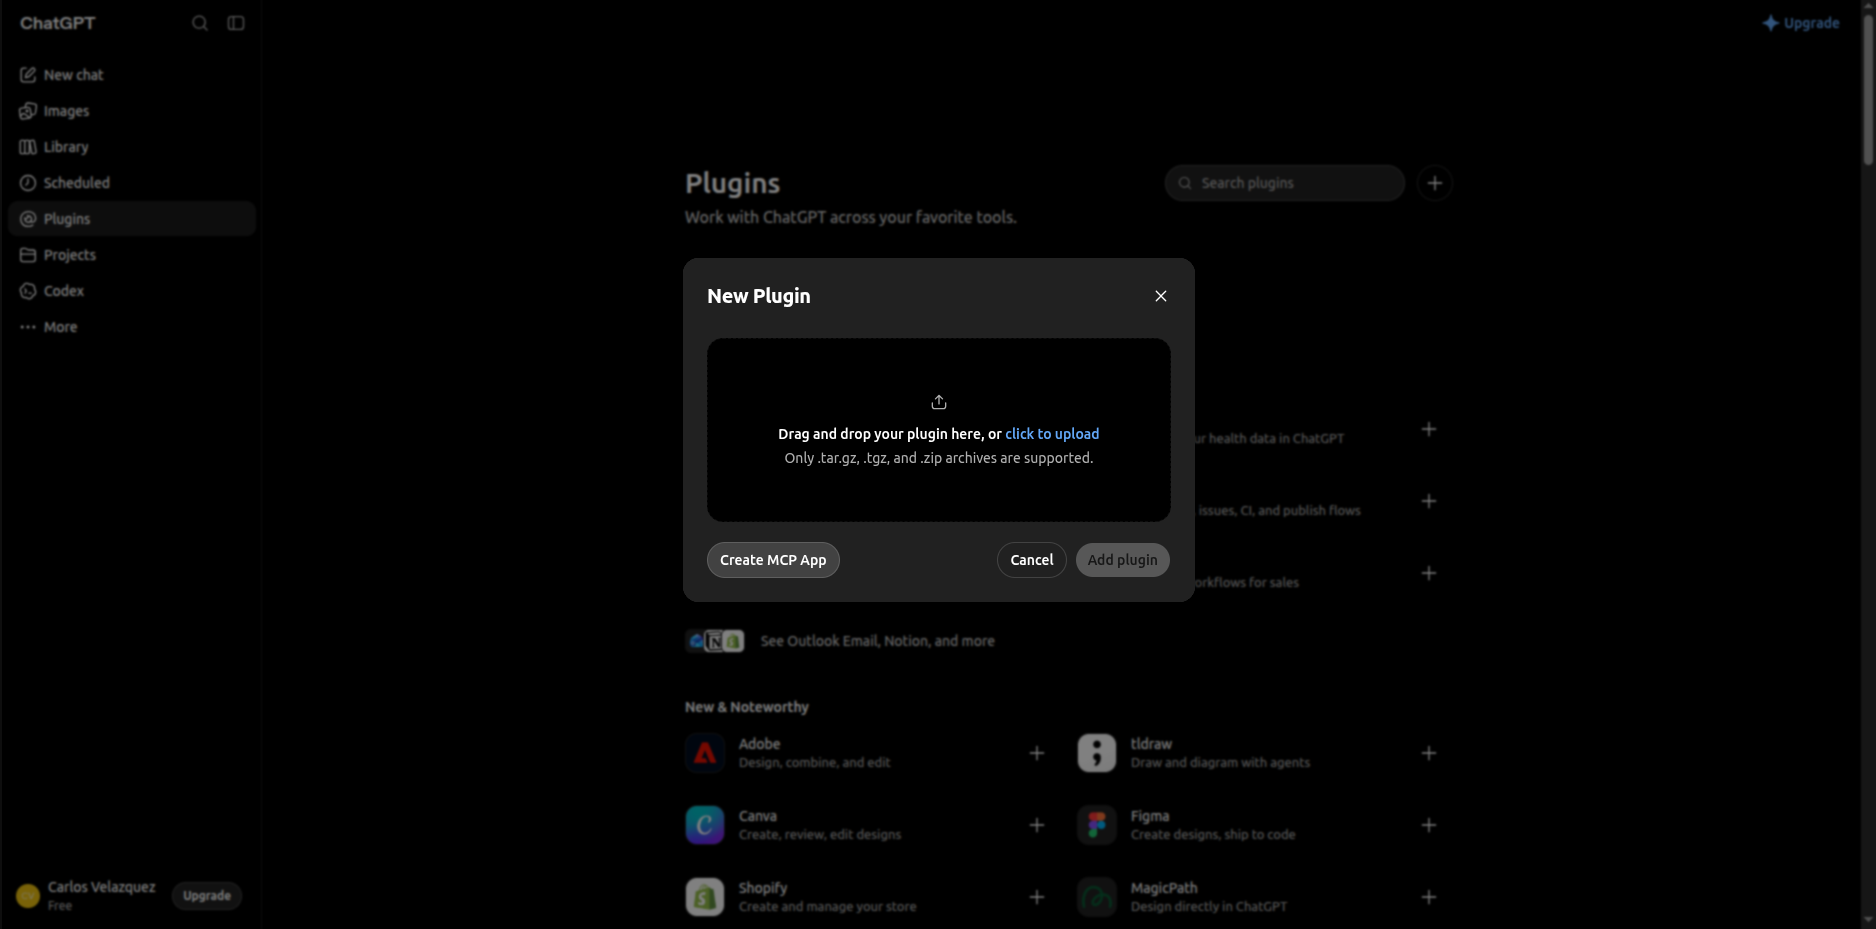
Click + and select Create custom MCP server.
- In the New Plugin window, click Create MCP App.
-
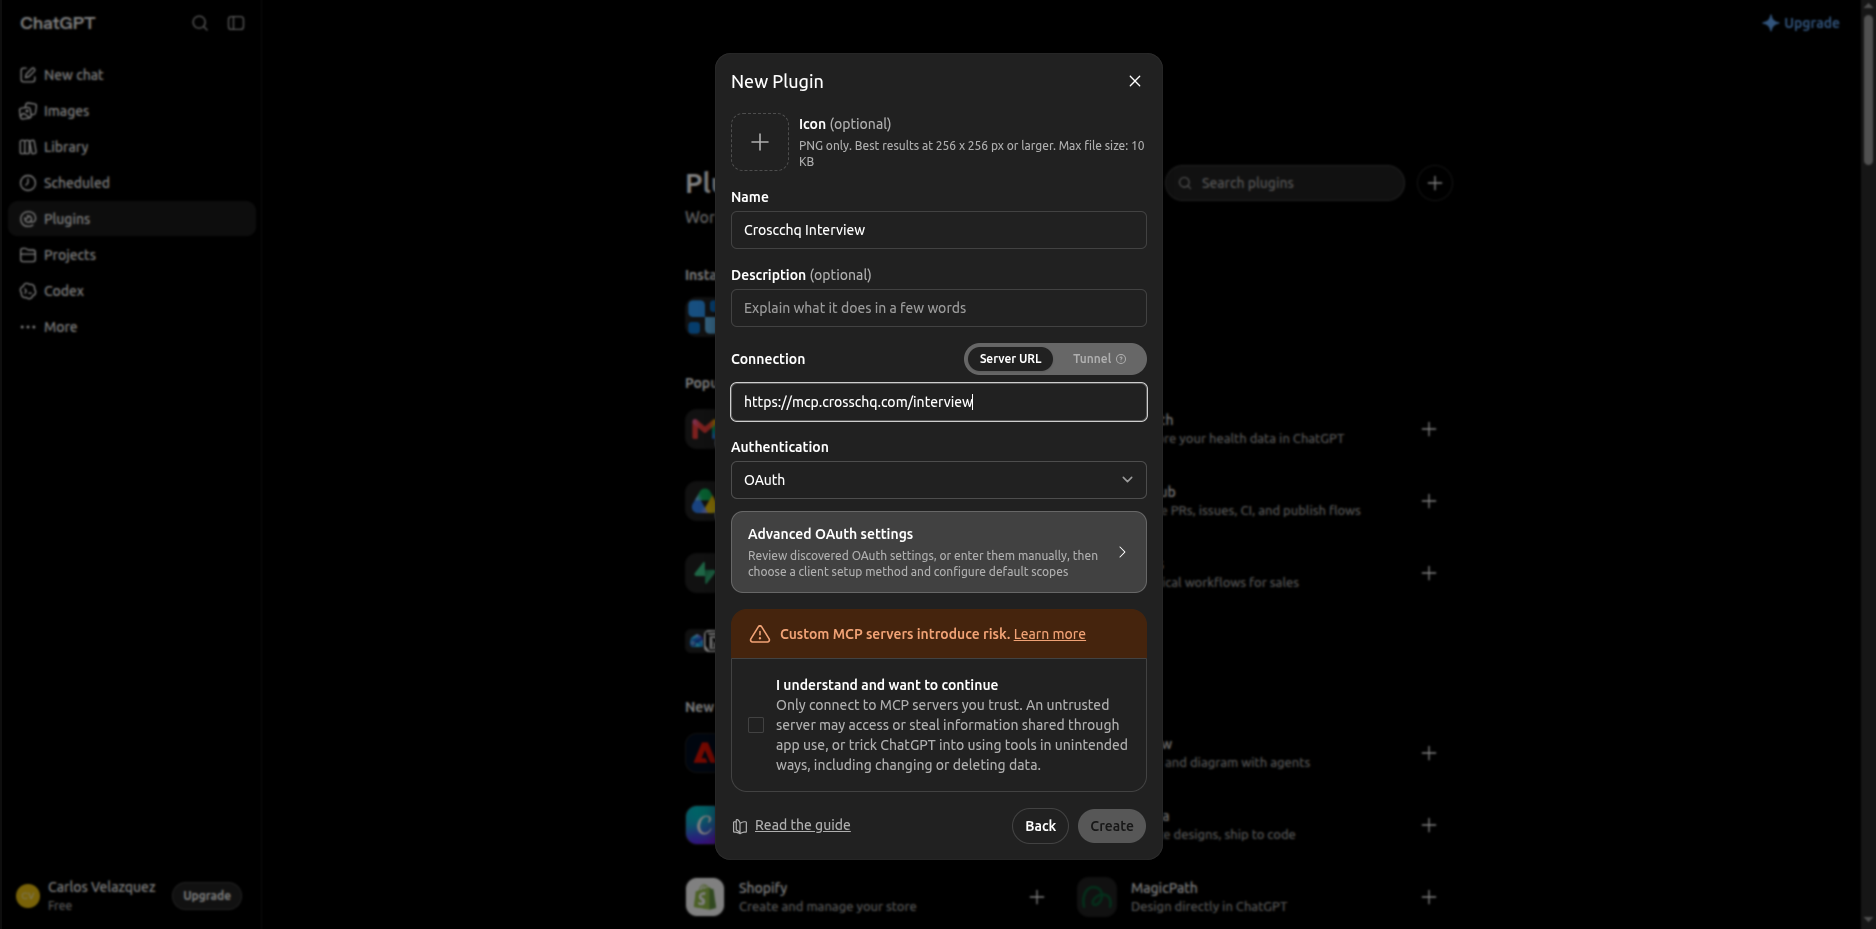
Enter a Name, for example "Crosschq Interview" or "Crosschq ApplicantX".
-
Under Connection, select Server URL and enter the MCP server URL for the product (see Before You Start).
- Under Authentication, select OAuth.
-
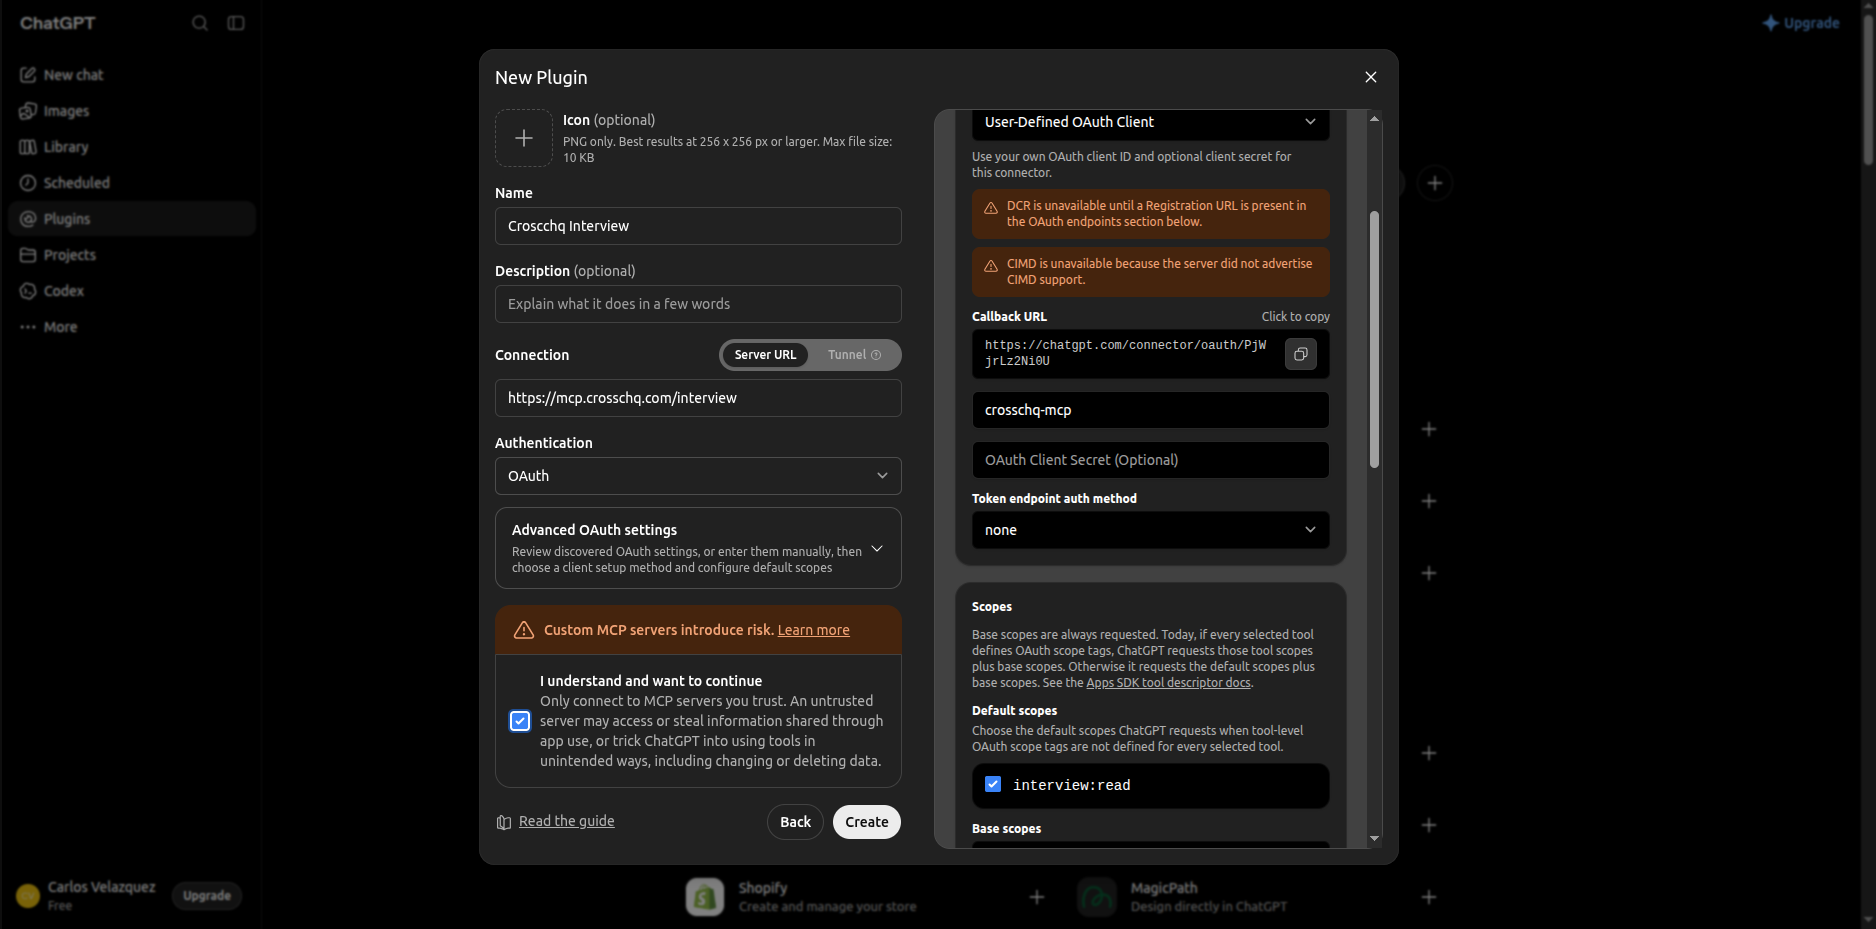
Open Advanced OAuth settings, select User-Defined OAuth Client and enter
crosschq-mcpas the OAuth Client ID. Leave the client secret blank and the other settings as they are. -
Select the I understand and want to continue checkbox, then click Create.
Step 3: Sign In to Crosschq
- In the window that opens, click Sign in with followed by the connector name.
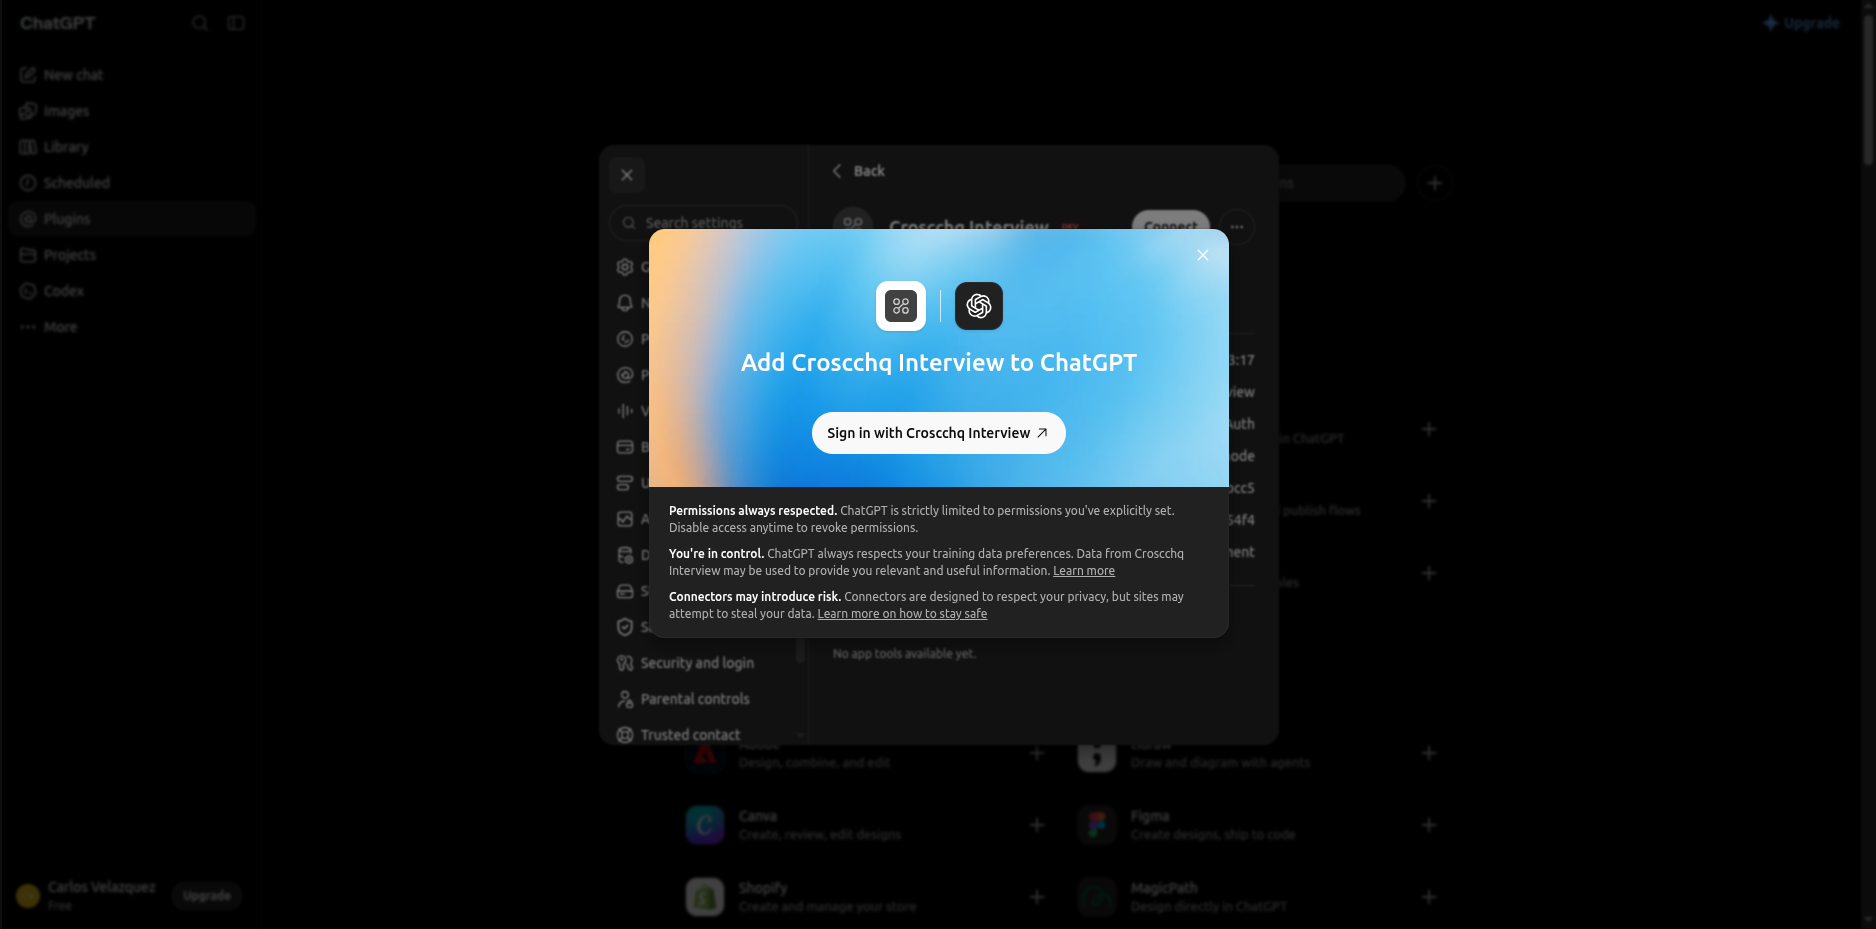
- Log in to Crosschq with a user that has MCP permissions for the product you are connecting.
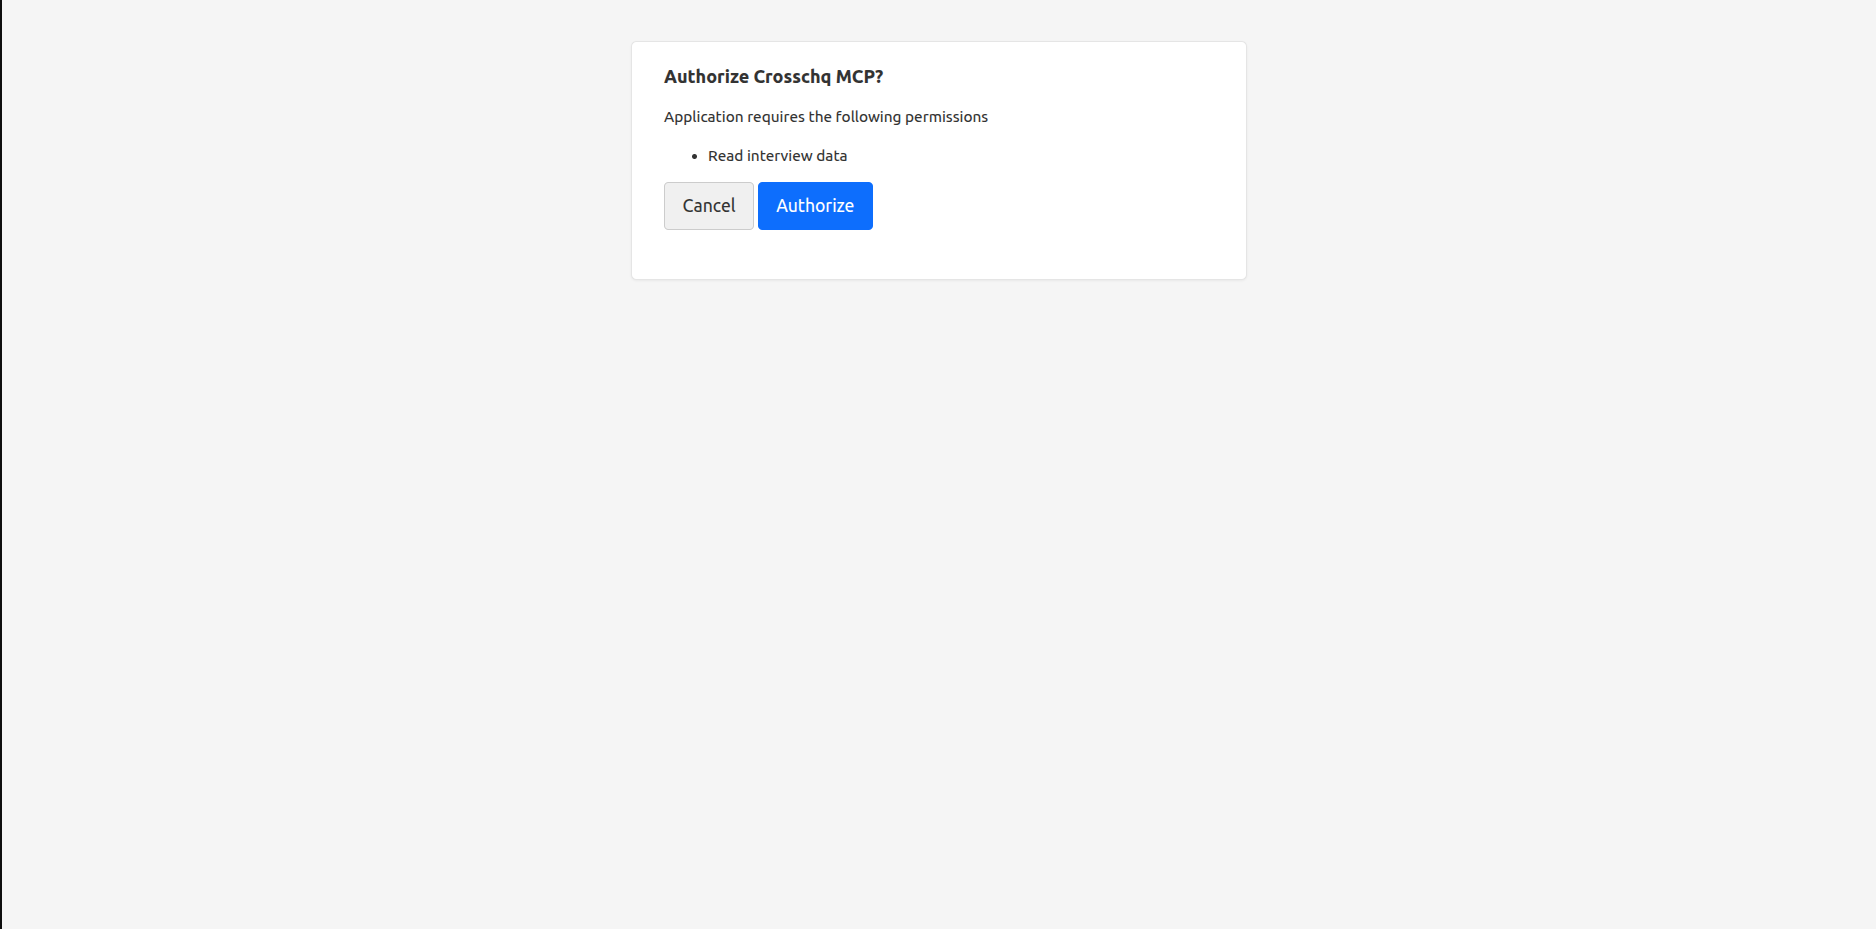
- Review the permissions requested and click Authorize.
Once connected, you can ask questions about your Crosschq data in any ChatGPT chat.
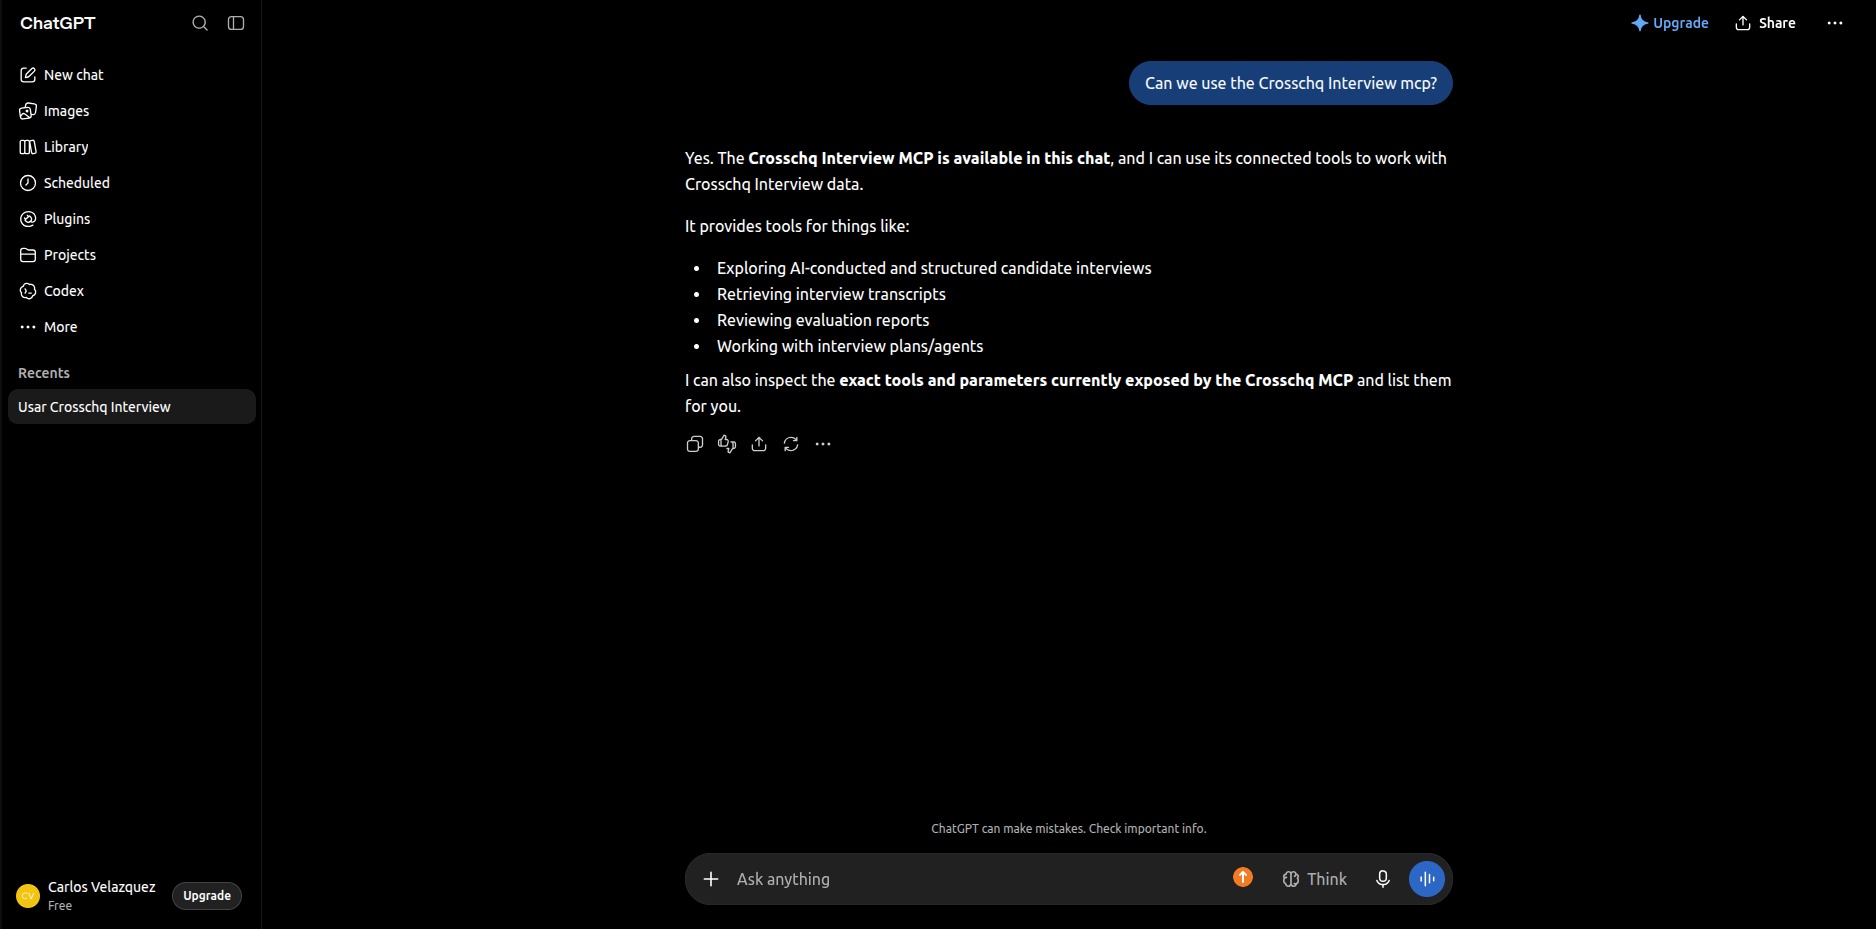
Using the Crosschq MCP
Once connected, ask questions in the chat in plain language. You do not need to use specific commands or mention Crosschq in every message. The AI assistant identifies when to use the Crosschq connector. Questions work in English, Spanish and other languages.
Finding Available Tools
Each connector includes a set of tools, such as searching and exporting data, viewing candidate or application details, and actions that add information to Crosschq. To see them:
- In Claude, go to Customize > Connectors and open the Crosschq connector to see its full list of tools.
- In any assistant, ask directly. For example: "What tools are available in Crosschq ApplicantX, and how do I use them?"
The assistant lists each tool, explains what it does and tells you which ones are read-only.
submit_feedback is the only tool that adds information to Crosschq. It requires the MCP Access: Read and Write permission for ApplicantX.
Example Questions
- "What are the most frequent fraud patterns this month?"
- "Summarize the fraud signals detected for candidates this week."
- "Show me the latest completed interviews."
- "Summarize the evaluation reports for the last 20 candidates."
- "Find candidates who scored above 80."
Approving Tool Use
The first time the assistant uses a Crosschq tool, it asks for your approval. Choose to allow it once or always. The assistant may ask again for other tools during the same conversation.
The assistant only accesses the data your Crosschq user has access to. Actions that add information to Crosschq require Read and Write permissions.
Troubleshooting
Feel free to reach out to our Support team if you have any further questions.