Crosschq has built a connector for Slack, which enables your team to communicate important Crosschq notifications using the Slack channel of your choice.
Follow the steps below to connect Slack with Crosschq:
- Enable the connector for Slack
- Grant permission
- Configure app settings
- 360 report sharing
- Insights dashboard and chart distribution
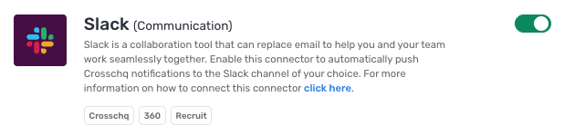
Enable the Connector for Slack
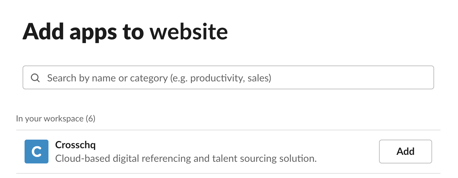
Search Slack from Organization Settings > Connectors. Click Manage from the Slack section.
 On the next page, turn on the connector for Slack by clicking the toggle on the right. The toggle should turn green.
Grant permission
Click the Add to Slack button.
Then, log in to Slack and authorize Crosschq to post notifications. Click the Allow button.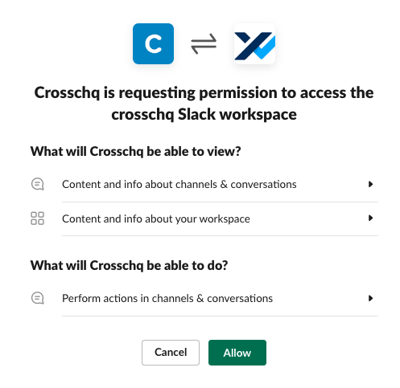
Return to Crosschq to complete the app settings configuration.
Configure app settings
Platform Notifications
Receive general platform notifications about updates on your connectors, team, and additional in-platform updates. Select the toggle switch so that it turns green to activate these notifications.

Once enabled, a text field will appear where you can assign a Slack channel to receive the platform notifications. Start typing into the field, and results will be auto-suggested.
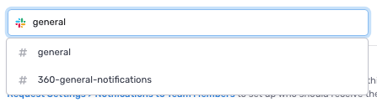
Crosschq will automatically connect with any of your public Slack channels. If you want to send notifications to a private Slack channel, follow the additional steps below:
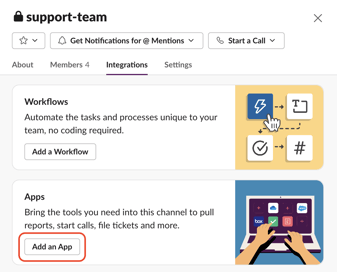
- In the Slack app, find the private channel that you would like to connect with Crosschq. Click the channel name, toggle to Integrations, and click Add an App under the Apps section.
- Search for Crosschq, and click Add.
- The private channel will be searchable in Crosschq after you re-sync channels from the Connector settings.

Channels are synced with Crosschq every evening. If you have added new channels during the day or if you have added the Crosschq app to a private channel, use the re-sync button in the connector settings to trigger an immediate update.
360 notifications
Receive notifications when a reference request changes its status.
Click the toggle switch so that it turns green to activate these notifications. Afterward, navigate to Organization Settings > Request Settings to configure your 360 notifications.
Within Request Settings settings is a section called Notifications to Team Members. Slack notifications can be enabled for any of the listed 360 events.

For each event, a direct message can be delivered to the Requestor and/or the Hiring Manager of the 360 request.

Alternatively, a notification for a specific event can also be delivered to a specific Slack channel.

Enabling Slack for Crosschq Recruit
To enable Recruit Alerts on Slack, scroll down to the "Get recruit alerts on Slack" section and toggle the slider on.

Once enabled, navigate to the Crosschq Recruit app. From there, set your search terms and create a Crosschq alert for Recruit by clicking the "Create Alert" option.

Within the alert settings, select the Slack option and type the channel in which you want to receive notifications.
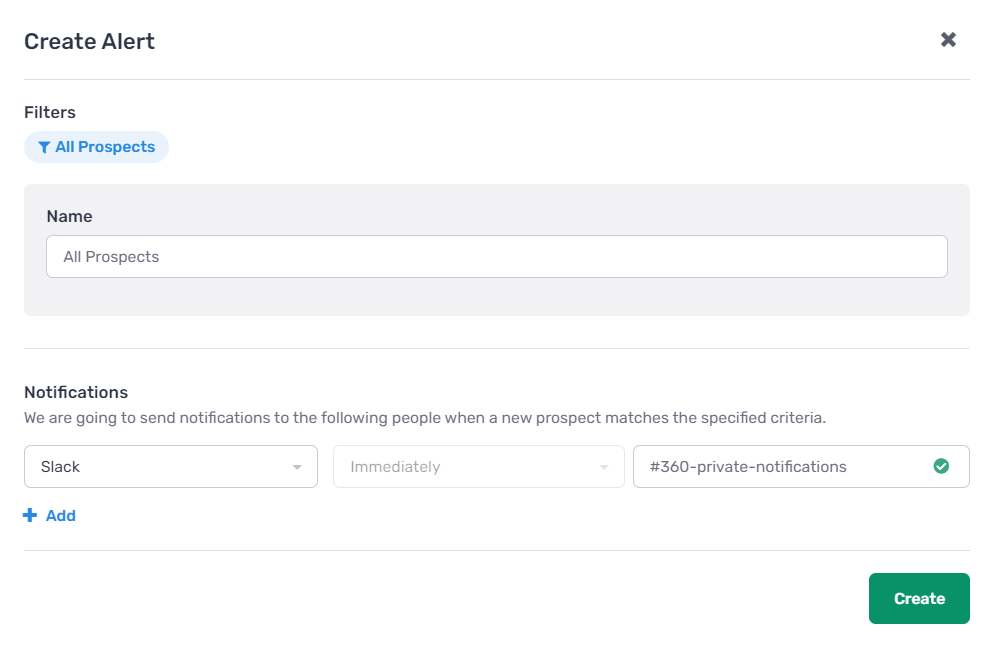
When typing the channel, a send icon will show up. Click it to send a test message.

You will then receive a message in the Slack channel. This means the channel was selected correctly and the communication with Slack is working properly. If you received an error alert, please read the errors section.
Finally, all of your Crosschq Recruit alerts will appear in your Slack channel so you can act quickly on potential new talent. Recruit alerts will look like this:

360 report sharing
Once the Slack integration is connected, you will also have the ability to share completed Crosschq 360 reports to individual Slack users.
From a Crosschq report, click on the Share button.

A new window will appear. Toggle to the Slack tab, and under the Share via Slack field, enter a Slack user in your org.
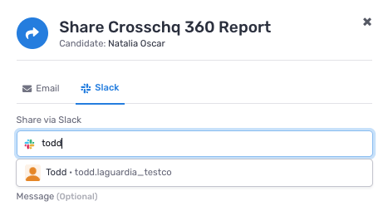
The recipient will be added to the list of users who can access the report.
Afterward, click Share Report to trigger a Slack notification to the user.
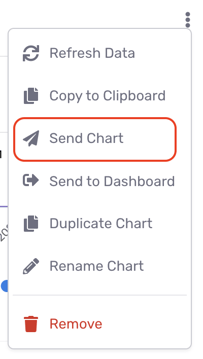
Insights dashboard and chart distribution
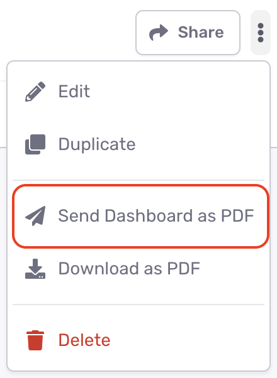
The Slack integration allows you to send dashboards and charts as images to other Slack users.
From either a dashboard or an individual chart, you can click the corresponding vertical ellipsis and select the Send option.
 .
. 
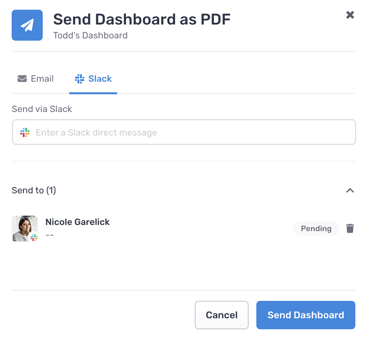
Afterward, a pop up will appear where you can toggle to a Slack tab to enter a Slack user to receive this content. A dashboard will be sent as a PDF, and a chart will be sent as a PNG.
For more information or if you have additional questions, email support@crosschq.com. As a reference, here is our privacy policy.