Follow the steps below to connect Jobvite with Crosschq:
- Enable the Jobvite integration
- Configure API settings
- Configure app settings
- Additional 360 configuration
Enable the Jobvite integration
Search for the Jobvite connector from Organization Settings > Connectors. Click Manage from the Jobvite section.
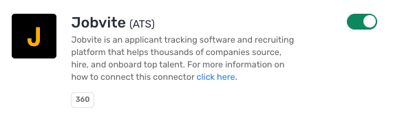
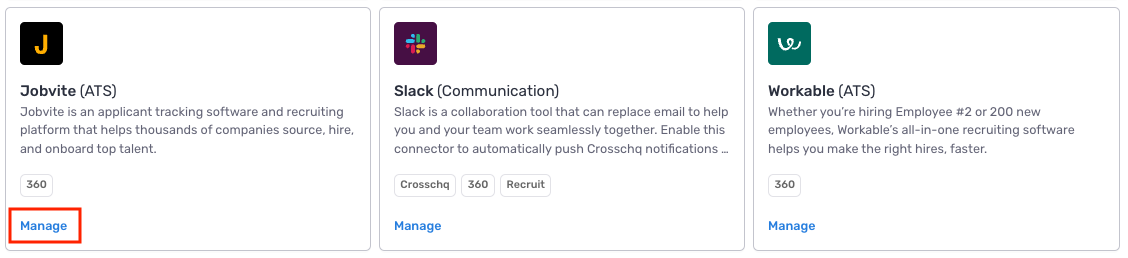 On the next page, turn on the Jobvite connector by clicking the toggle on the right. The toggle should turn green.
Configure API settings
To connect Crosschq with Jobvite, reach out to Jobvite's support team and request a Jobvite API key and Secret key. These fields must be pasted within the Jobvite API settings section in Crosschq. Once you have entered this information in Crosschq, click Save Changes.
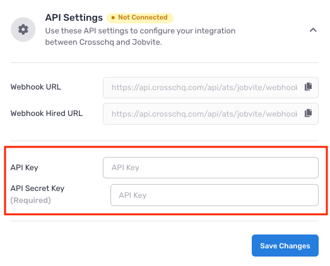
A webhook URL and webhook hired URL are stored within the Jobvite API settings. When integrated with Jobvite, these URLs allow 360 requests to be triggered from Jobvite and statuses (hired or not hired) to be updated in real time within Crosschq. We have also implemented a new auto-cancelation feature, which will auto-cancel reference requests in Crosschq when candidates are marked as rejected in Jobvite. To set up these features, copy both URLs, file a ticket, and share them with the Jobvite support team.
Configure app settings
The Jobvite 360 integration should be fully connected after the API settings are configured from the above steps.Additional 360 configuration
The following sections will outline extra steps to make sure your Jobvite connection is successfully linked.Configure Crosschq templates
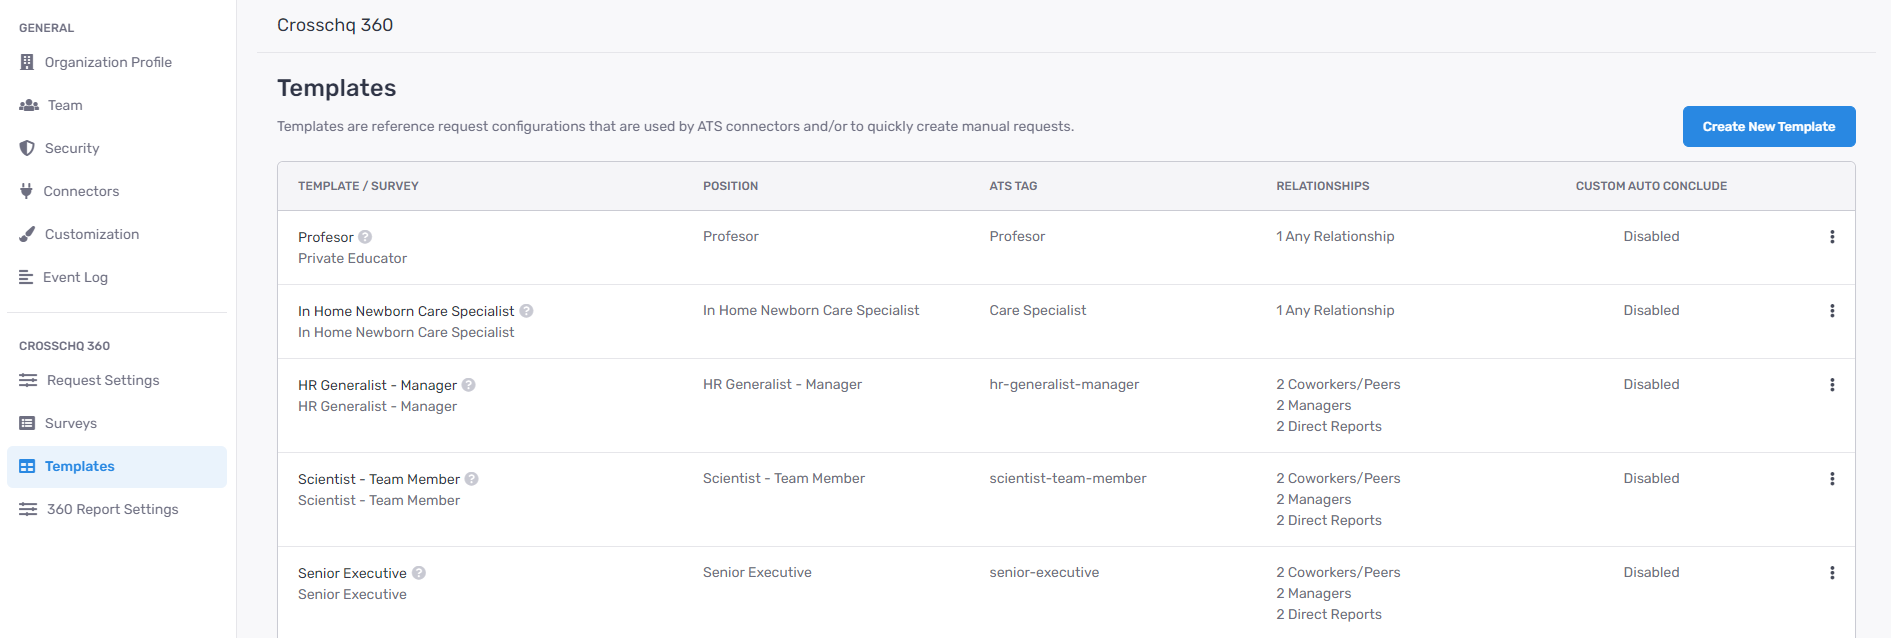
Templates are reference request configurations that are used to trigger requests from ATS connectors. You have to set up your Crosschq templates to be able to send Crosschq requests from an ATS.
Within Crosschq, go to Organization Settings > Templates. Select Create New Template.
Enter the required information such as template name, add in an ATS Tag for that template if required, and create a description of the template.
Within the Request Settings, add in the position, select the appropriate survey, and configure the number/type of references you want to be associated with this request. Please note, the relationship type can either be specified or you can select any relationship type and let the candidate determine the type of reference. Additionally, you can add customized notes to each specific reference request, i.e. "Please provide a manager reference from X company."
From there, add in optional hiring manager information. Finally, you can create custom emails or text messages associated with each template by filling out the custom notifications section. When you are done, select Create Template.
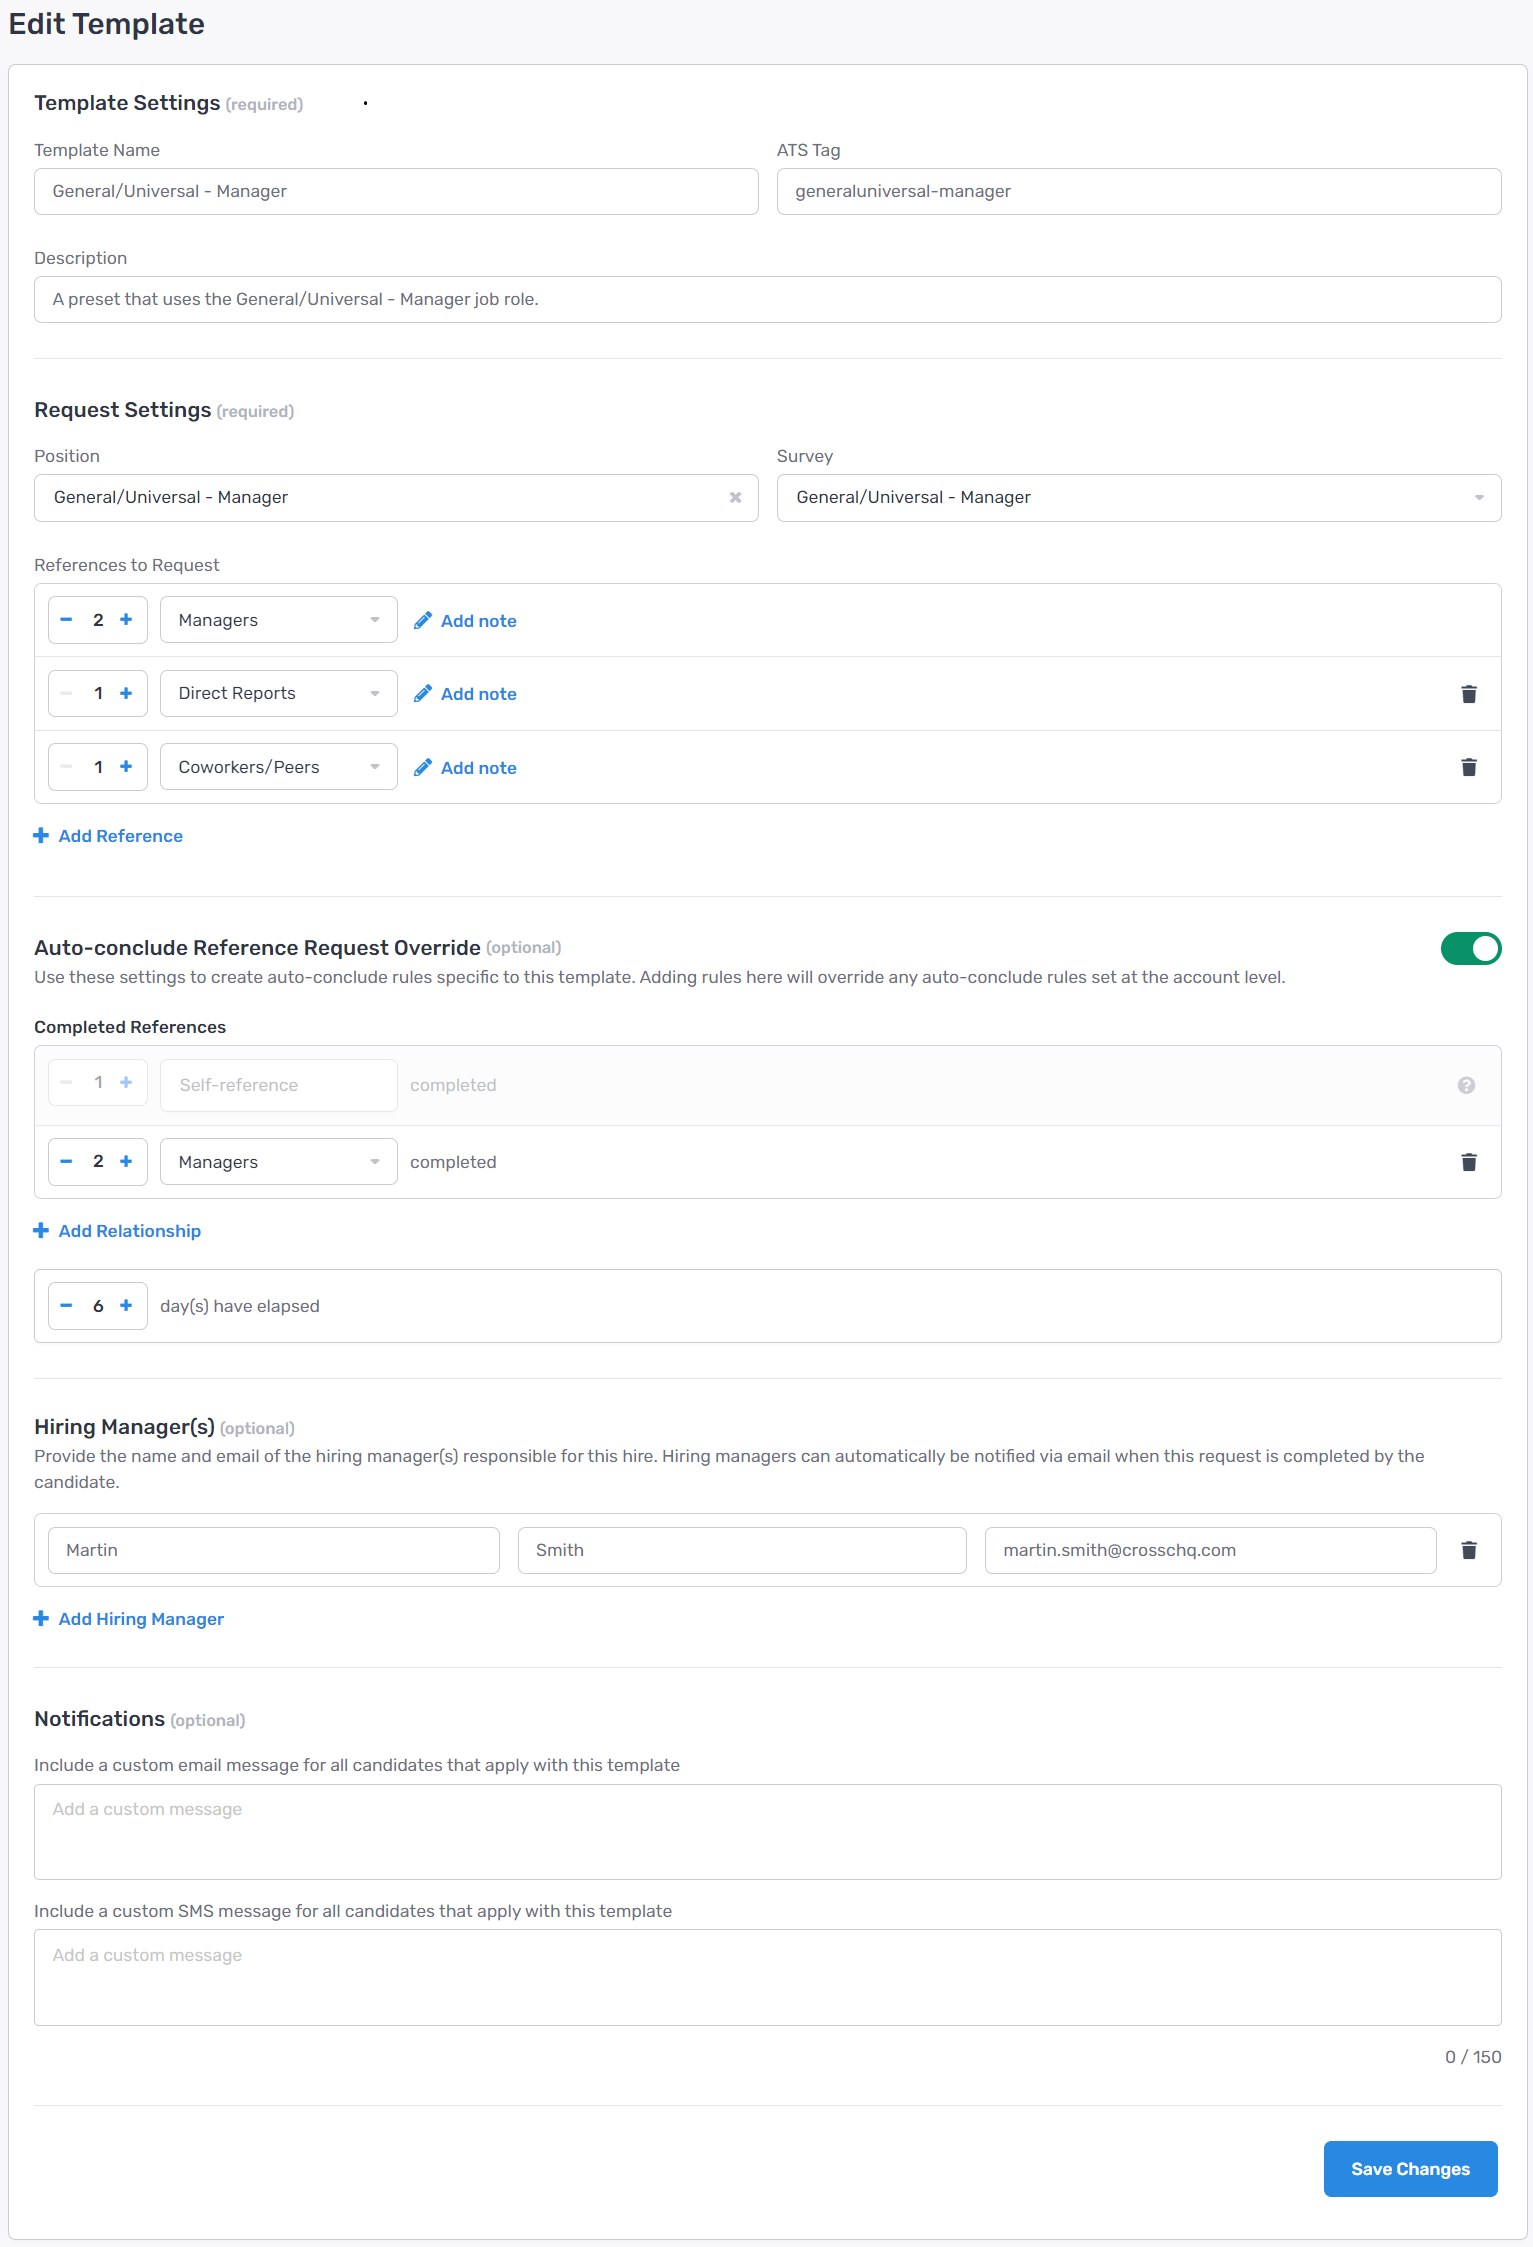
At any point, if you need to edit or delete a template, select the three dots next to the template and you can manage from there.

Adding templates to Jobvite
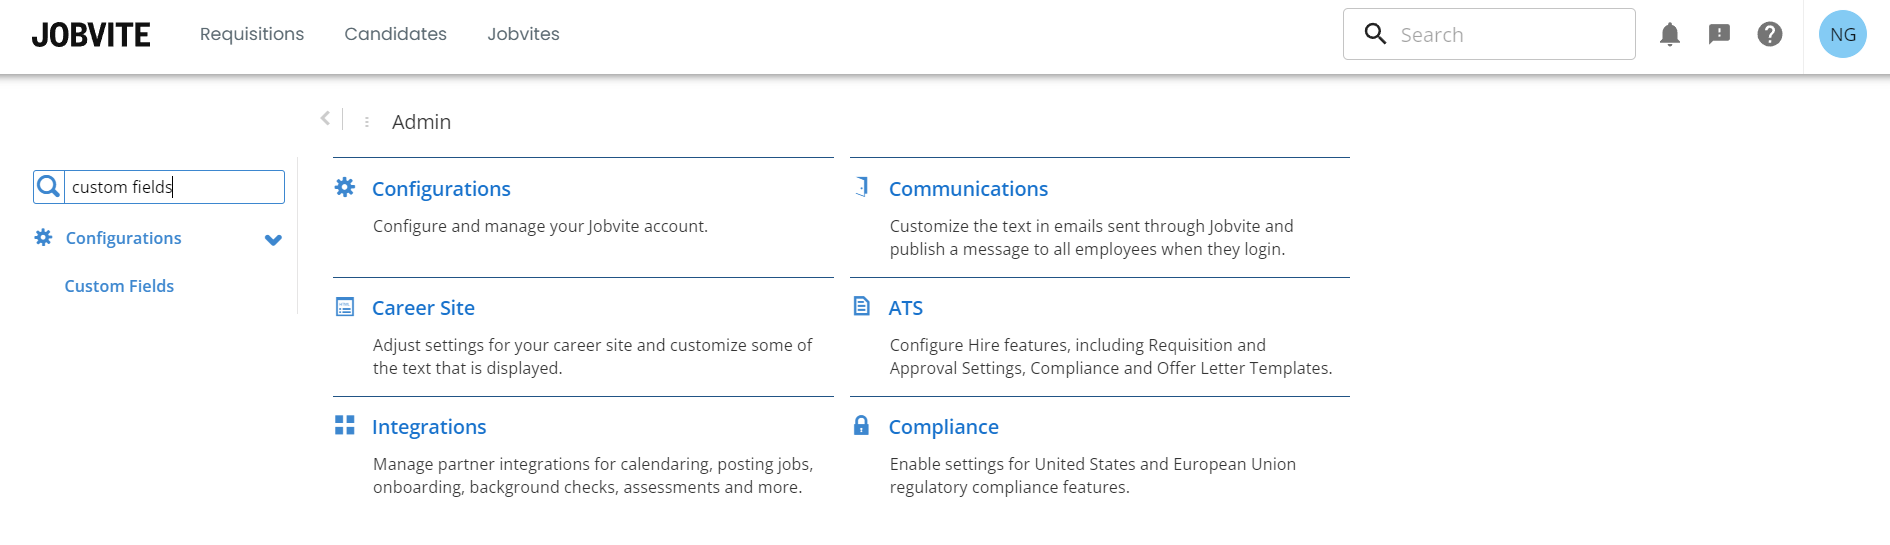
Templates created in Crosschq need to link with job requisitions in Jobvite.The first step is adding the Crosschq template to the job requisition custom field within Jobvite. For this, access Jobvite > Admin and search for the custom fields section using the search bar at the left side of the screen.
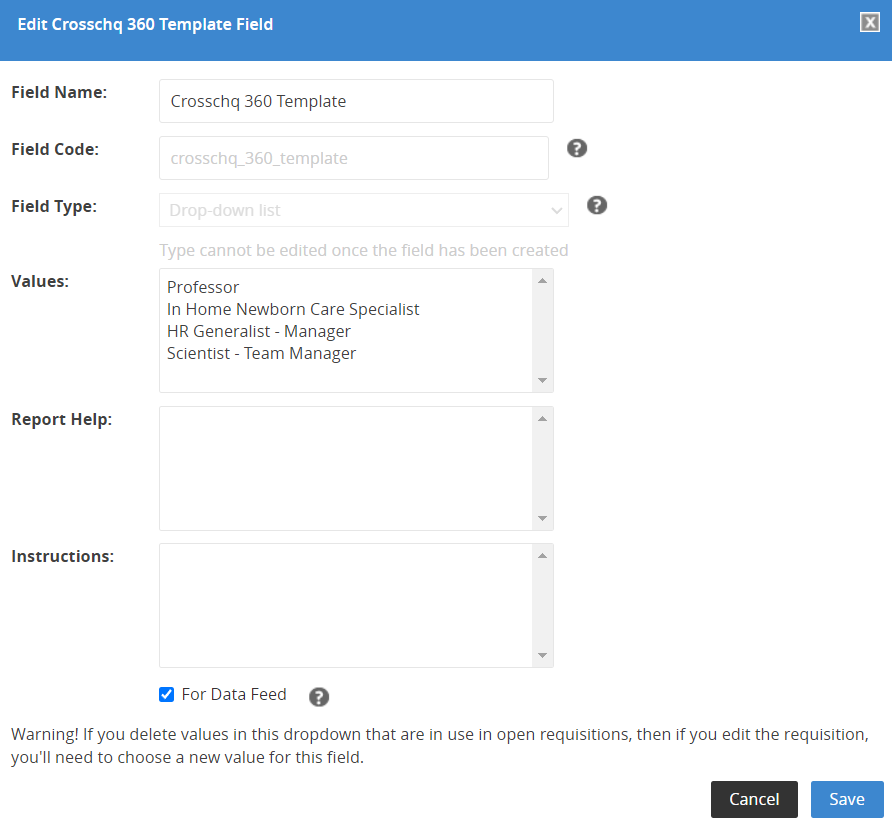
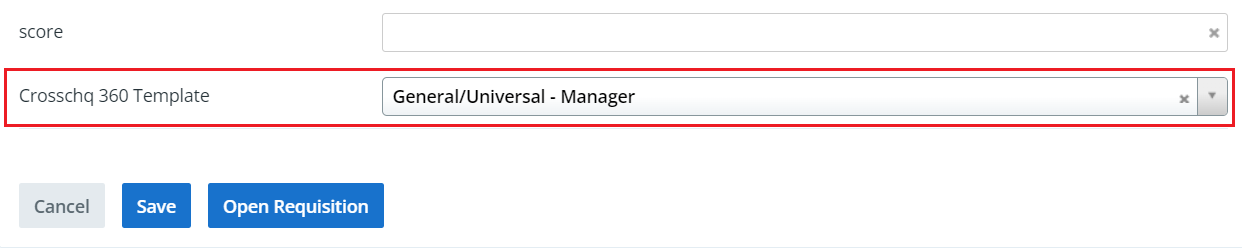
Once in the custom field section, scroll down, locate the Crosschq 360 Template field, and click edit.
Within this section, the values field must be filled out with the names of the templates that were created within Crosschq, as you can see in the image below:
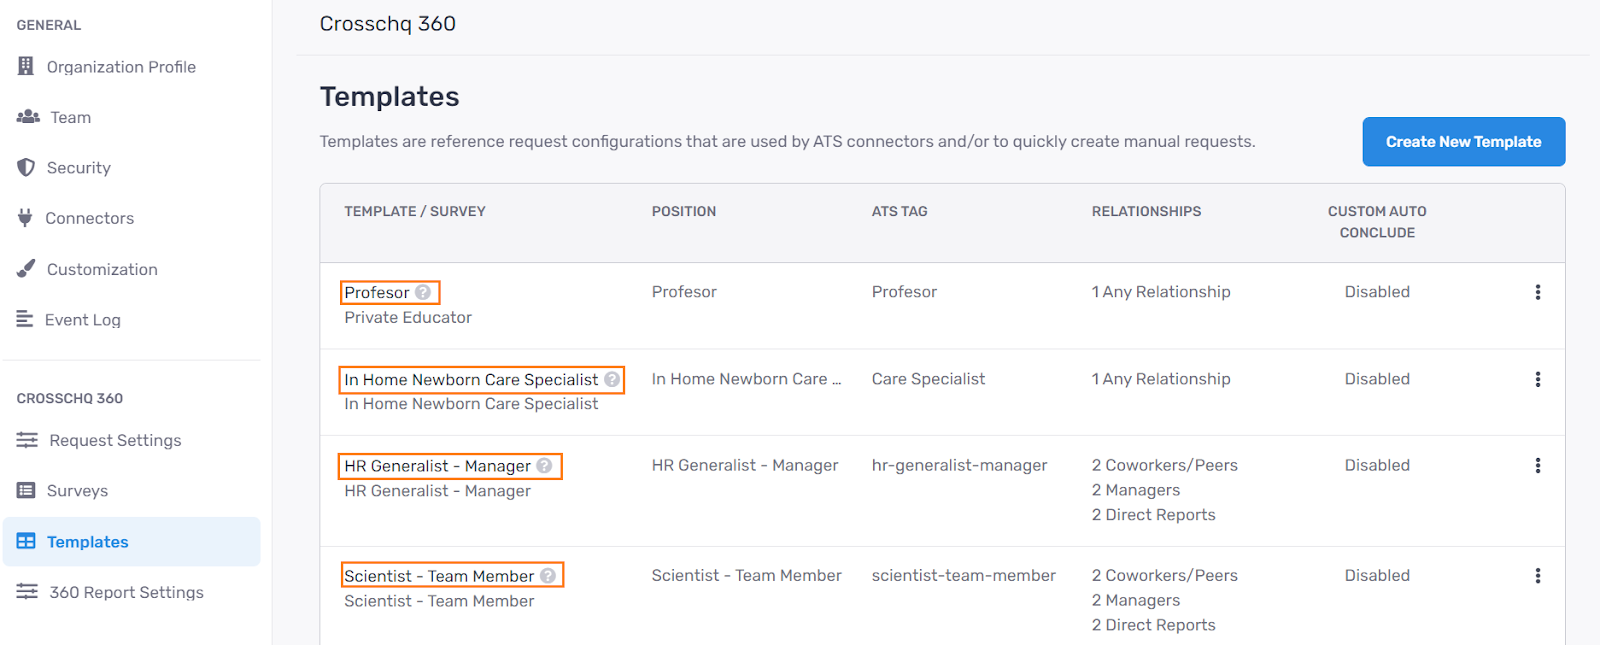
Once you click save the templates will be available to be used.
Note: The following image shows the name that must be copied from Crosschq and pasted on the “Values” field within Jobvite. Be careful to copy the name of the template, not the name of the survey. You can copy this name within the template’s section on the organization settings.
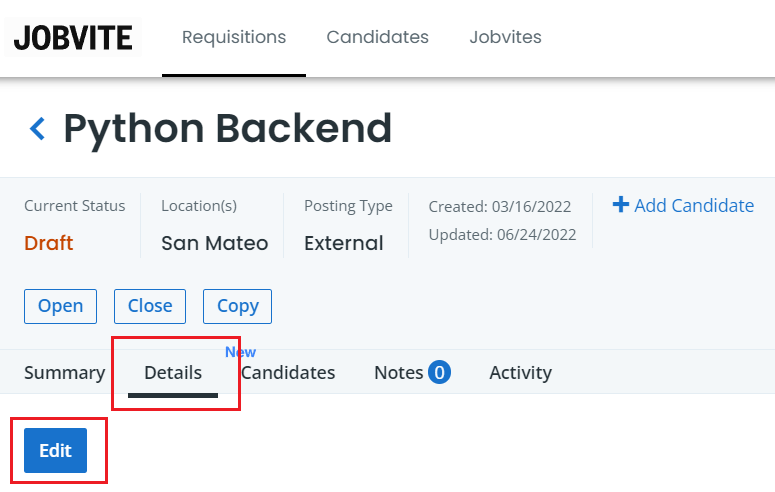
Adding templates to a job requisition
Once Crosschq templates are added to Jobvite, the next step is to link the template you would like to use to a job requisition within Jobvite.
Within Jobvite, access the job requisition > details section > select edit > scroll down to locate the Crosschq 360 Template field and select the Crosschq template you would like to use. All the templates you have added in the last step will show up in the drop-down menu. Confirm the job requisition settings by clicking Save.
Requestors and Hiring Managers
Crosschq pulls the Recruiter and Hiring Managers' data from the details section within the Job Requisition in Jobvite.
Crosschq will assign as requestor the Jobvite user listed as "Recruiter" within the Job Requisition.
As for the Hiring Managers, Crosschq will add all users listed as Hiring Managers within the Job Requisition in Jobvite.
Sending a Crosschq from Jobvite
Once the candidate profile has been created, you will be able to trigger the Crosschq request from the candidate profile within Jobvite.
To do this, access the candidate profile and change the workflow step to Crosschq 360. When this step is selected Crosschq will send the reference request to the candidate.
Note: While creating the candidate profile, remember to select the job requisition linked to the Crosschq template. Otherwise, the Crosschq request won’t be sent.

Viewing a Crosschq report
You can follow the request status within the Application details section in the Candidate’s profile. You can also click the Crosschq 360 Report link and you will be redirected to your Crosschq account.
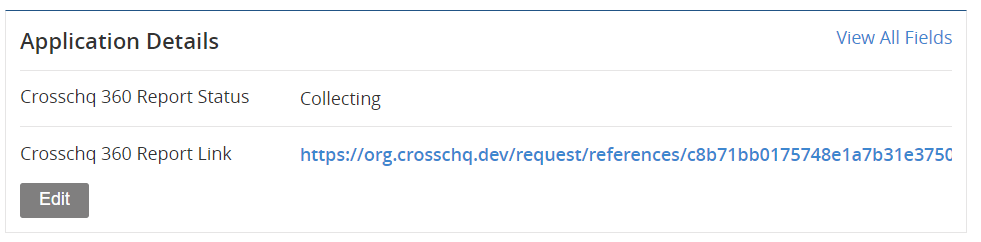
Once the requisition is completed the report link will redirect to the Crosschq Report within the Crosschq platform.
