Follow the steps below to connect Lever with Crosschq:
- Enable the Lever integration
- Configure API settings
- Configure app settings
- Additional 360 configuration
Enable the Lever integration
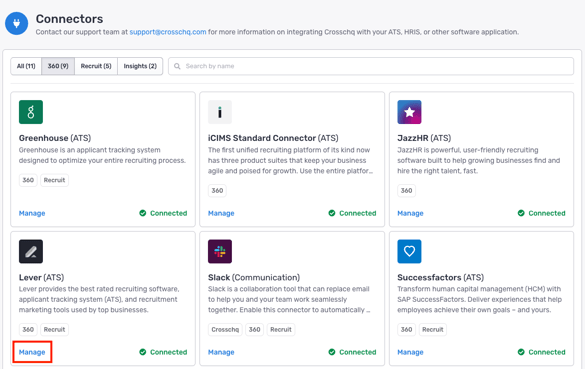
Search for the Lever connector from Organization Settings > Connectors. Click Manage from the Lever section.
 On the next page, turn on the Lever connector by clicking the toggle on the right. The toggle should turn green.

Configure API settings
Step 1: Generate API token
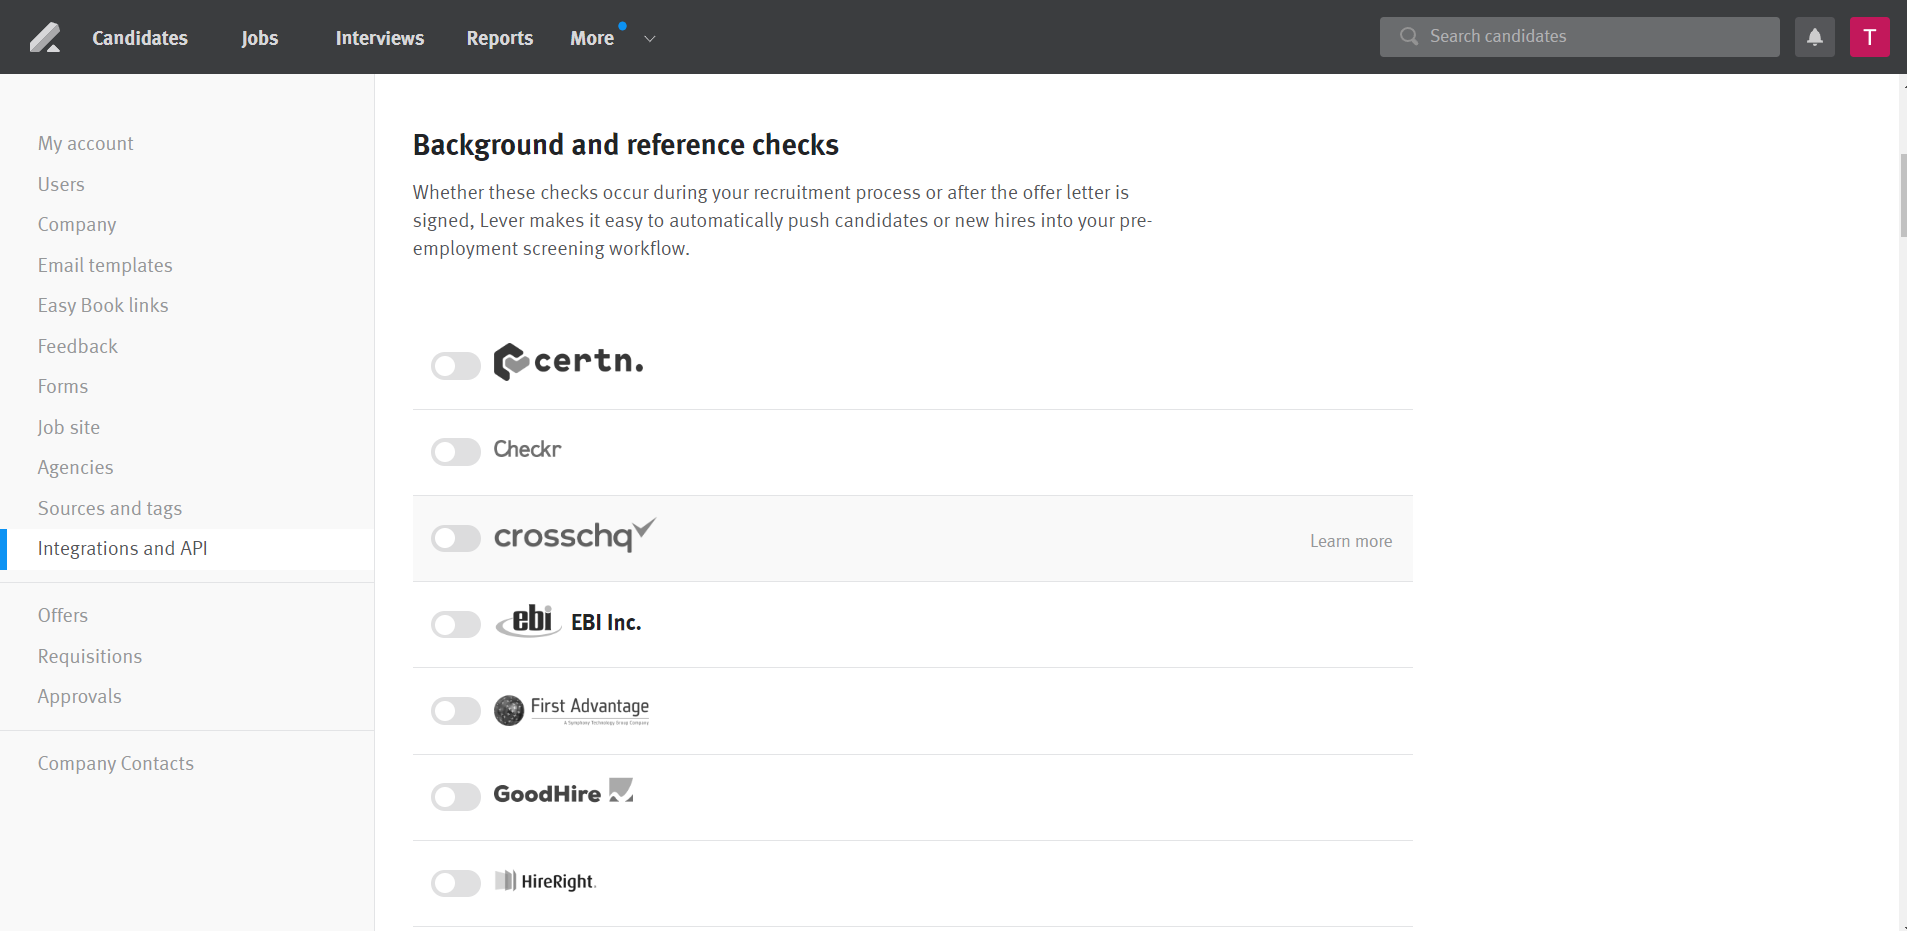
To establish a connection with Lever, a Lever API token needs to be retrieved from your Lever instance. Within Lever, go to Settings > Integrations and API. Scroll down and find Crosschq within the Background and reference checks section.
Enable the connector by clicking the slider.
Crosschq requests for access to confidential data so that this can be pulled into our Insights app.
Click Generate New Key and copy the API key. Make sure to save the API key as it's only shown once. Then press done.
Next, navigate back to the Lever connector settings in Crosschq. Under the API Settings section, paste the API key into the field called Lever API token.
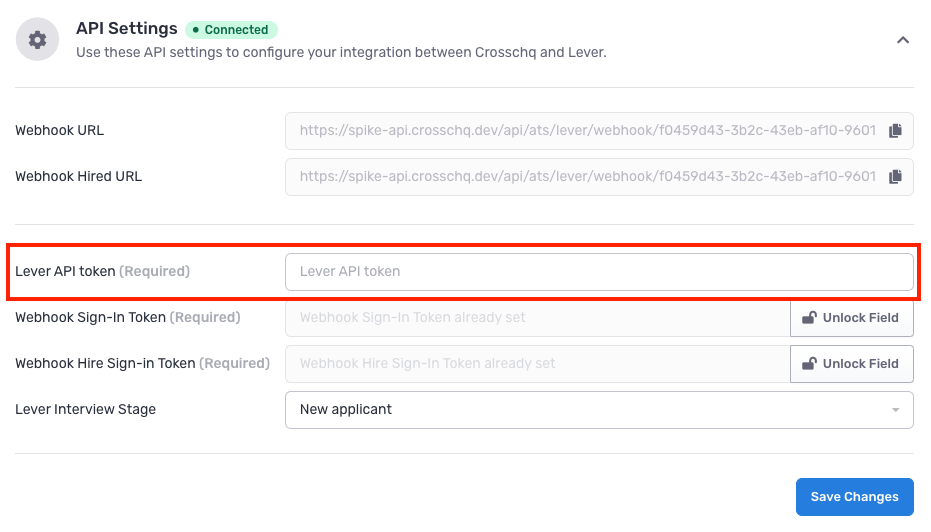
Click Save Changes.
Step 2: Establish candidate stage change webhook
Webhooks allow specific events to be updated in real-time in Crosschq (for example, updating the hiring status in Crosschq when a candidate gets hired).
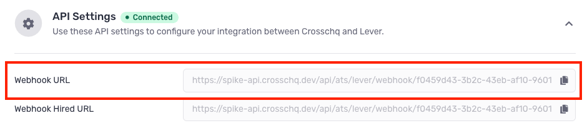
On the Lever App Settings in Crosschq, copy the Webhook URL by clicking the copy button at the right.
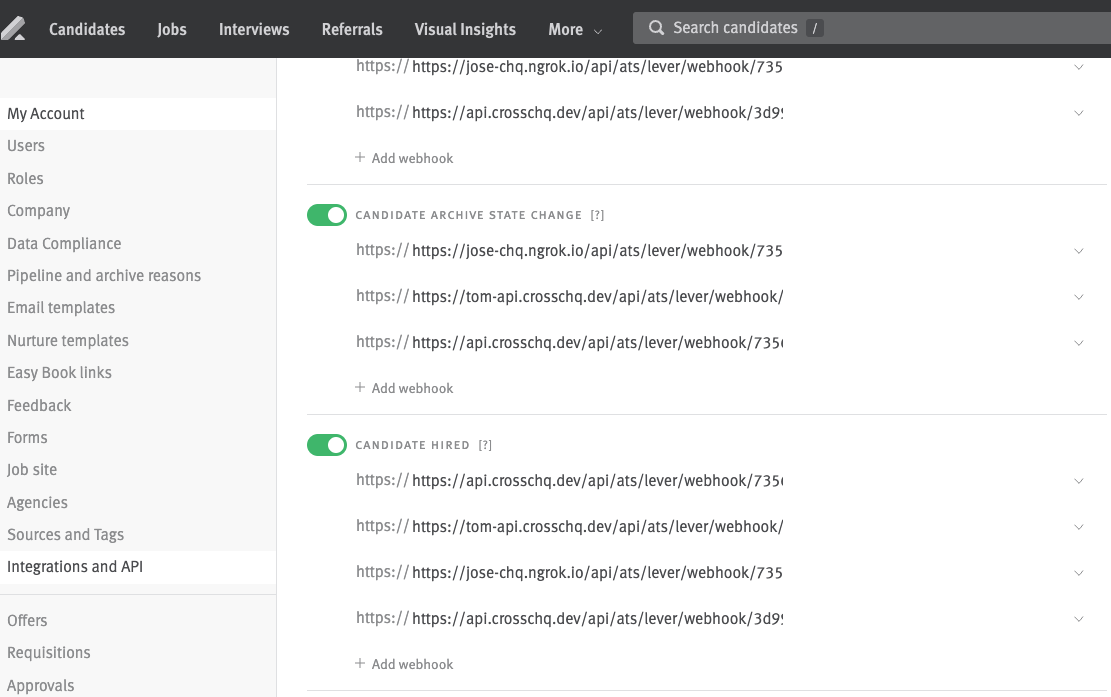
Navigate to your Lever instance, and access the Webhooks tab from the Integrations and API settings page.
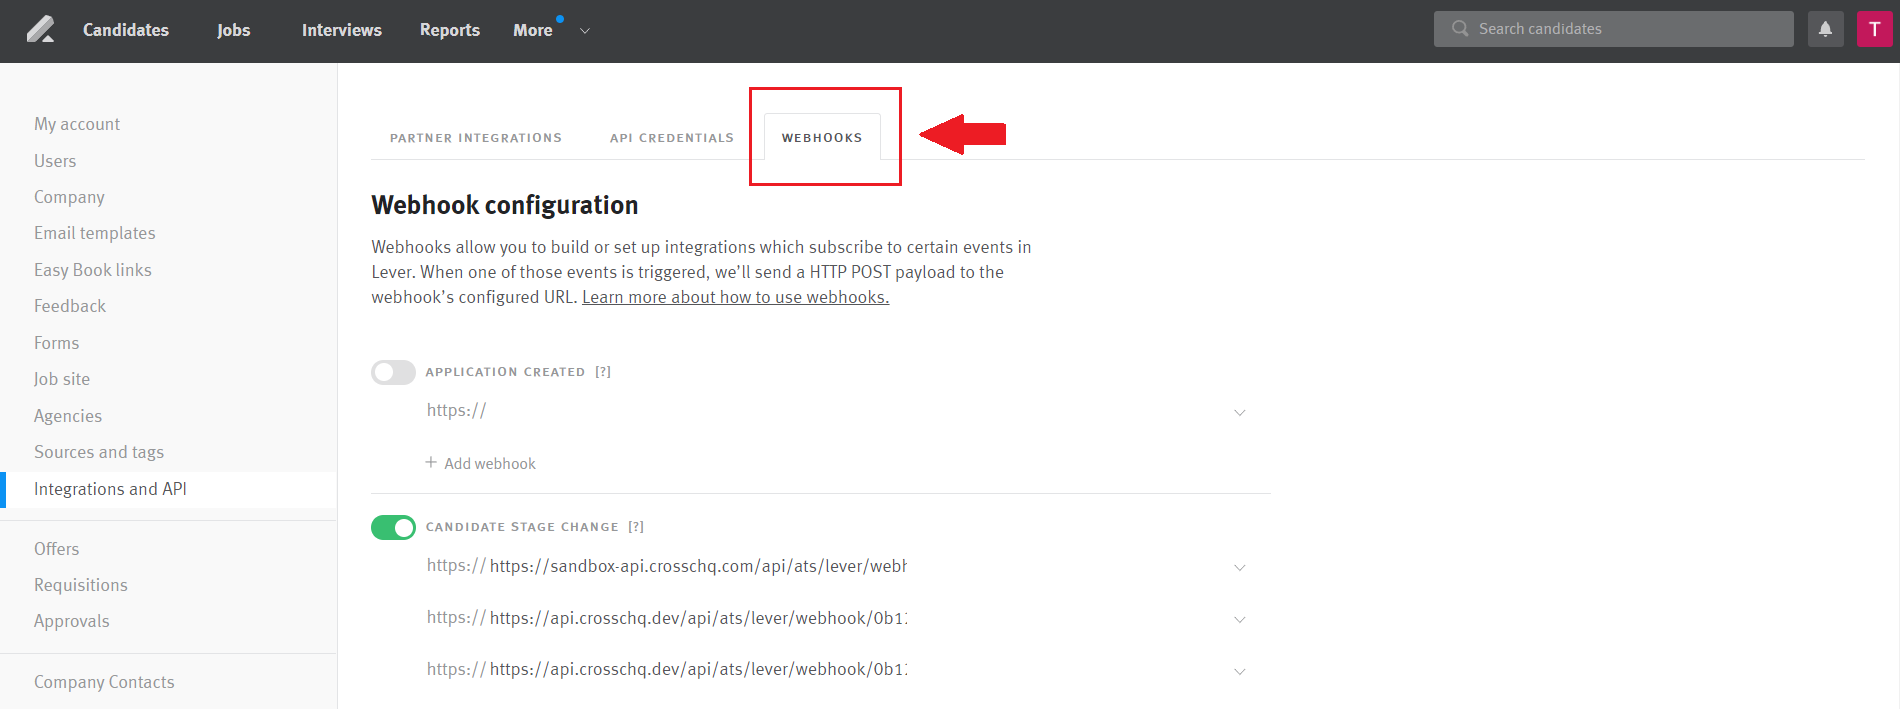
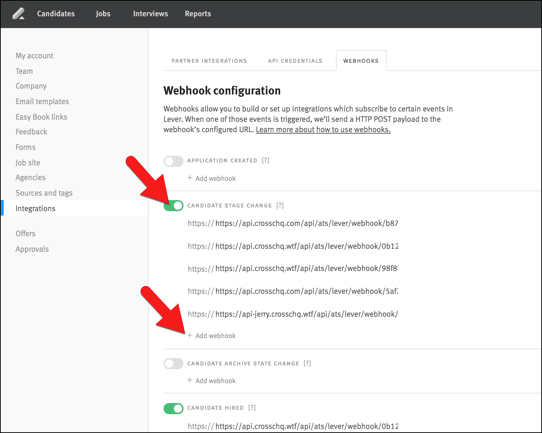
Enable the Candidate Stage Change slider so that it turns green in color. Then, click Add Webhook.
A window will open where you can paste the Webhook URL you copied from Crosschq.
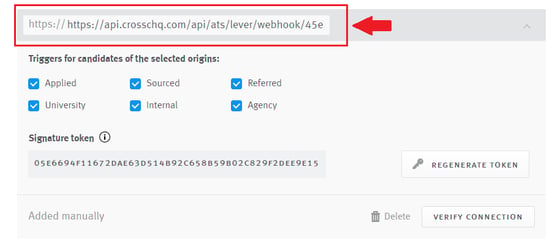
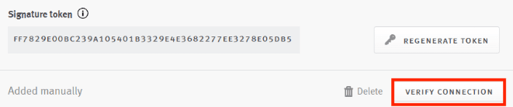
On this same window, copy the Signature token. This will need to be entered back in Crosschq.
Navigate back to the Lever API Settings in Crosschq. Under the Webhook Sign-In Token field, paste the Signature token that you retrieved from Lever's Candidate Stage Change webhook. Click Save Changes.

Step 3: Establish candidate hired webhook
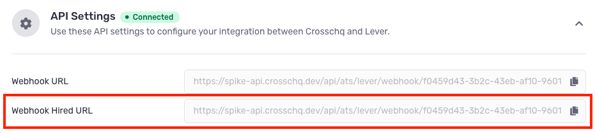
Navigate back to Crosschq and copy the Webhook Hired URL.
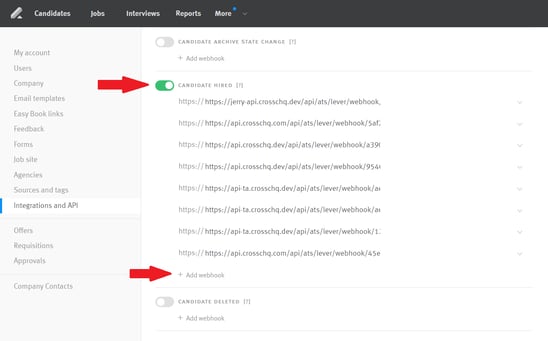
Navigate back to Lever's Webhooks tab from the Integrations and API settings page. Click the Candidate Hired slider so that it turns green in color. Select Add Webhook.
A window will open where you can paste the Webhook Hired URL you copied from Crosschq.
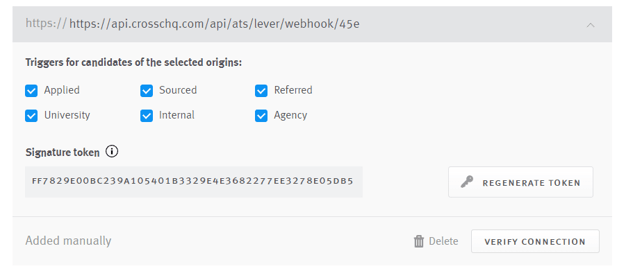
On this same window, copy the Signature token. This will need to be entered back in Crosschq.
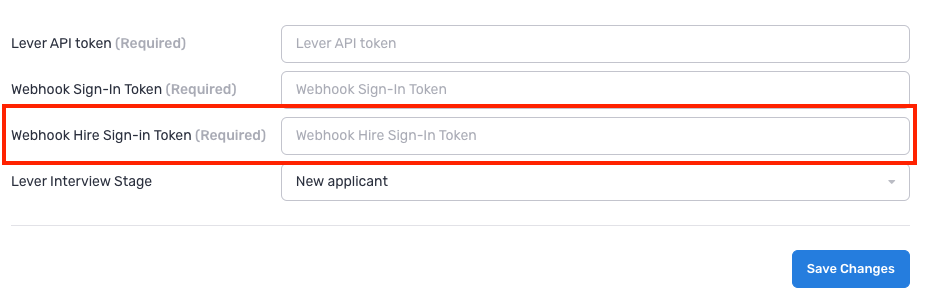
Navigate back to the Lever API Settings in Crosschq. Under the Webhook Hire Sign-In Token field, paste the Signature token that you retrieved from Lever's Candidate Hired webhook. Click Save Changes.
For each webhook, you can confirm that the webhooks are working properly by selecting verify connection within the Lever webhook settings.
Establish candidate archive state change webhook
This webhook is used to trigger Voice campaigns. Navigate back to Crosschq and copy the Webhook Hired URL.
Navigate back to Lever's Webhooks tab from the Integrations and API settings page. Click the Candidate archive state change slider so that it turns green in color. Select Add Webhook.
A window will open where you can paste the Webhook Hired URL you copied from Crosschq.
On this same window, copy the Signature token. This will need to be entered back in Crosschq.
Navigate back to the Lever API Settings in Crosschq. Under the Webhook Archive Sign-in Token field, paste the token that you retrieved from Lever's Candidate archive status change webhook. Click Save Changes.

For each webhook, you can confirm that the webhooks are working properly by selecting verify connection within the Lever webhook settings.
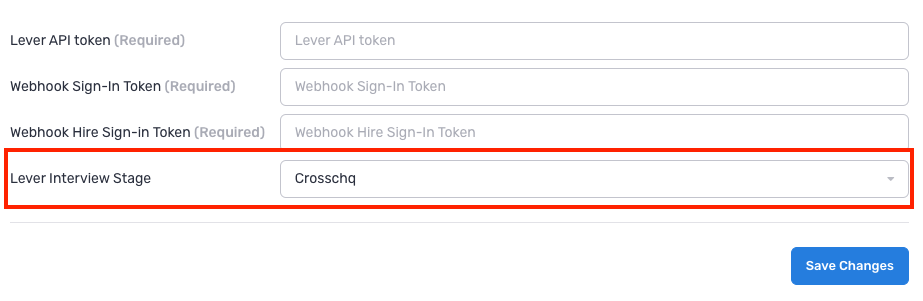
Step 4: Assign interview stage
Finally, from the Lever API Settings in Crosschq, use the Lever Interview Stage field to select the stage at which you want the Crosschq request to be triggered. Note that all stages you create within Lever will populate in this drop-down menu. Then click "Save Changes."
Configure app settings
Once your API settings are saved, you can configure additional settings for specific Crosschq Apps.
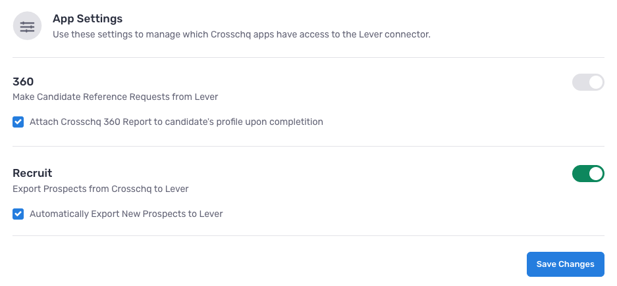
360 settings
When you enable Attach Crosschq 360 Report to candidate's profile upon completion, we will upload completed reference reports to the candidate's profile in Lever if the reference was initiated from the ATS.
Recruit settings
The additional Recruit settings allow you to export prospects from Crosschq to Lever. Enable Automatically export new prospects to Lever to send any new prospects over to your Lever instance.
Additional 360 configuration
The following sections will outline extra steps to make sure your Lever connection is successfully linked.Configure Crosschq templates
Templates are reference request configurations that are used to trigger requests from ATS connectors. You have to set up your Crosschq templates to be able to send Crosschq requests from an ATS.
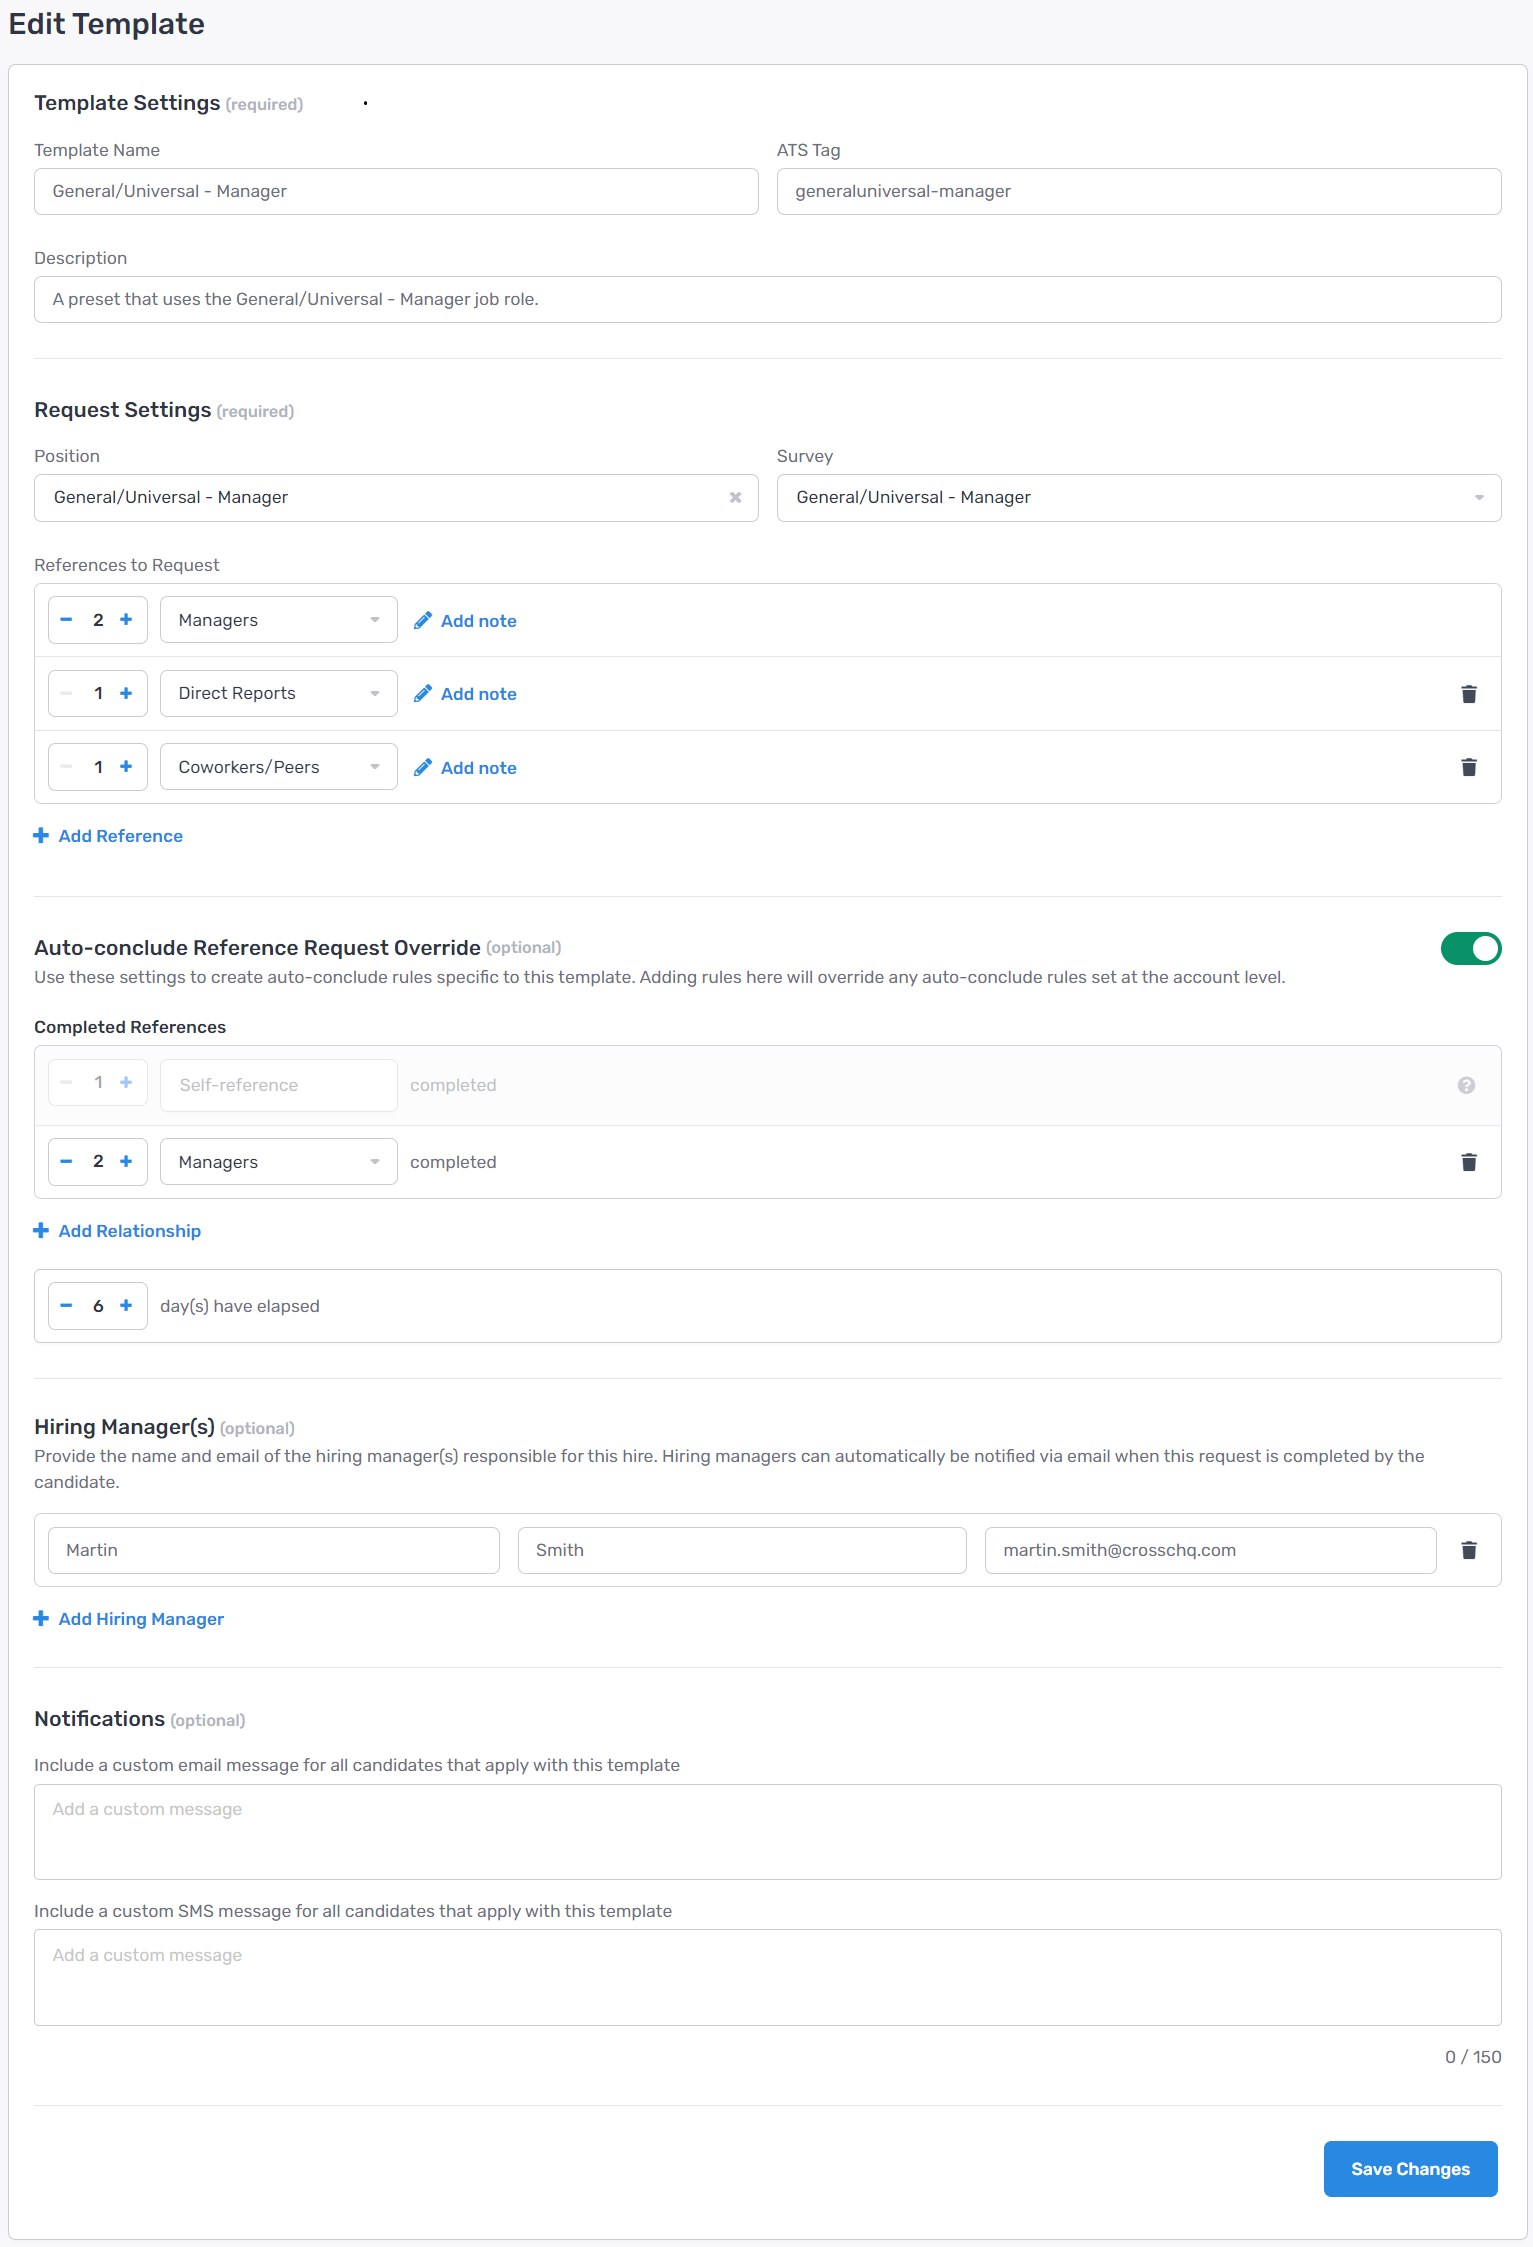
Within Crosschq, go to Organization Settings > Templates. Select Create New Template.
Enter the required information such as the template name, add an ATS Tag for that template, and create a description of the template.
Within the Request Settings, add in the position, select the appropriate survey, and configure the number/type of references you want to be associated with this request. Please note, the relationship type can either be specified or you can select any relationship type and let the candidate determine the type of reference. Additionally, you can add customized notes to each specific reference request, i.e. "Please provide a manager reference from X company."
From there, add optional hiring manager information. Finally, you can create custom emails or text messages associated with each template by filling out the custom notifications section. When you are done, select Create Template.
At any point, if you need to edit or delete a template select the three dots next to the template and you can manage from there.

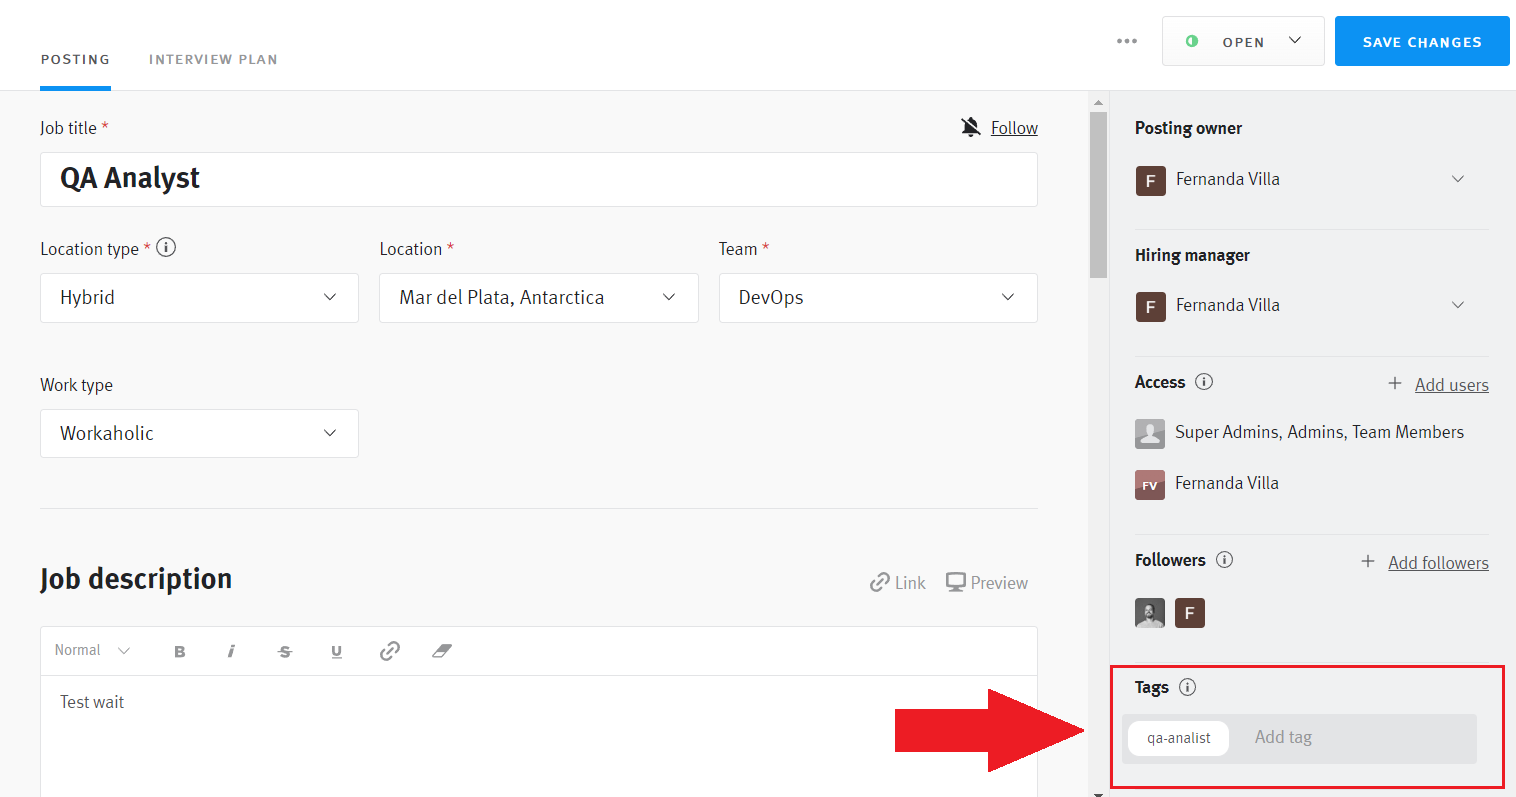
Back in the Lever admin facility, it's important to ensure that any job that you create contains the survey tag so that the template will match the job.
Please note that tags should be all lowercase
Access your job requisition, locate the tags section, and add the template tag:
Requestors and Hiring Managers
Crosschq will assign as requestor the Lever user listed as "Owner" within the candidate's profile.
As for the Hiring Managers, Crosschq will add all users listed as Hiring Managers within the Job's Hiring Team in Lever.
Sending a Crosschq from Lever
Choose a candidate that is currently applying for a specific job and ensure that the tag for the job matches the tag of the default template that you've chosen in Crosschq.
When you are ready to start the Crosschq reference request, go to the candidate's page in Lever and move that candidate to the stage you chose in the Lever Interview Stage field when setting up the connector. This will automatically initiate the Crosschq request.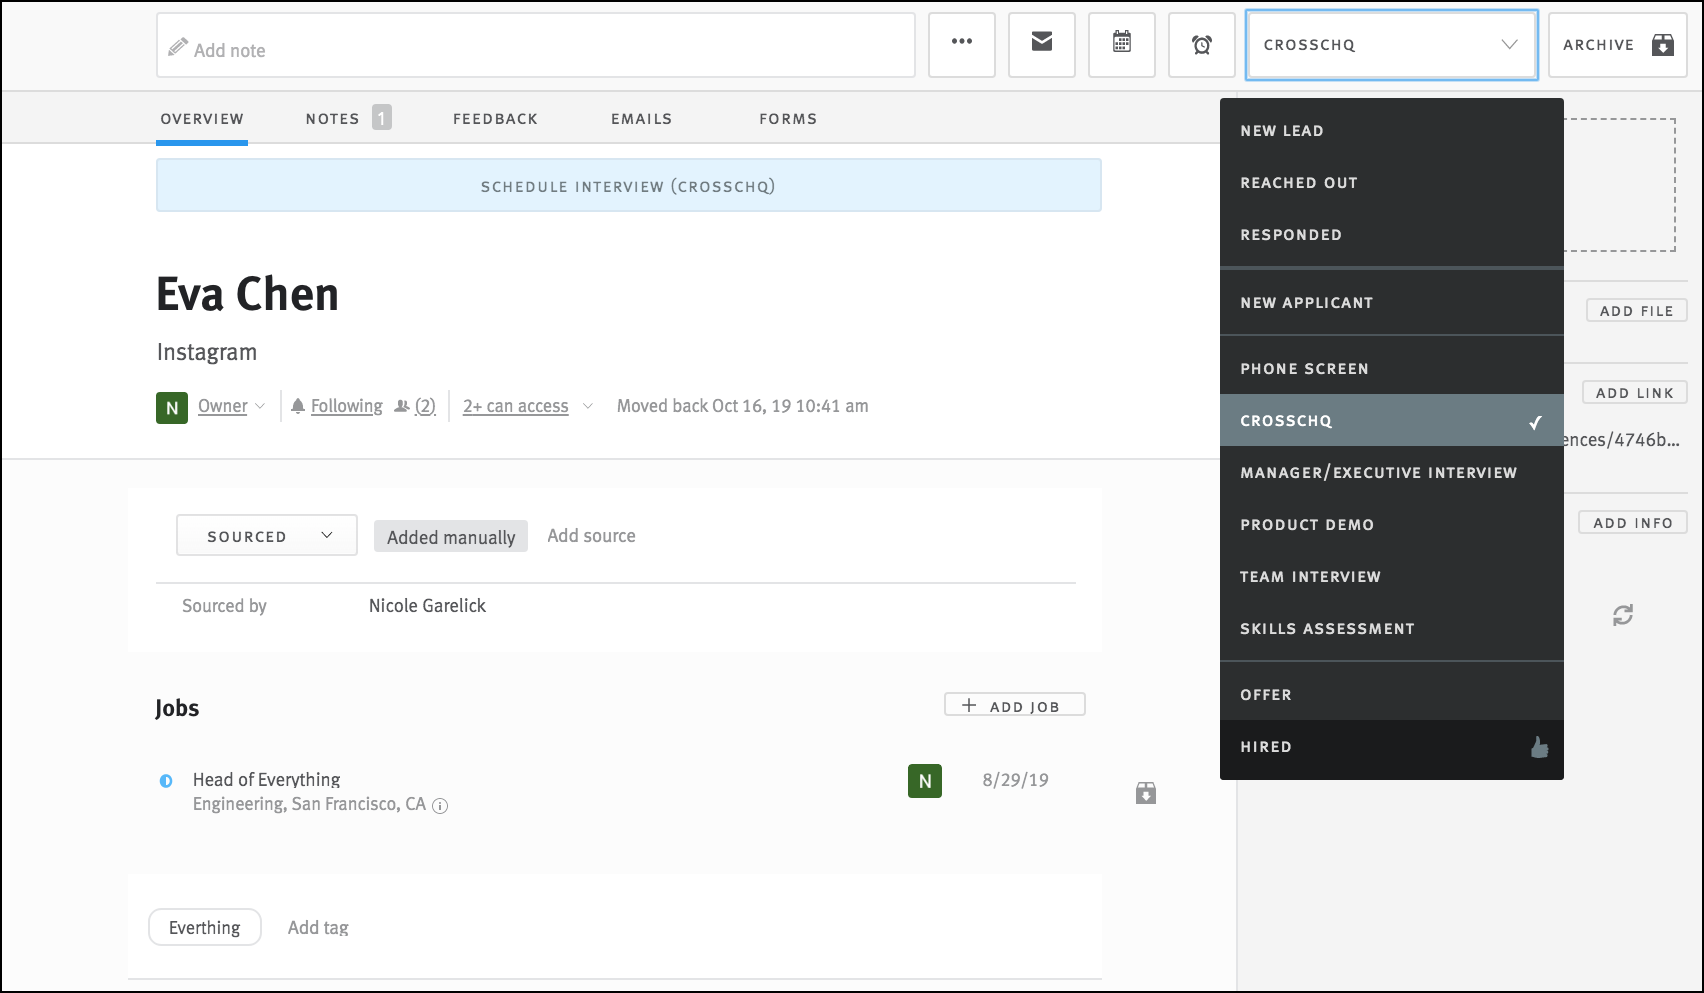
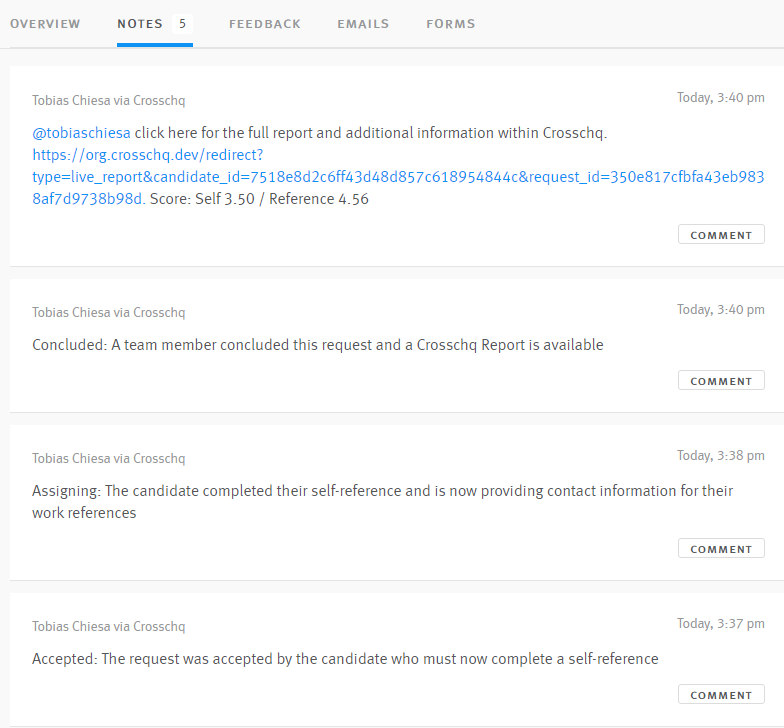
You will be able to keep track of each request status change by accessing the Notes section within the candidate profile:
Viewing a Crosschq report
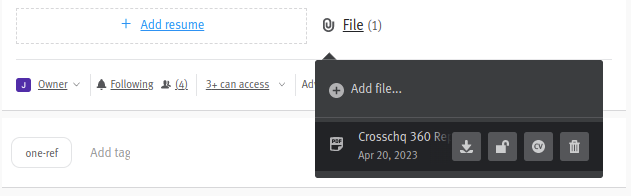
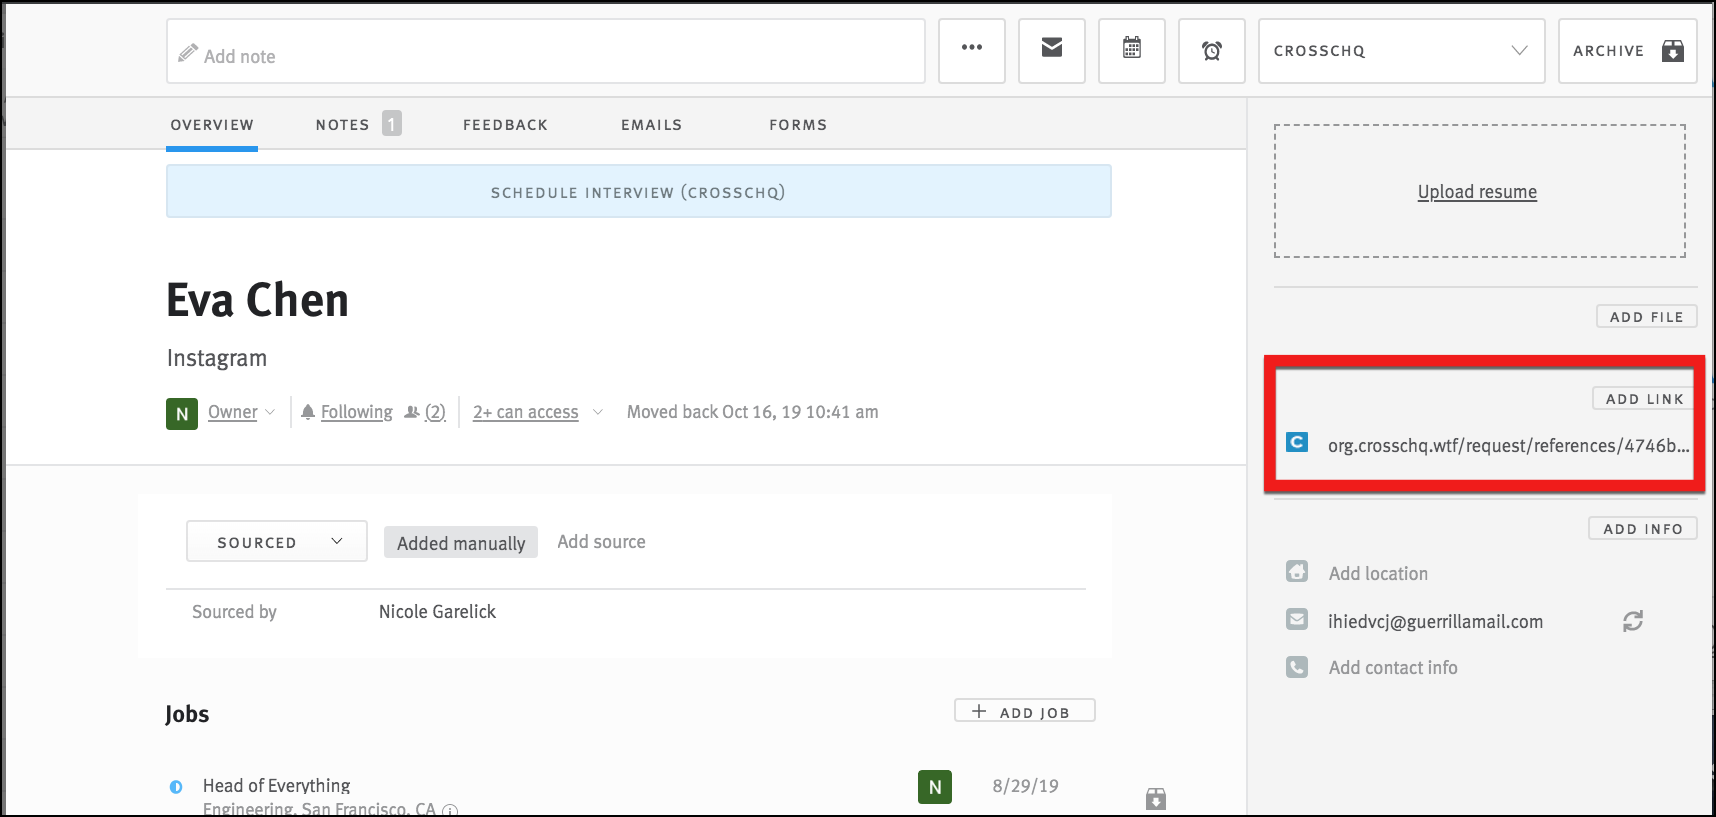
To view a Crosschq reference report in Lever, go to a candidate page. Along the right side, you will find a link to the Crosschq report (see the figure below). Click this link to open another page from which you can review the Crosschq report.
Additionally, the recruiter will get a notification in the notes section of the candidate's profile in Lever when the request is completed with a link to the report.

Activate the "Attach Crosschq 360 Report to candidate's profile upon completion" option in the Crosschq admin to automatically ingest PDF reports into Lever. You will see the PDF attached to the candidate's opportunity: