Follow the steps below to connect SuccessFactors with Crosschq:
- Enable the SuccessFactors integration
- Configure API settings
- Configure app settings
- Additional 360 configuration
- Picklist configuration
- Adding fields to templates
- Configure Intelligent Services Center (ISC)
- Configure Crosschq templates
- Requestors and Hiring Managers
- Sending a Crosschq from SuccessFactors
- Viewing a Crosschq report
Enable the SuccessFactors integration
Search for the SuccessFactors connector from Organization Settings > Connectors. Click Manage from the SuccessFactors section
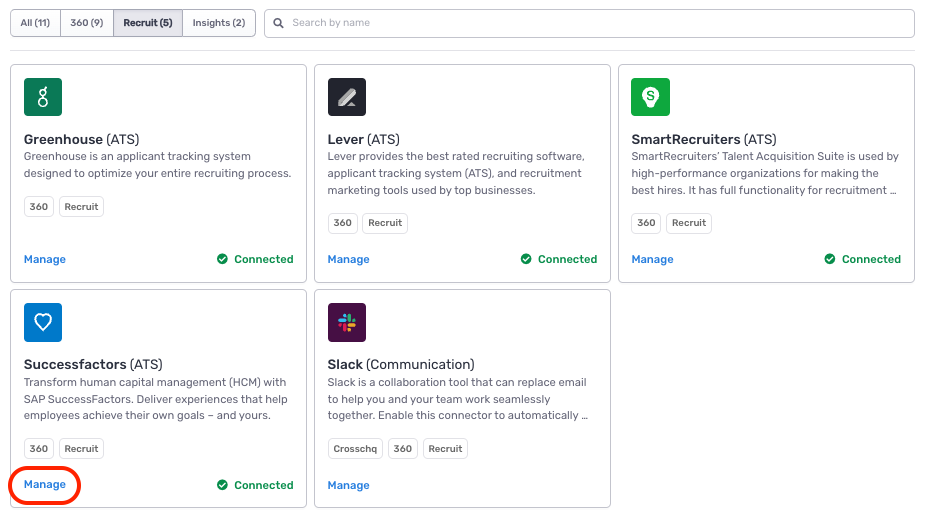
On the next page, turn on the Greenhouse connector by clicking the toggle on the right. The toggle should turn green.
Configure API settings
Connect SuccessFactors OData API
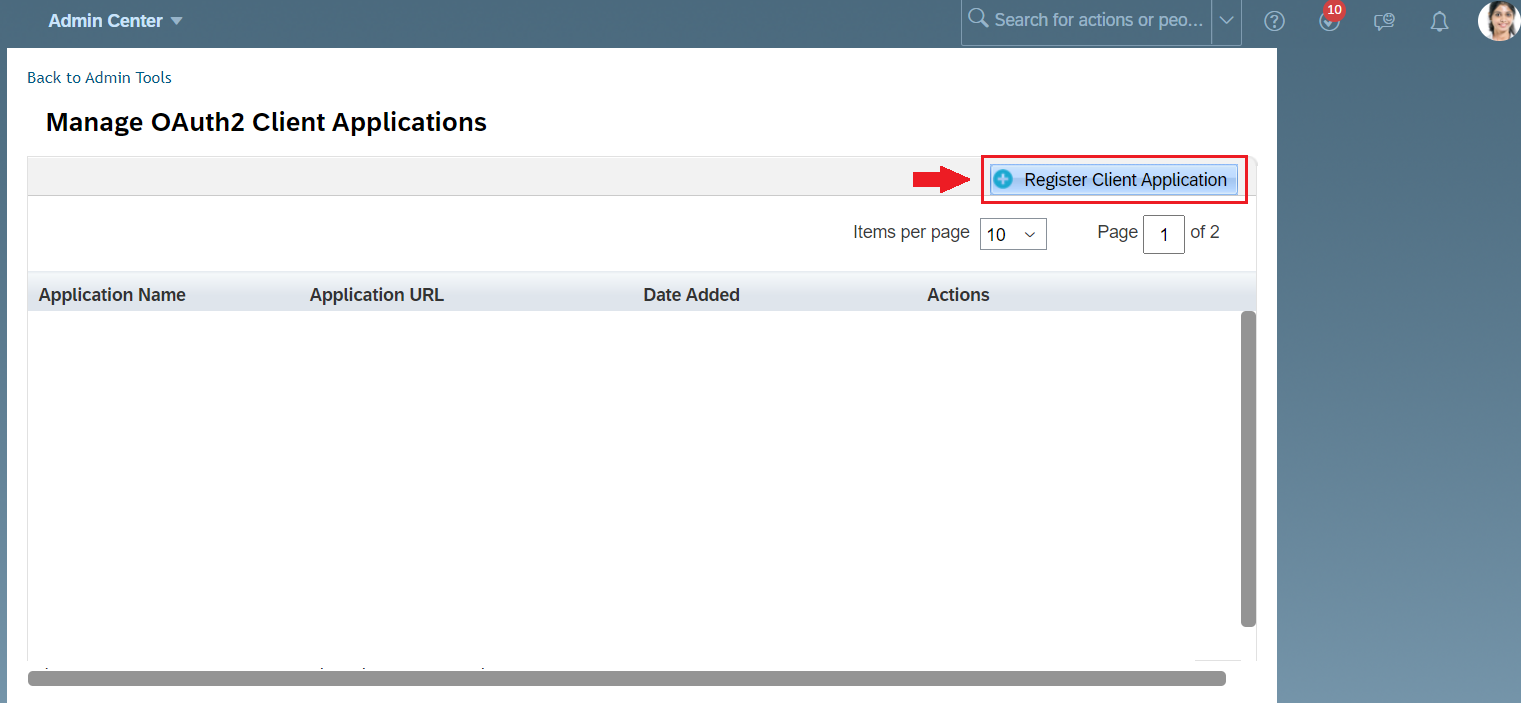
Prior to completing the setup in Crosschq, you will need to enable the OData API in your SuccessFactors account. To start, login to SuccessFactors, search for "API Center" within the navigation bar, next click the arrow to the next page and locate the OAuth Configuration for OData option and then click Register Client Application.
Complete the form by typing "https://api.crosschq.com" in the Application URL field. Then generate and download an X.509 certificate and save it in a safe place. This certificate must be uploaded later in Crosschq's SuccessFactors connector configuration.
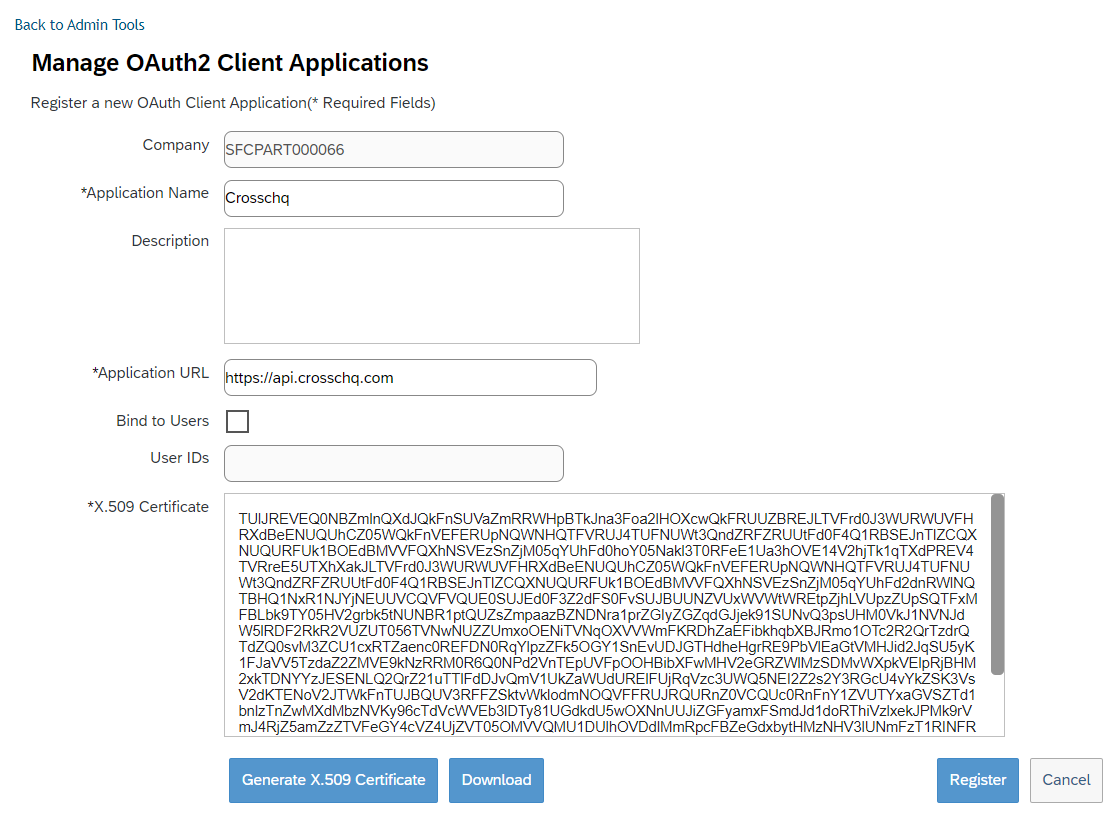
The x.509 certificate is valid for one year after enabling the integration. Please be sure to note this so you know to update this certificate one year after integrating with Crosschq.
Go back again to the Client Application section, click "view" on the client application you created in the last step, and copy the API KEY. This will be required to configure the connector with Crosschq.
Navigate back to the connection settings in Crosschq. Under the API settings, enter the following information:
- OAuth URL
- API URL
- Certificate PEM: upload the X.509 certificate generated before
- API Secret Key: paste the API key copied before
- Username: this user should have access to modify information in the job requisition and candidate's profiles.
- Company: SF company code
-1.png?width=688&height=376&name=image%20(47)-1.png)
Please note that OAuth and OData URLs have different domains. Here is a list of API URLs for different Data Centers.
Click Save Changes.
Enable webhooks
Within SuccessFactors, configure webhooks to automatically trigger reference requests and update the hiring status in Crosschq. In SuccessFactors:
- Search for Security Center within the navigation bar

- Select Destination Settings and add a new destination setting.
.png?width=512&name=unnamed%20(13).png)
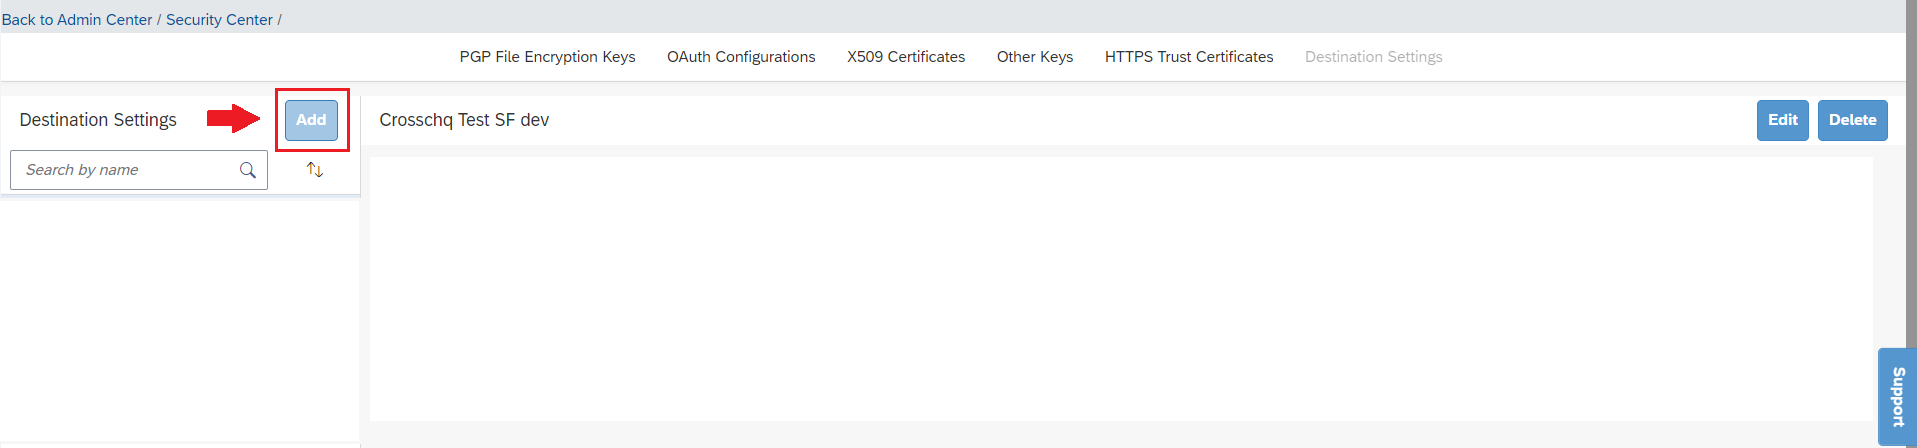
- Complete the form with the following parameters:
- Name: "Crosschq"
- Type: Rest
- Authentication Type: Basic Authentication
- Endpoint URL, User Name, and Password: for these fields, navigate back to Crosschq > Organization settings > Connectors > SuccessFactors. Here you will find three values:
- Webhook URL must be pasted into the Endpoint URL field within SuccessFactors.
- Basic Username must be pasted into the User Name field within SuccessFactors.
- Basic Password must be pasted into the Password field within SuccessFactors.
- Save your changes in SuccessFactors.
Configure Intelligent Services Center (ISC)
Crosschq allows SuccessFactors to provide notifications as a candidate moves through the process. Two definition files will be required to set up the webhook calls within SuccessFactors:
- Reference request definition - triggers the Crosschq request;
- Hire status definition - updates the hiring status within Crosschq.
Both files can be found here and here.
Within SuccessFactors go to Integration Center > My Integrations > Create > Import an Integration Definition and import both files.
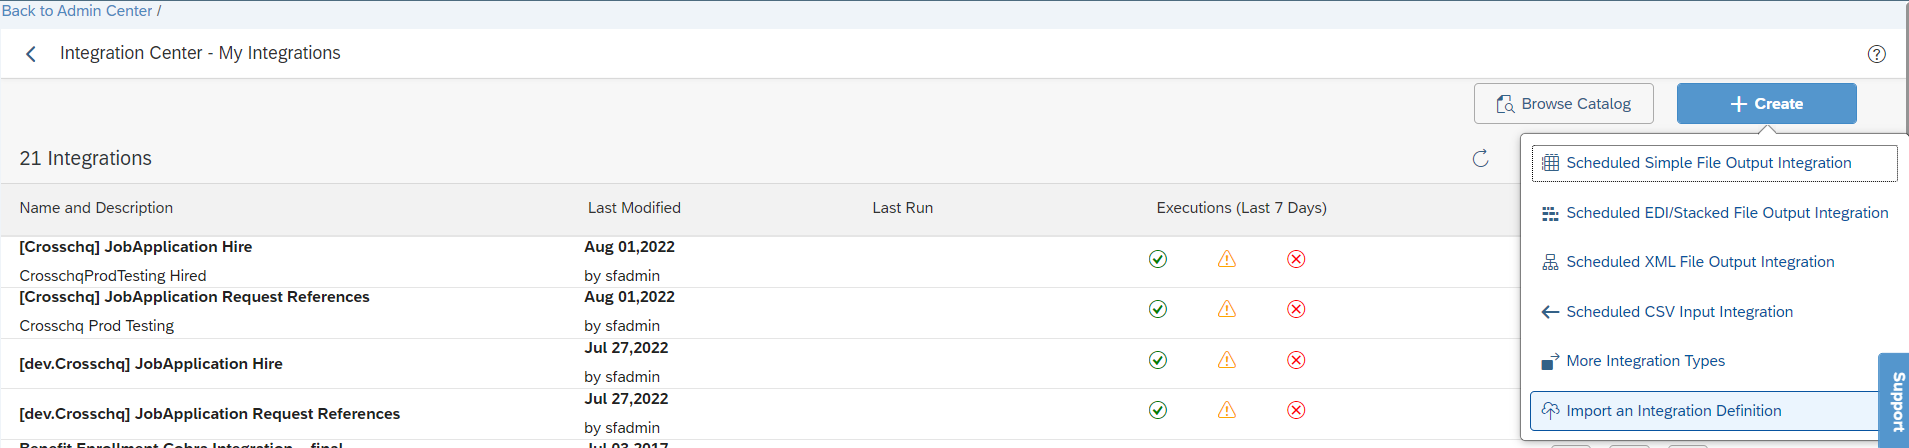
*Note: Review the filter applied for Request (Background Check) and for Hired (Hired).
1. Reference request definition
In the Filter step, select the ID of the applicant status workflow (step in your pipeline) that triggers Crosschq.
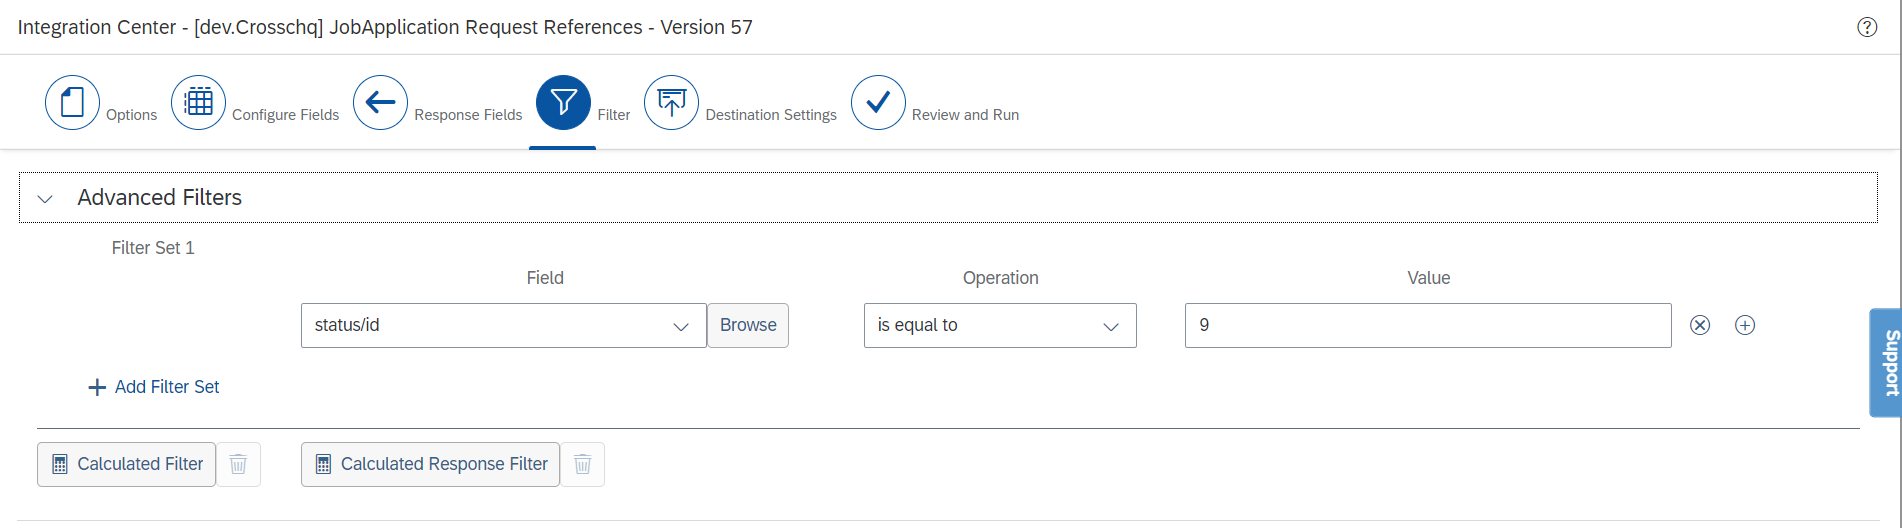
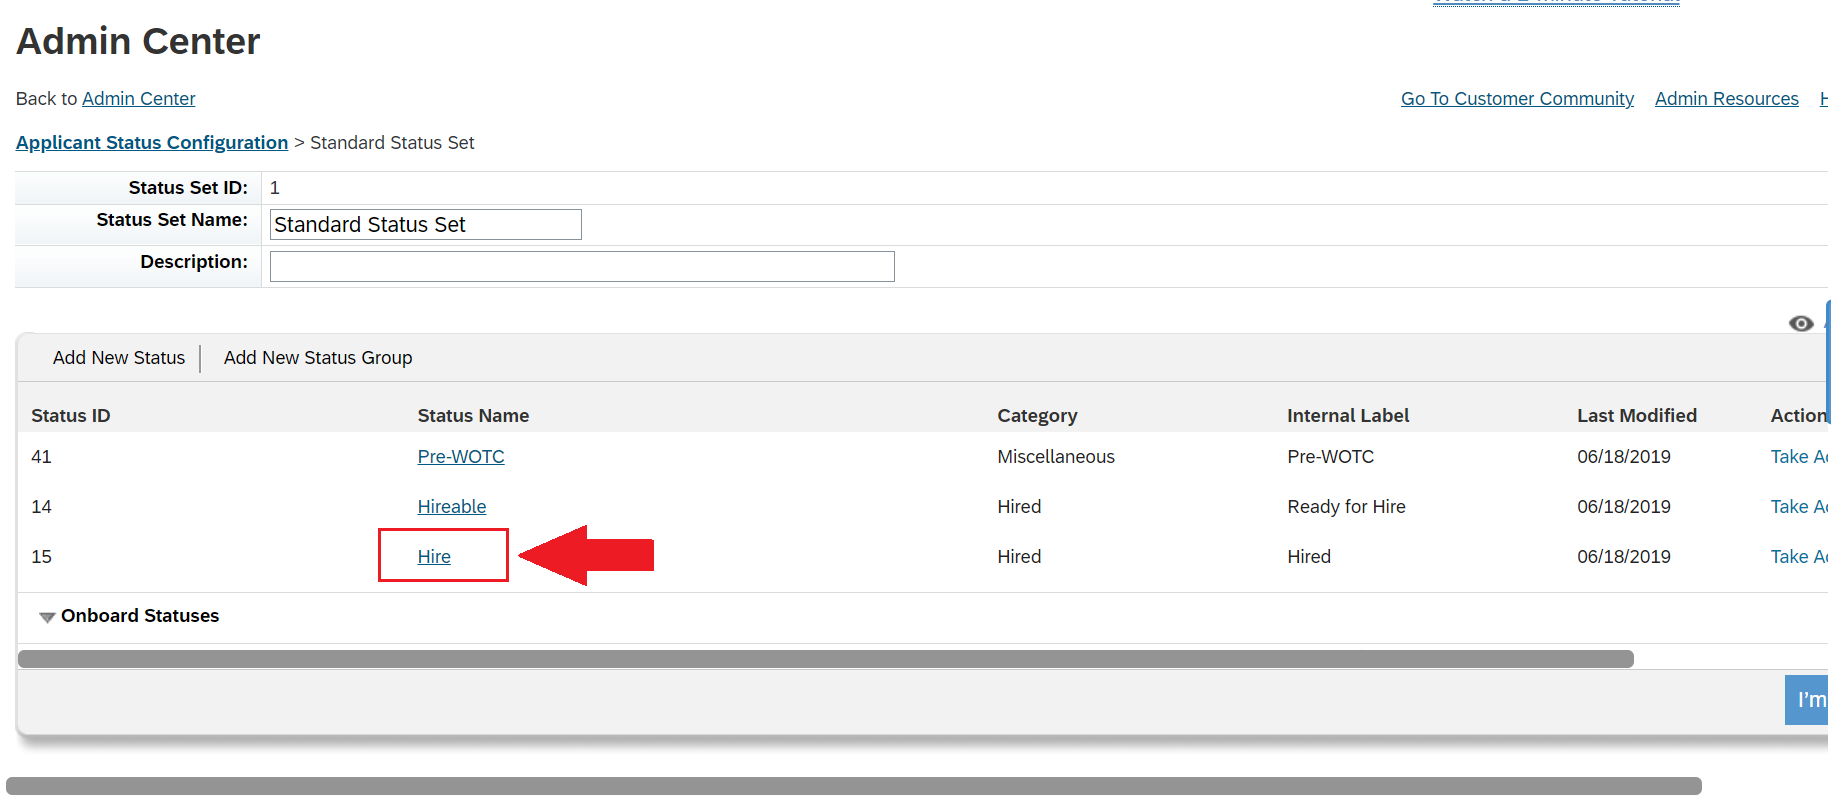
*Important: Use the base status ID created in Provisioning (visible when adding the status in “Add New Status”). Do not use the automatically generated workflow ID from “edit applicant status configuration,” as this will not trigger the Crosschq integration.
In the Destination Settings step, scroll down, select the "REST Server Settings from Security Center" option and then select the REST destination created before.
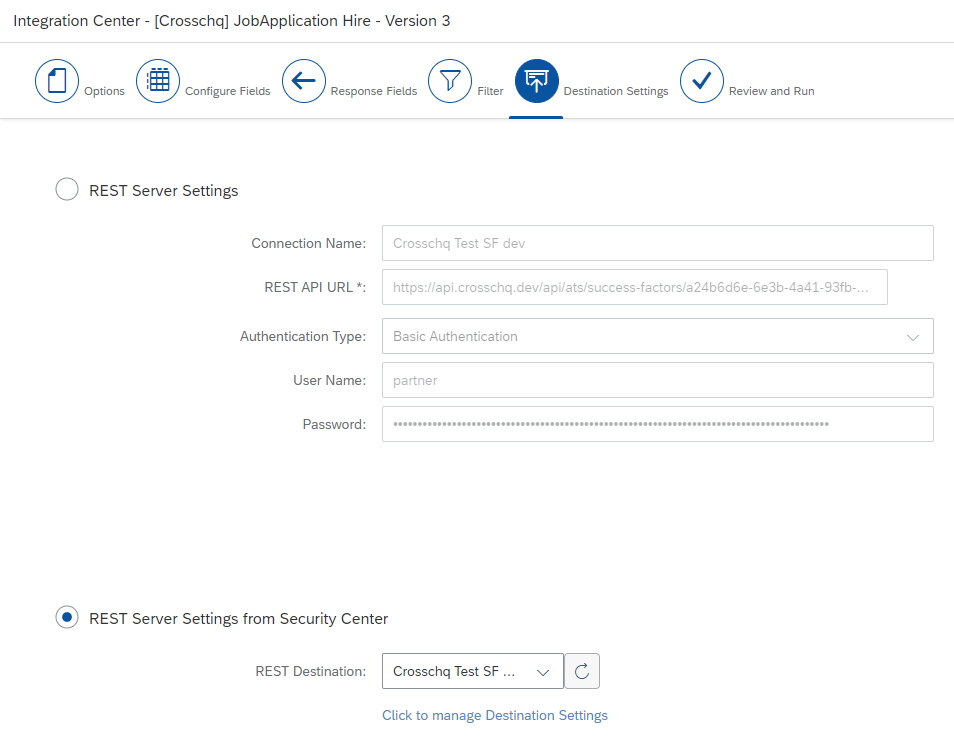
And add the following data within the REST Operation Settings section:
- Operation Name: Candidate Request ;
- Operation URI*: /webhook-request/ ;
- HTTP Method: POST ;
- Enable diagnostics for Run Now: ENABLED ;
- Execute with exceptions: ENABLED ;
- Exclude empty requests: DISABLED.
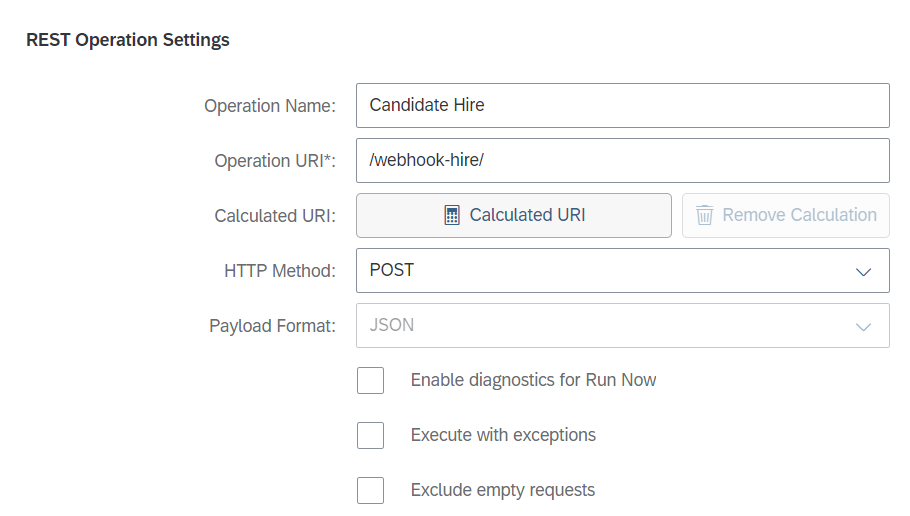
2. Hire status definition
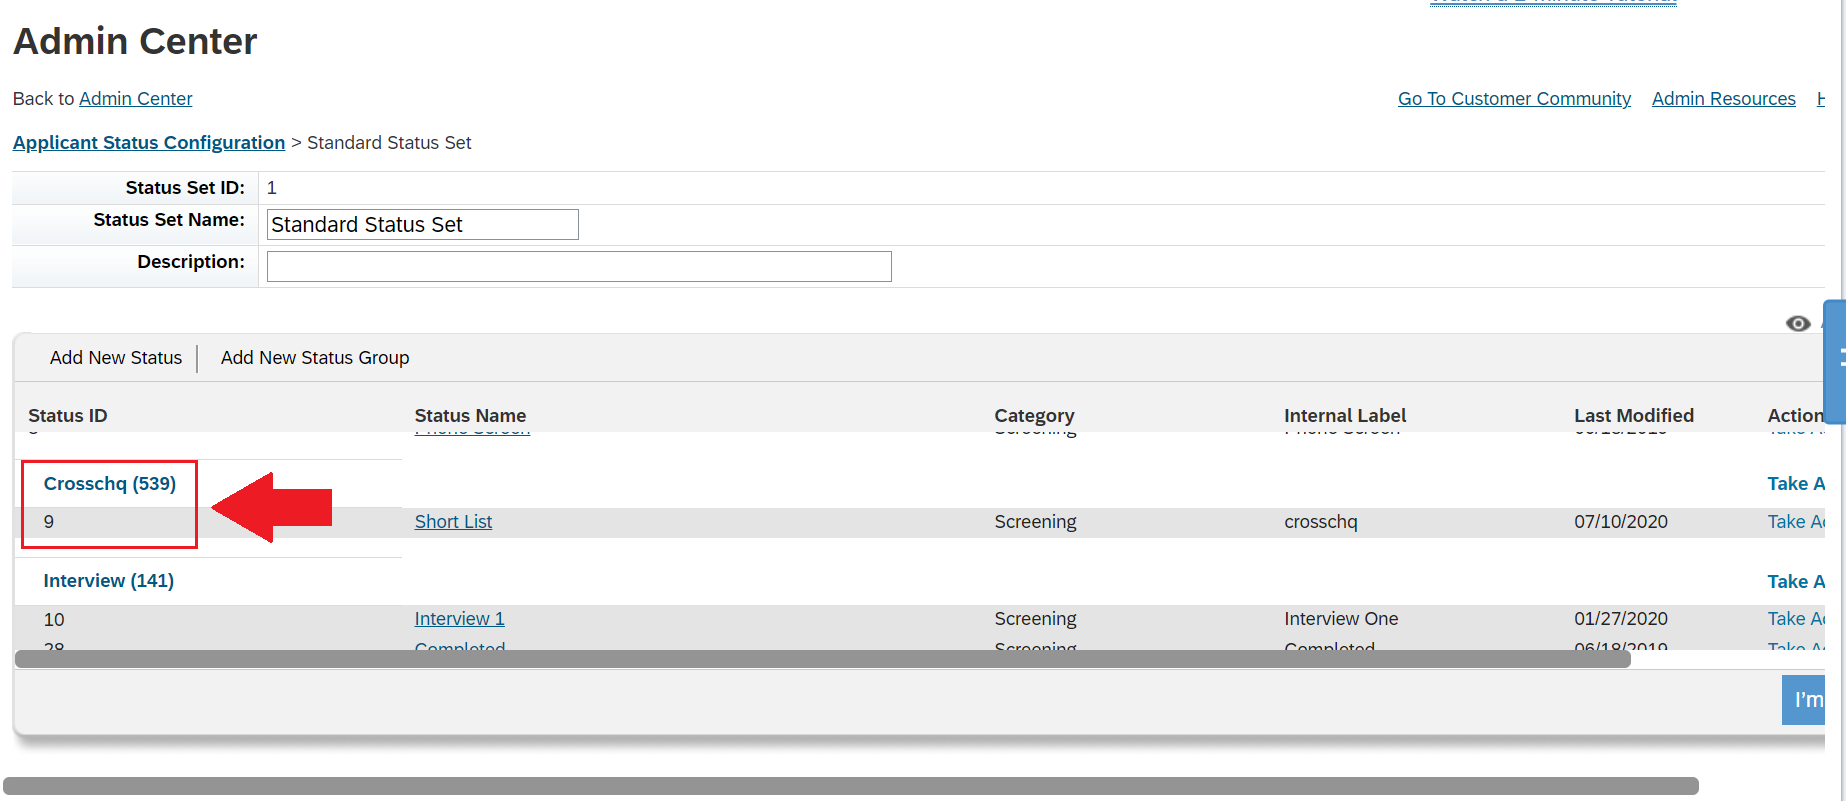
In the Filter step, select the status name of the applicant status workflow (step in your pipeline) that triggers the Hired webhook (hire in our case). Note: Crosschq does not send reference requests from “Hire” status. References are only triggered when the candidate is moved into the Crosschq status you configured in the Request webhook filter. The “Hire” webhook is used only to update the candidate’s hire status in Crosschq
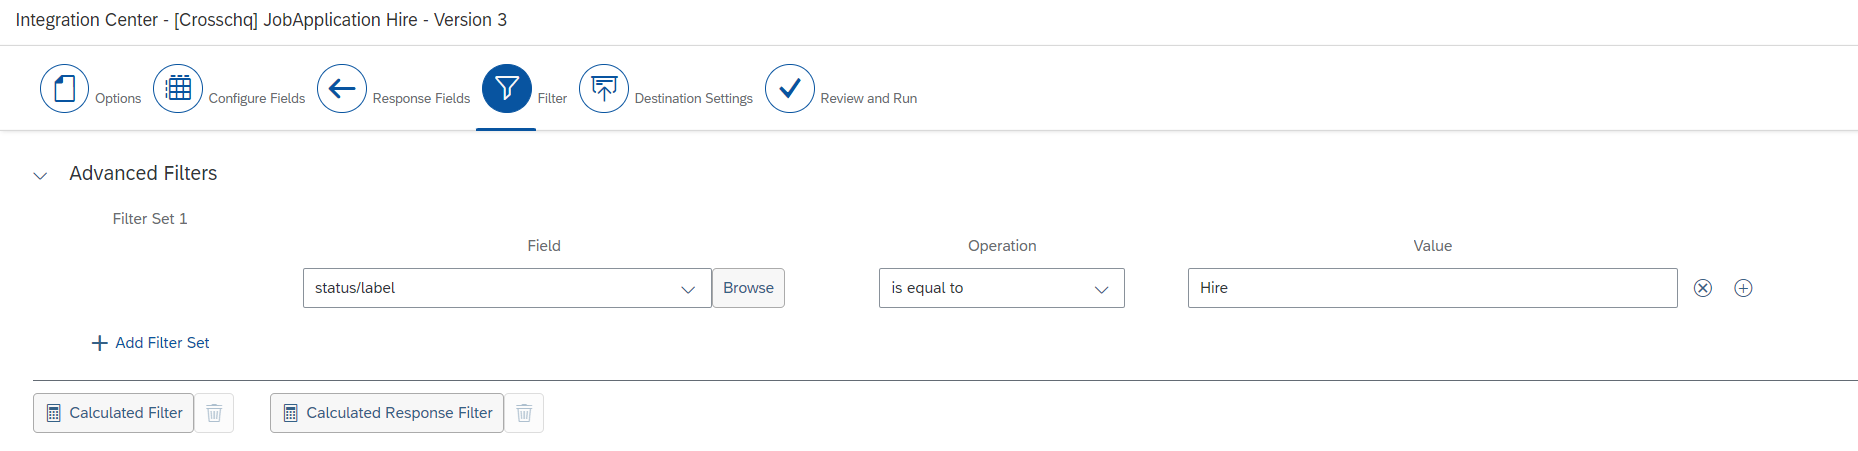
*Note: you can find the applicant status name by searching for "edit applicant status configuration" and accessing the workflow in question:
In the Destination Settings step, scroll down, select the "REST Server Settings from Security Center" option and then select the REST destination created before.
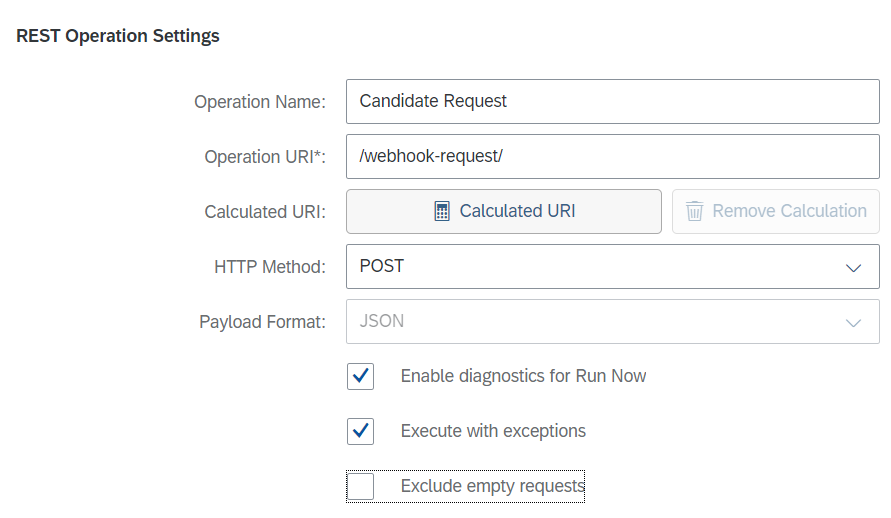
And add the following data within the REST Operation Settings section:
- Operation Name: Candidate Hire ;
- Operation URI*: /webhook-hire/ ;
- HTTP Method: POST ;
- Enable diagnostics for Run Now: DISABLED ;
- Execute with exceptions: DISABLED ;
- Exclude empty requests: DISABLED.
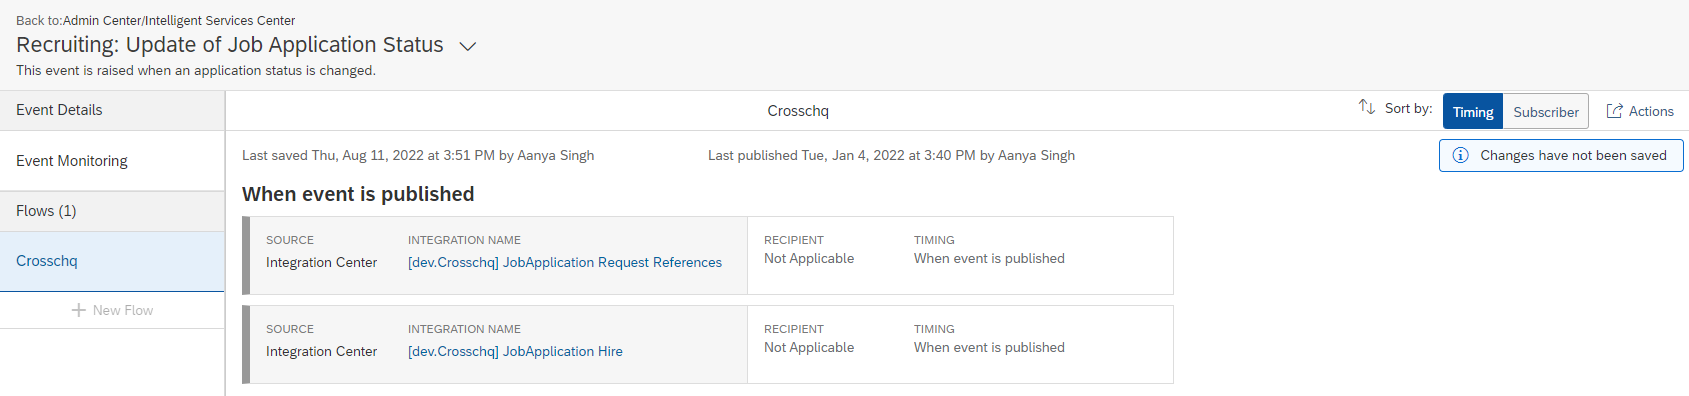
Once you have configured the TWO Integration Definitions go to Admin Center > Intelligent Services Center, search for Update of Job Application Status event and click on it.

Next, create a new flow: Crosschq, click on integration, select both events Hired and Request and add them to the flow. Then save the flow.
Configure app settings
360 settings
The 360 integration should be fully connected after the API settings are configured from the above steps.Recruit settings
The additional Recruit settings allow you to export prospects from Crosschq to SuccessFactors. Enable Automatically Export New Prospects from Crosschq to SuccessFactors to send any new prospects over to your SF instance.
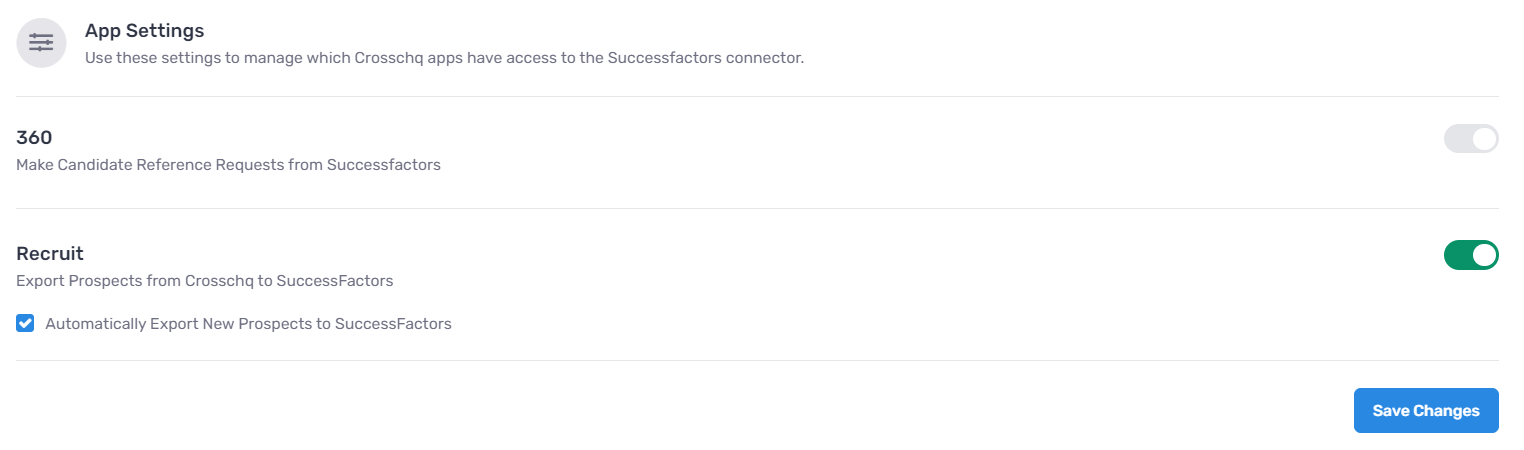
Crosschq automatically applies a tag to every prospect that is imported through manual or automatic methods. By filtering candidates with the "Crosschq" tag in SuccessFactors, you can easily identify and view the ones that have been brought in from Crosschq.
Additional 360 configuration
Picklist configuration
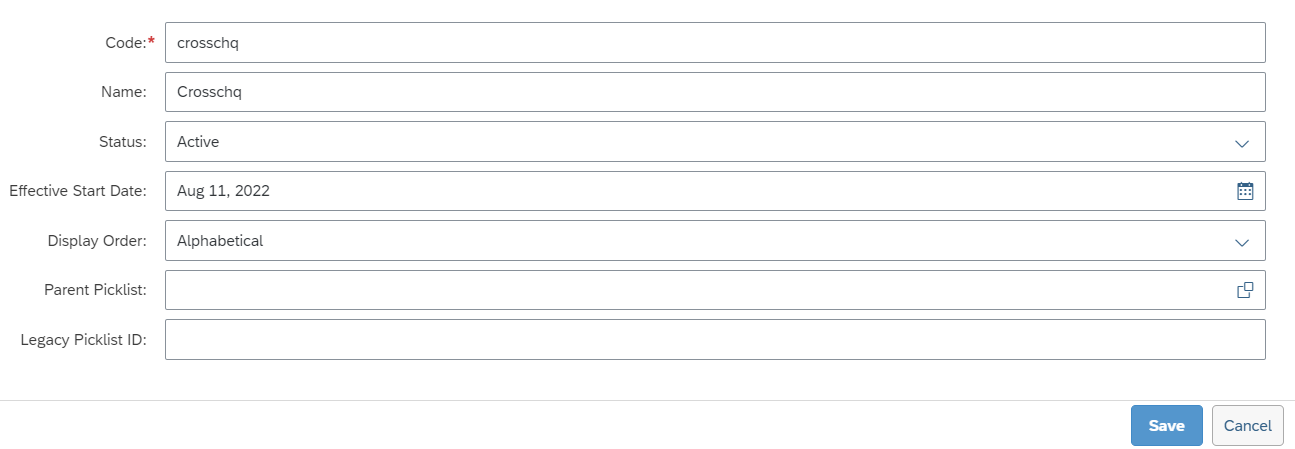
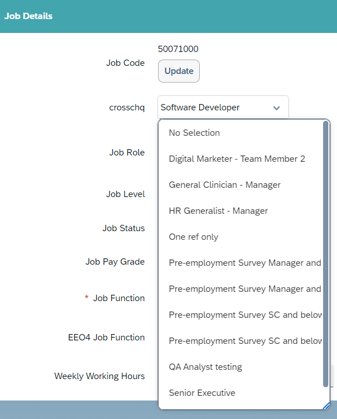
Search for Picklist Center within the navigation bar and select Create a new picklist.
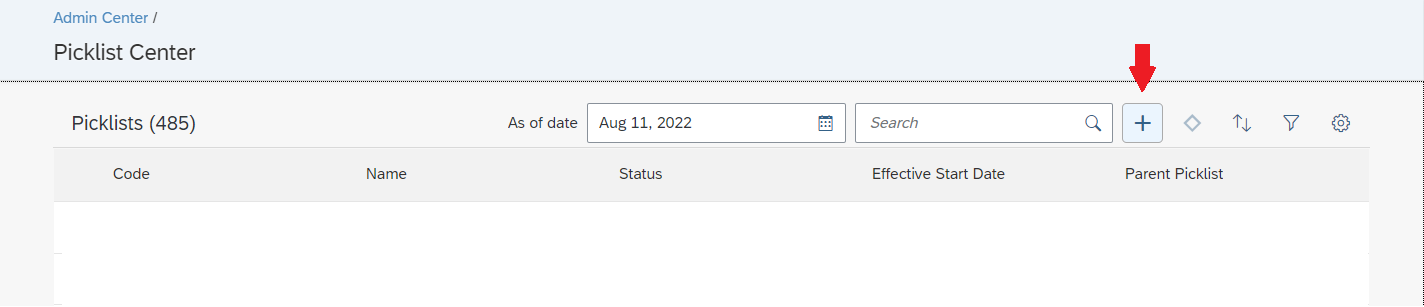
Create the new picklist by typing "crosschq" (all lowercase) in the Code field. Then modify the other fields as needed and press Save.
Adding fields to templates
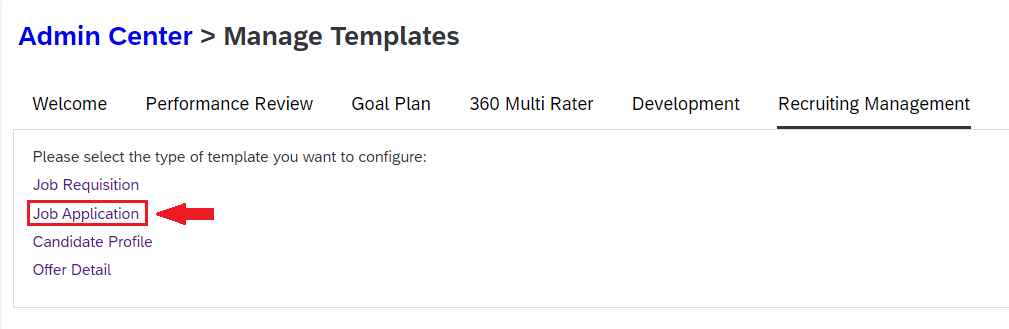
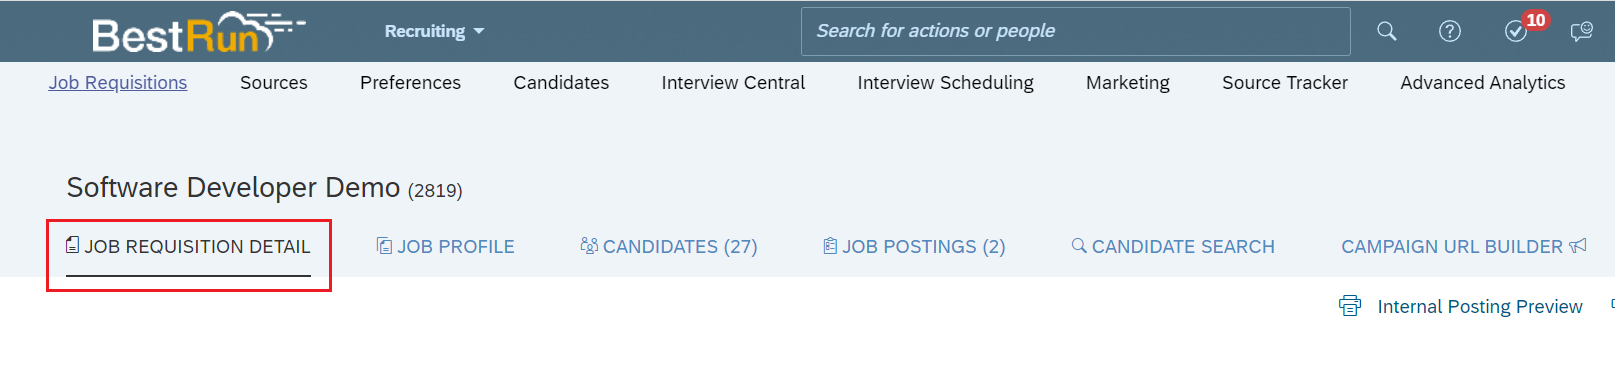
Search for Manage Templates within the navigation bar, then access Recruiting Management > Job Requisition.
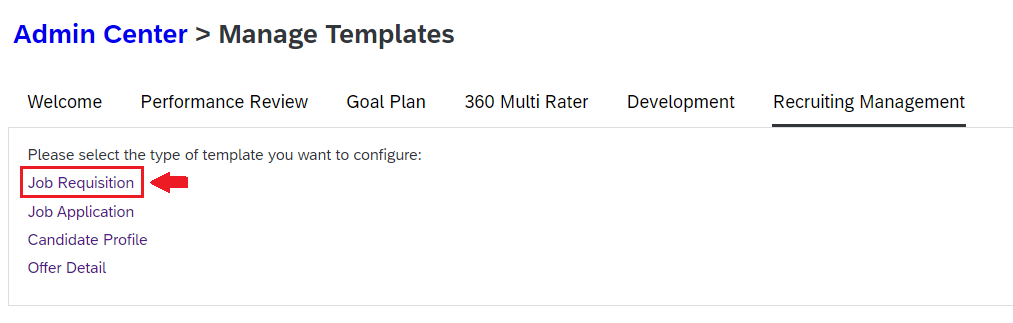
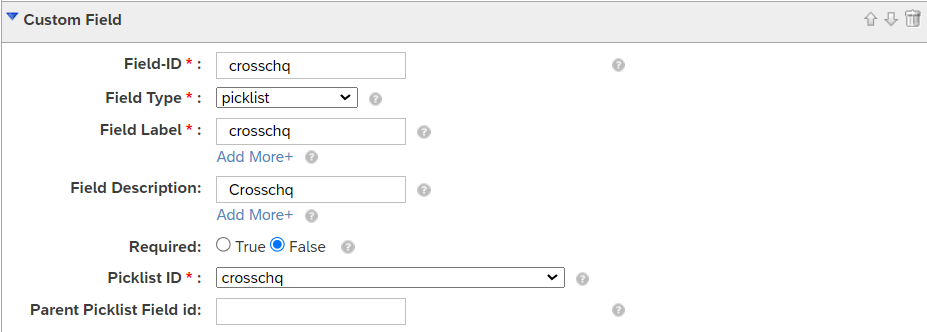
Here, you must add a new field for each job requisition template, according to the following:
- Field-ID: "crosschq" (all lowercase)
- Field Type: picklist
- Field Label: "Crosschq"
- Field Description: "Crosschq"
- Picklist ID: select the picklist generated in the last step
Navigate back to the Manage Templates section and select Job Application.
Here, you must add two new fields for each job application template, according to the following:
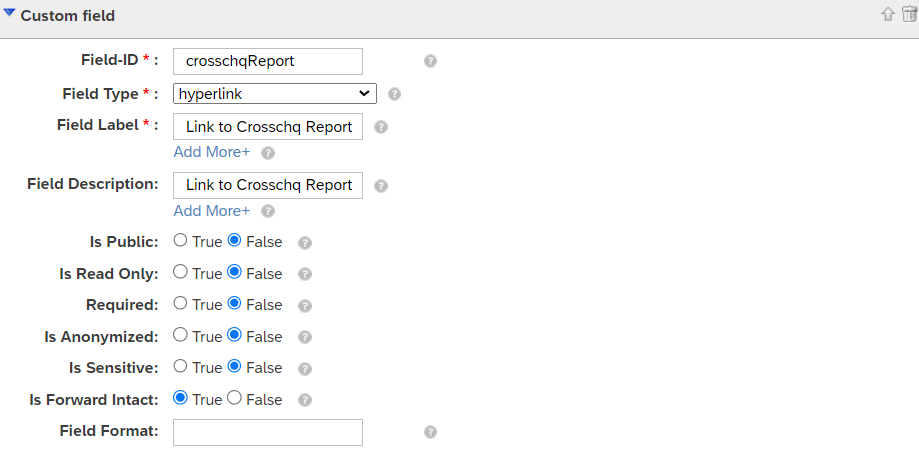
1) First Field: Link to the Crosschq report-
- Field-ID: "crosschqReport"
- Field Type: hyperlink
- Field Label: "Link to Crosschq Report"
- Field Description: "Link to Crosschq Report"
2) Second field: Crosschq PDF report attachment
- Field-ID: "attachment1" (all lowercase)
- Field Type: multiattachmentselection
- Field Label: "Additional Documents:"
- Field Description: "Please attach any additional document"

Important Note
In order for Crosschq to ingest information into the candidate's profile, such as the PDF report and comments, you will need to add the user with whom you connected Crosschq to SuccessFactors to the job requisitions in SF. You can add this user as a Recruiter Assistant.
Remember this user should have access to modify information in the job requisition and candidate's profiles.
Configure Crosschq templates
Templates are reference request configurations that are used to trigger requests from ATS connectors. You have to set up your Crosschq templates to be able to send Crosschq requests from an ATS.
Within Crosschq, go to Organization Settings > Templates. Select Create New Template.
Enter the required information such as the template name, add an ATS Tag for that template, and create a description of the template.
Within the Request Settings, add in the position, select the appropriate survey, and configure the number/type of references you want to be associated with this request. Please note, the relationship type can either be specified or you can select any relationship type and let the candidate determine the type of reference. Additionally, you can add customized notes to each specific reference request, i.e. "Please provide a manager reference from X company."
From there, add optional hiring manager information. Finally, you can create custom emails or text messages associated with each template by filling out the custom notifications section. When you are done, select Create Template.
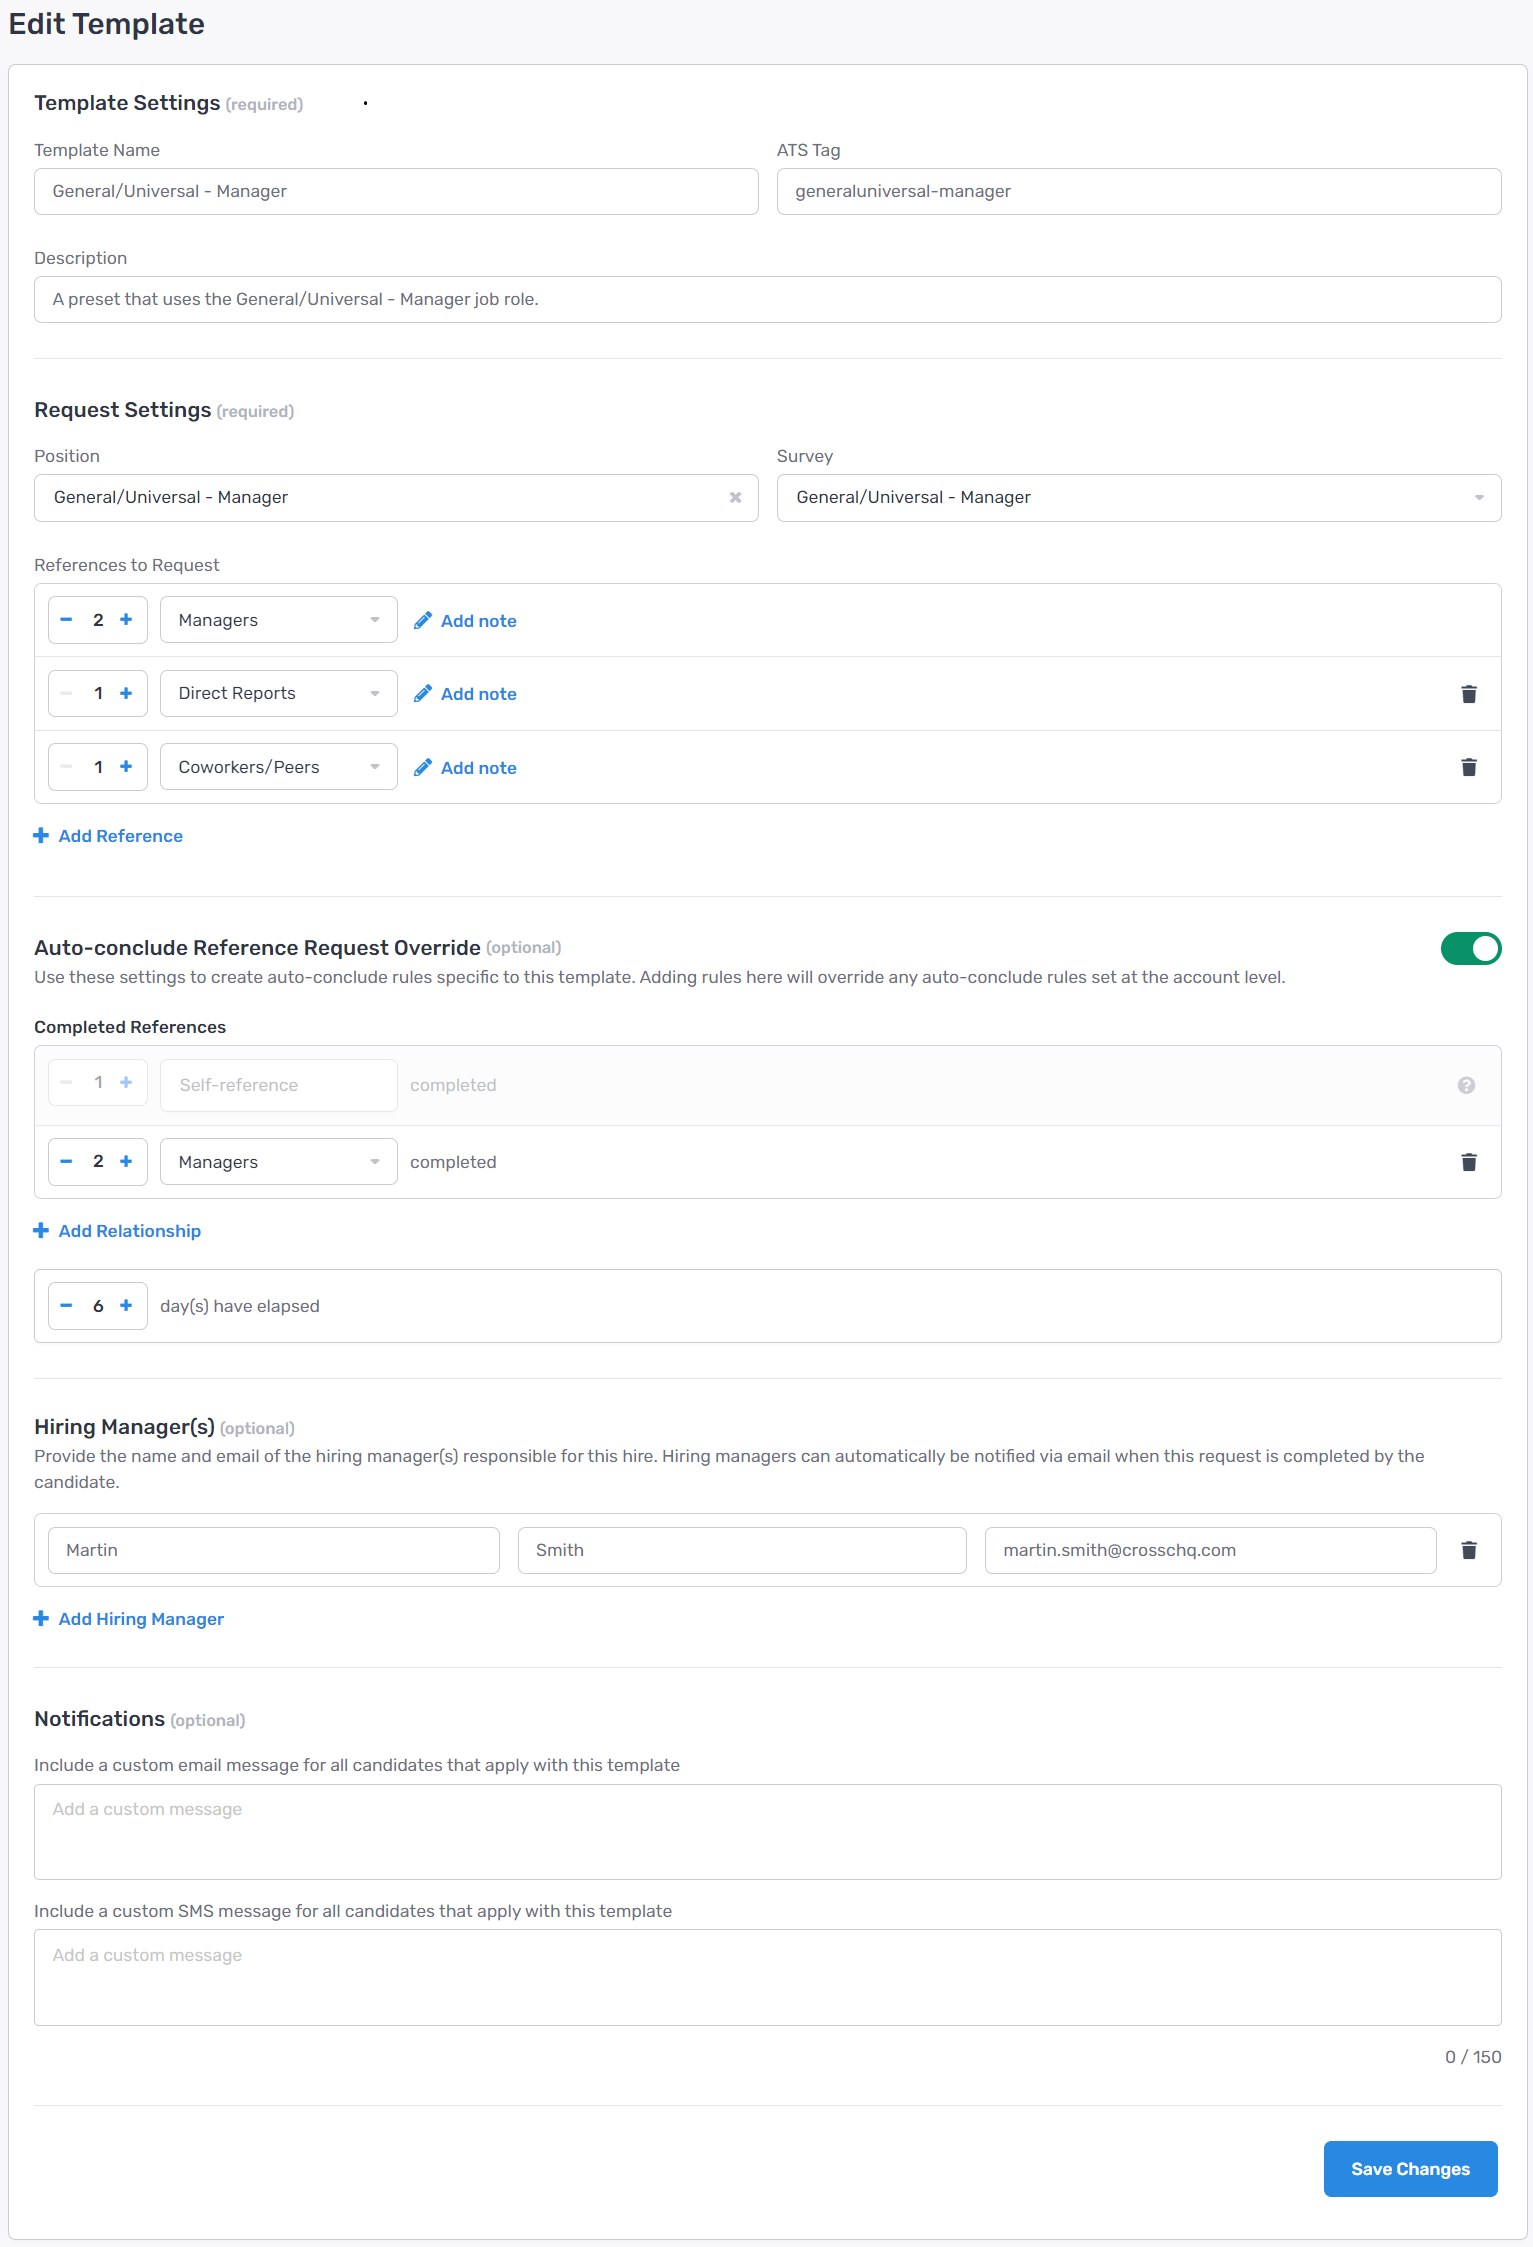
At any point, if you need to edit or delete a template select the three dots next to the template and you will be able to manage from there.

Once you set up your templates in Crosschq, select the specific template for each Job Requisition within the Job Requisition Detail in SuccessFactors by using the picklist created in the last steps.
Requestors and Hiring Managers
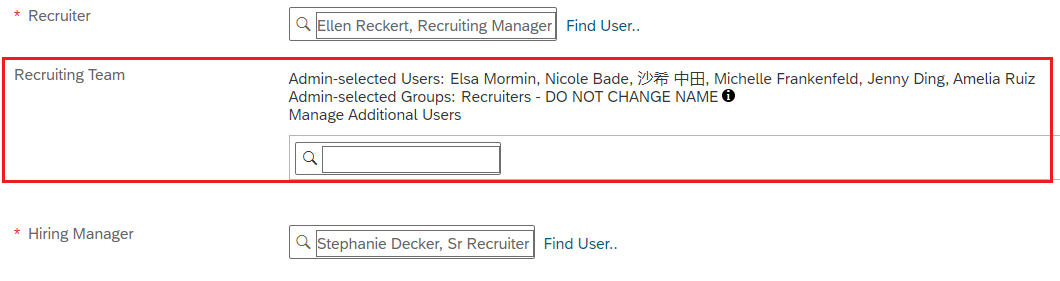
Crosschq pulls the Recruiter and Hiring Managers from the details section within the Job detail section in SuccessFactors.
Crosschq will assign as requestor the SuccessFactors user listed as "Recruiter" within the Job details and will assign as Hiring manager the users listed as "Hiring Manager" within the job details.
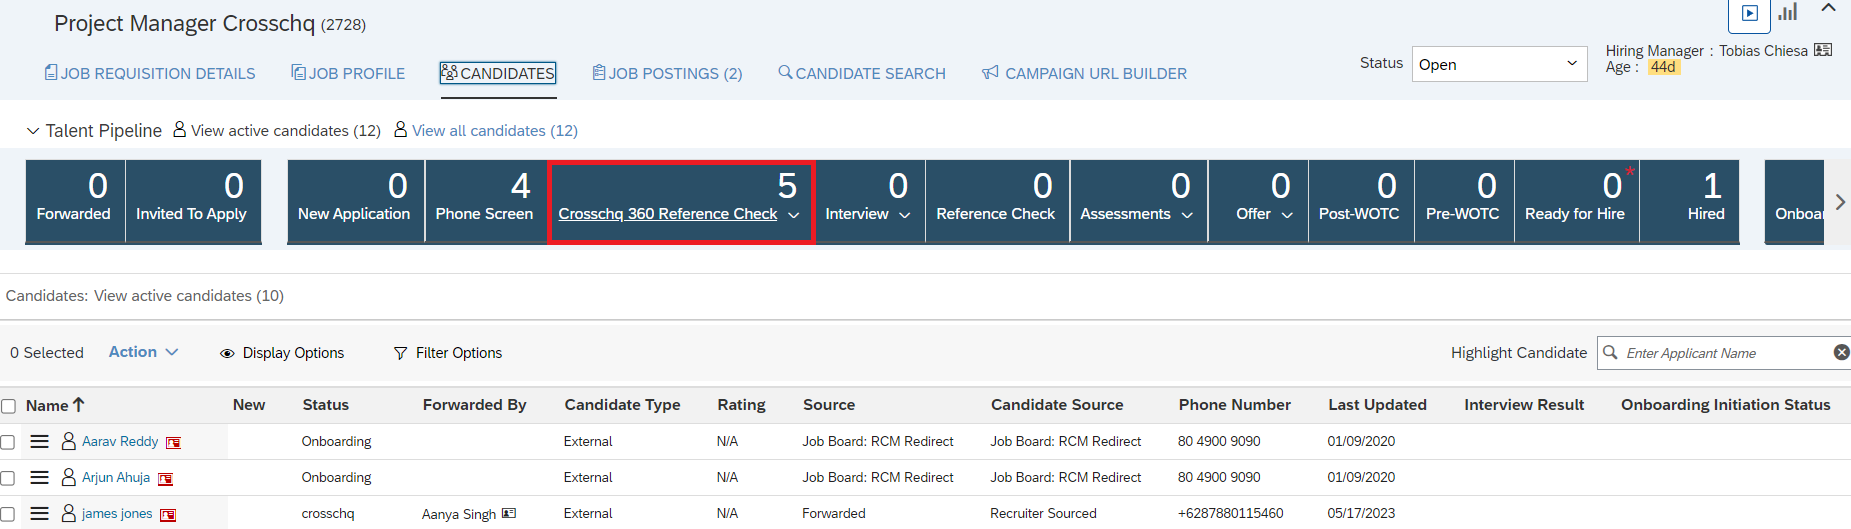
Sending a Crosschq from SuccessFactors
When you are ready to start the Crosschq reference request, move the candidate to the Crosschq stage you chose when setting up the connector. This will automatically initiate the Crosschq request.
You will be able to keep track of each request status change by accessing the Notes section within the candidate profile:
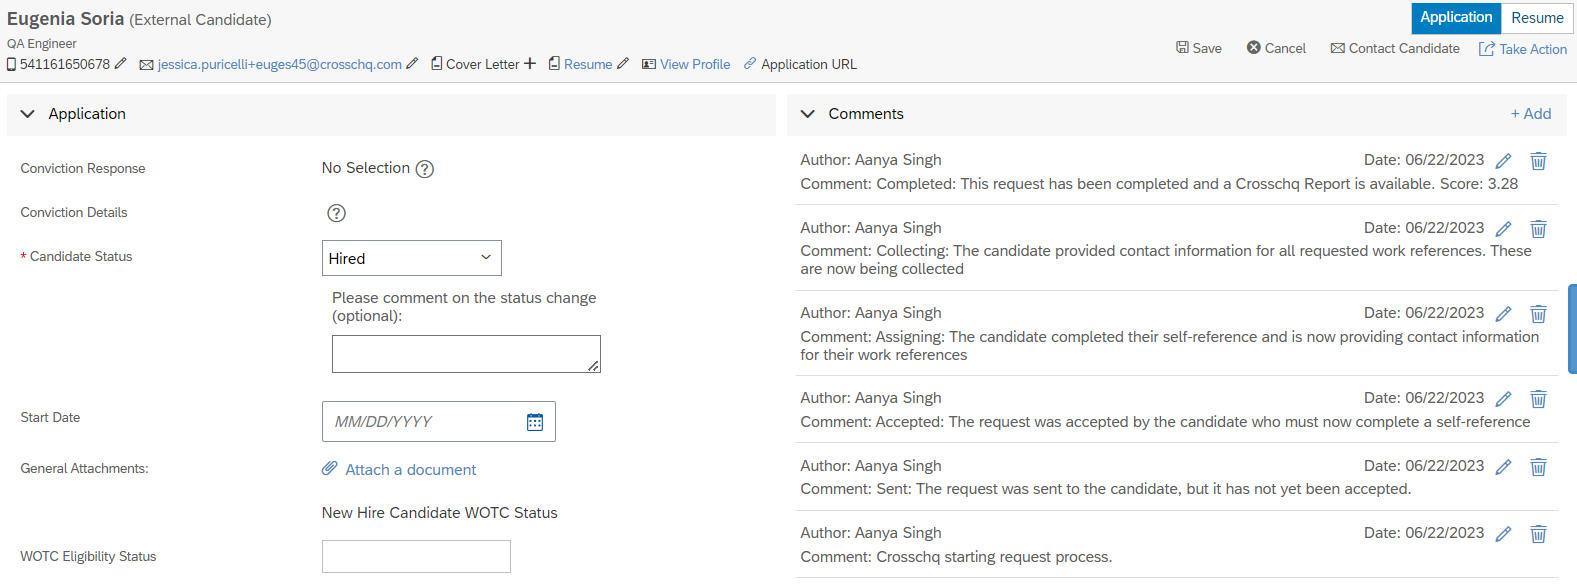
Viewing a Crosschq report
The link to access the Crosschq report and the PDF report can be found within the custom fields that were created in the previous steps.
