The Workday ATS connector integrates Crosschq Interview with Workday Recruiting. There are two integration options available, each sending interview data to a different location in Workday:
| Option A — Webhook Integration | Option B — Assessment API Integration | |
|---|---|---|
| How it works | Sends interviews automatically when a candidate reaches the Interview stage in the Business Process. | Sends interviews from within the Assessment section in Workday. |
| Where results appear | In custom fields created on the Job Application (requires setup). | In Workday's native Assessment section with default fields — no custom object creation required. |
Both options share the same initial setup steps. Follow the Shared Setup section first, then continue with the option that applies to your configuration.
Shared Setup (required for both integrations)
- Integration System User
- Security Group
- Crosschq Assessment Statuses
- Integration System
- Configure App Settings in Crosschq
Option A — Webhook Integration (Business Process)
Interview results are sent to custom fields created on the Job Application in Workday. This requires creating a Custom Object as part of the setup.
- Business Process: Interview
- Add Custom Fields to the Job Application View
- Create Interview Agents based on existing jobs in Workday
- Sending a Crosschq Interview Agent from Workday
- Viewing an Interview Report
Option B — Assessment API Integration
Interview results are sent to Workday's native Assessment section with default fields. No custom object creation is required.
- Option B1 — One agent per job
- Option B2 — One agent for multiple jobs
- Sending a Crosschq Interview Agent from Workday
- Viewing an Interview Report
Integration System User
To begin enabling the Workday ATS integration, use the search bar to search for Create Integration System User.

Once you’ve done so, complete the following fields:
- Username
- New Password
- New Password (Verify)
Click OK, check the information on the next page, and select Done.

Security Group
The user created in the last step must be linked to a security group. There are two ways to link the user with a security group:
- A - Assign the user to an existing security group;
- B - Create a security group and then assign users.
A - Assign the user to a security group
If you have already created your security group, go to the user profile, select the three dots, hover over Security Profile, select Assign Integration System Security Groups and assign the user to the desired security group.

B - Create a security group
Use the search bar to search for Create Security Group and fill out the fields according to the following:
- Type of tenants security group, please select the “Integration System Security Group (Unconstrained)” option;
- Please name the security group “Crosschq”. Remember you will need to search for the security group later.

Then, select OK. You will be redirected to the next page where you have to search for the user you want to link with the security group.
Click the Integration System Users field and select the user created in the last step.
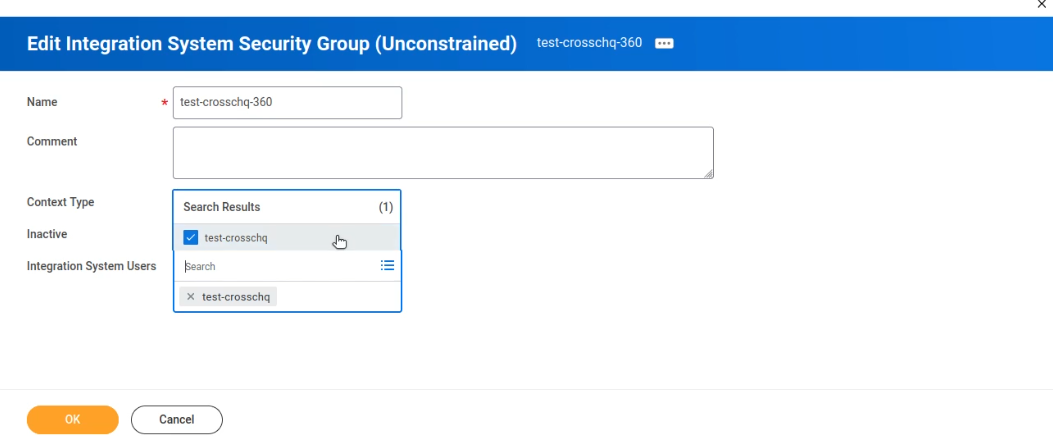
Click OK and Done.
Configuring security group data access and permission
Use the search bar to search for the Domain Security Policies for Functional Area task.
Fill out the Functional Area field with the Recruiting option, then click OK.

Once you’ve clicked OK you will be redirected to the next page.
Within the Recruiting domain details, you will be able to configure the permissions for the security group you’ve created before.
You have to add the following permissions to the security group:
- Candidate Data: Job Application
- (Get AND Put) Candidate Data: Assessment Results
- (Get only) Candidate Data: Eligibility Results
- (Get only) Candidate Data: Interview Feedback Comments
- (Get only) Candidate Data: Interview Feedback Results
- (Get only) Candidate Data: Offer Details
- (Get only) Candidate Data: Quick Stats
- (Get only) Candidate Data: Sharing
- (Get Only) Job Requisitions for Recruiting
- Candidate Data: Other information
- (Get AND Put) Candidate Data: Attachments
The following process must be repeated for each individual permission:
1) Select the permission
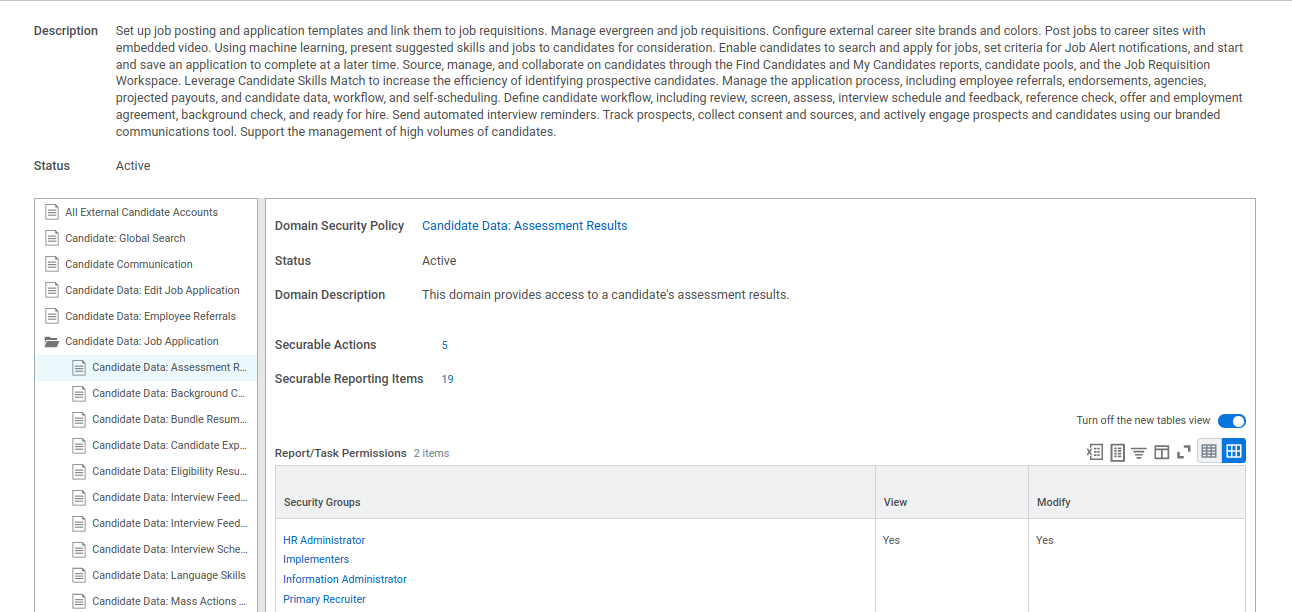
*note: the image shows the candidate Data: Assessment Results permission
2) Scroll down and select Edit Permissions.
Note: If the Edit Permissions button is not available click Override Parent Permissions.
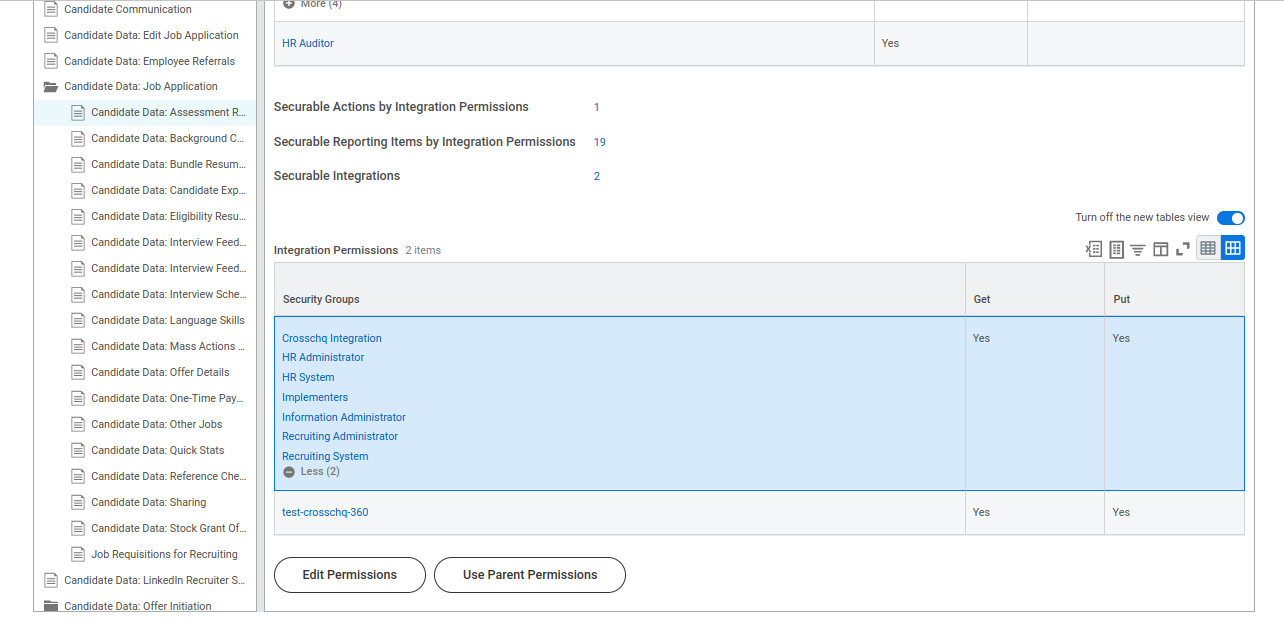
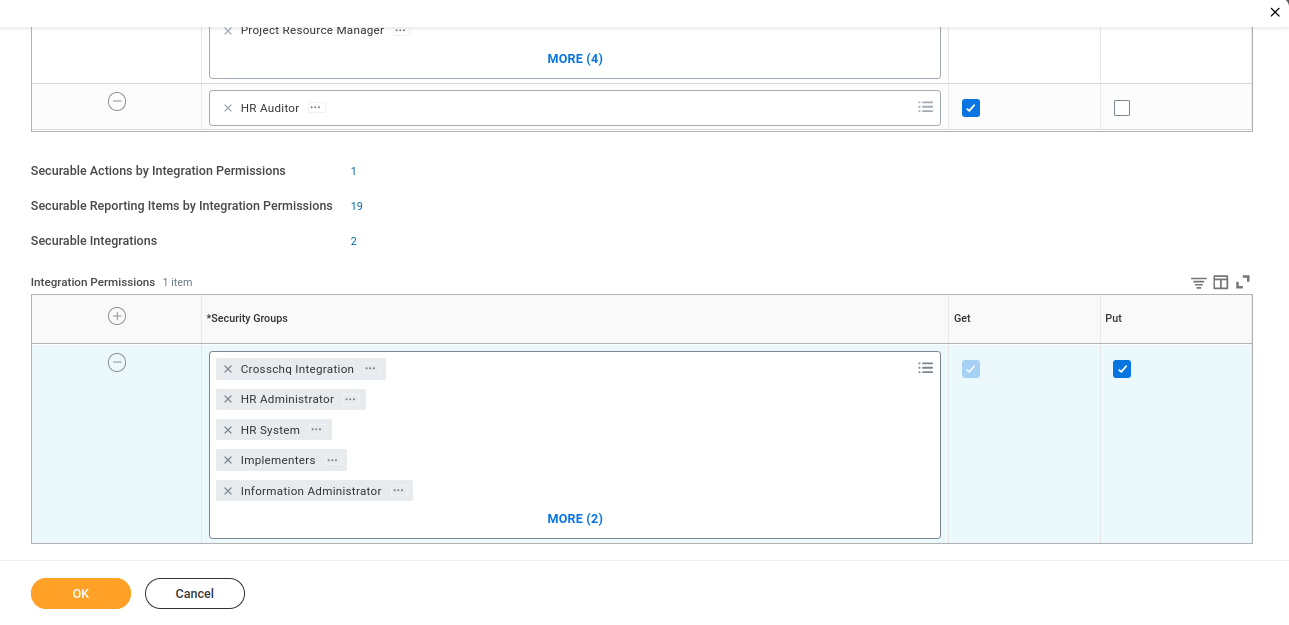
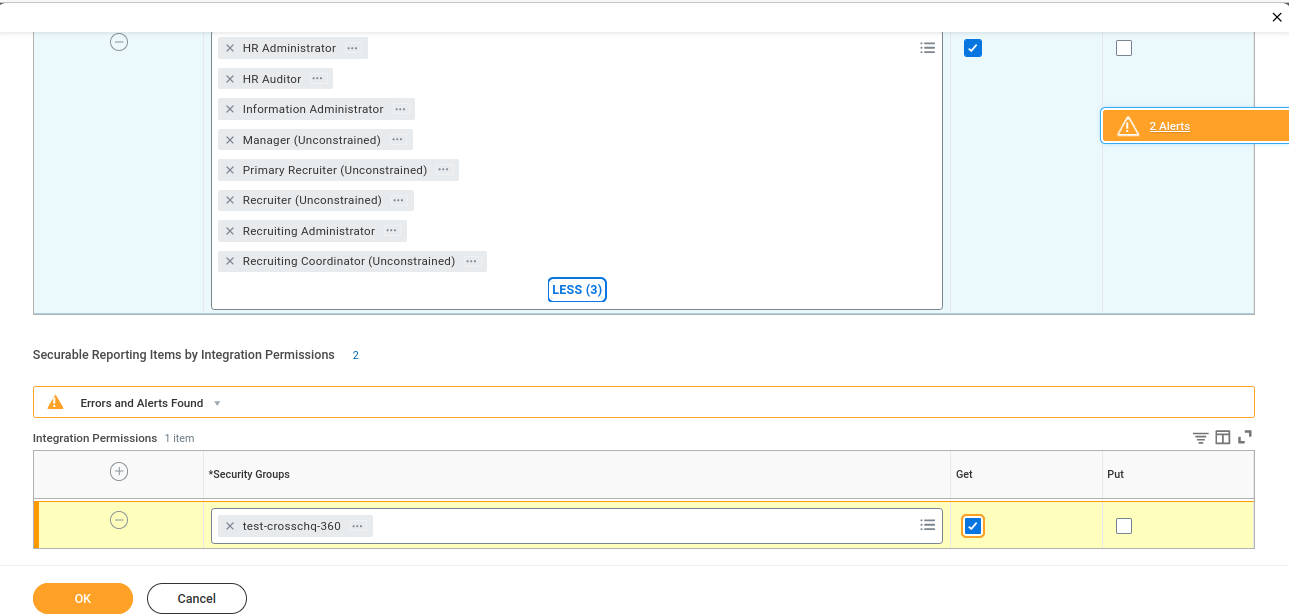
3) Add the security group you have created before.
Once you have added all permissions to the Recruiting area, change the Functional Area by clicking in the Change Section icon in the top bar as shown below, and choose the Pre-Hire process area.

From this area, add the following permissions.
- (Get Only) Job Requisition Data
Important: Set GET and PUT permissions. The following table shows which domain should have GET and PUT permissions.
| Operation | Domain Security Policy | Domain Security Policies Inheriting Permission | Funcional Areas |
| Get Only | Candidate Data: Job Application | Candidate Data: Eligibility Results Candidate Data: Interview Feedback Comments Candidate Data: Interview Feedback Results Candidate Data: Offer Details Candidate Data: Quick Stats Candidate Data: Sharing Job Requisitions for Recruiting |
Recruiting |
| Get AND Put | Candidate Data: Job Application | Candidate Data: Assessment Results | Recruiting |
| Get AND Put | Candidate Data: Other information | Candidate Data: Attachments | Recruiting |
| Get Only | Job Requisition Data | Pre-Hire process |
An alert asking to check if these checkboxes are selected will prompt.
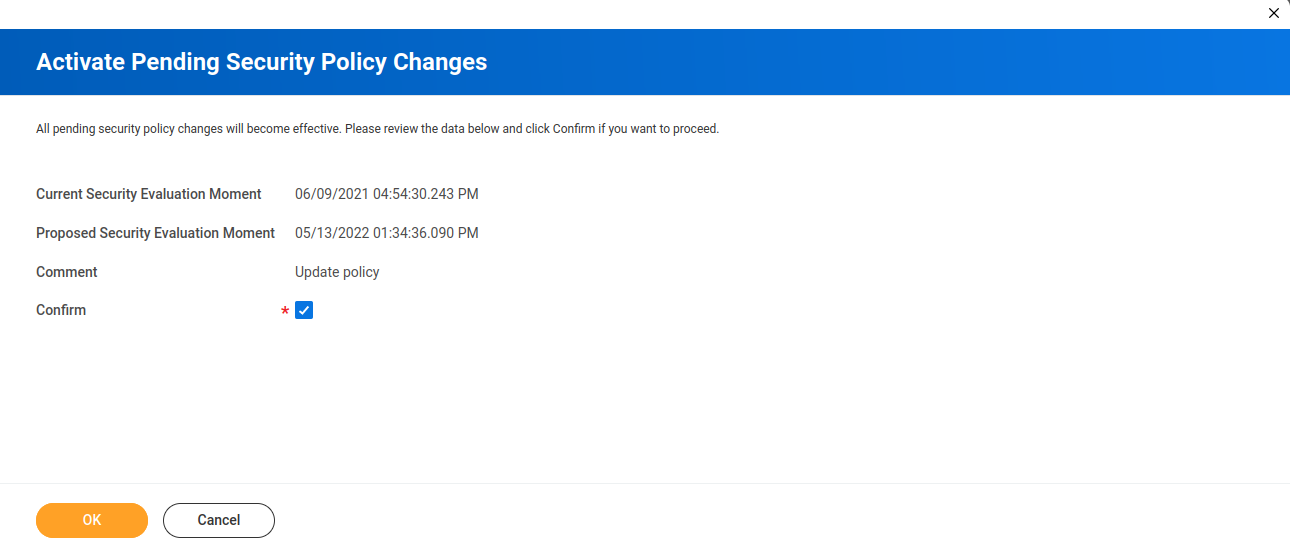
4) For changes to be effective, you will have to complete the Activate Pending Security Policy Changes task.
Once you’ve linked the security group with the permissions, use the search bar to search for Activate Pending Security Policy Changes and click OK. This process will save the modifications.
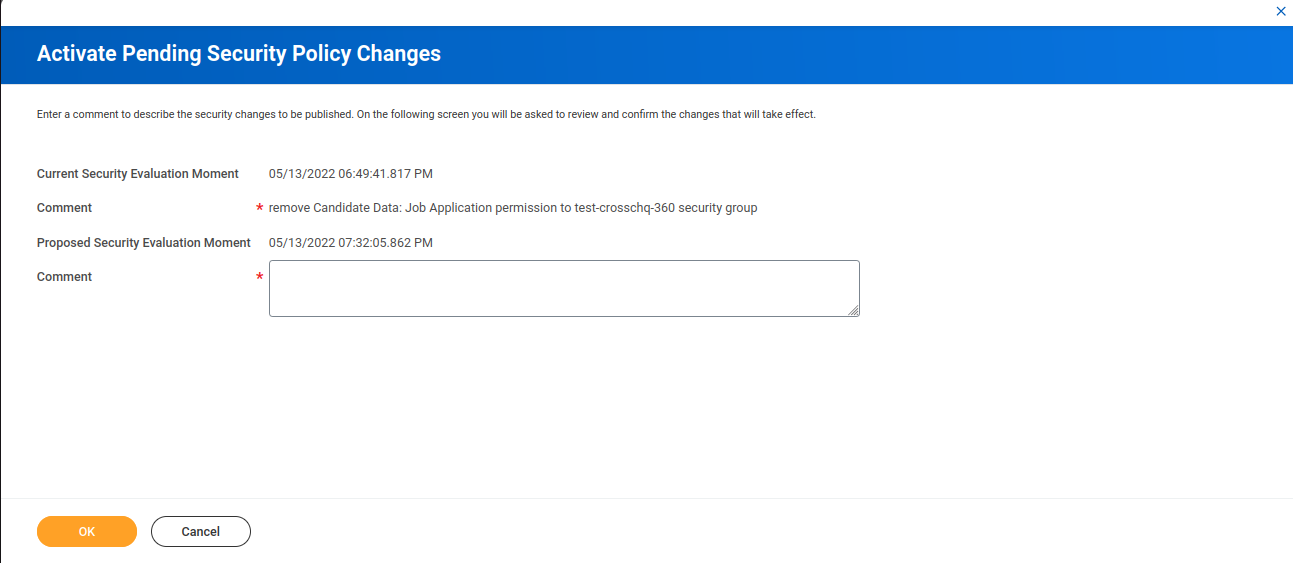
Click OK again.
After this step is completed, enter the following information into the Workday API settings section, within the Organization Settings in the Crosschq platform.
- ATS tenant
- ATS username
- ATS password

Create Crosschq Assessment Status
The statuses required depend on which integration option you are setting up.
Option A — Webhook Integration
Create the following assessment status:
Option B — Assessment API Integration
Create the following assessment statuses:
For each status, follow the same steps: use the search bar to search for Maintain Assessment Statuses, click the plus sign to create the status, complete the required fields:
The following fields must be completed:
- Assessment Status Name
- Check Overall Status
- Check Test Status
Click OK once you have added the status.
On the next page, you must edit the reference ID of the assessment status. Make sure the reference ID is the exact status from above. (Paste only the information in italics and bold).
To do this, hover over the assessment status column, click the three dots, go to Integration IDs > Edit Reference ID, and type the ID within the Reference ID value field.


Integration System
Use the search bar to search for Integration System and click on Create Integration System. Next, complete the fields:
- System Name: Crosschq Interview
- New using template: Inline Assessment

Press OK.
On the page that opens, click the three dots, hover over Integration System, and select Configure Integration Attributes.

On the next page, you'll need to complete the following fields:
-
Username
-
Password
-
Endpoint
-
Assessment Status
-
Suppress Overwrite Assessment
-
Document Retention Policy
To locate this information, go to Crosschq > Organization Settings > Connectors.
Click Manage on the Workday Recruiting ATS tile. Enable the connector by toggling the switch (it should turn green), then open the API Settings section.

Copy the following information to complete the required fields:
-
Username: Basic username
-
Password: Basic password
-
Endpoint: Webhook URL
Then complete the remaining fields as follows:
-
Assessment Status: Select Crosschq Interview Send Invite
-
Suppress Overwrite Assessment: Enable this option
-
Document Retention Policy: Select 5 days

Configure App Settings in Crosschq
Once the shared setup is complete, configure the Interview app settings in Crosschq to select which integration option you will use.
Navigate to Organization Settings > Connectors, click Manage on the Workday tile, and open the App Settings section. Enable the Interview toggle.

In the Trigger Definition dropdown, select the option that corresponds to your integration:
- Upon accessing Interview Stage (default) — interviews are triggered automatically when a candidate reaches the Interview stage in the Business Process. Continue with Option A — Webhook Integration.

- Via Assessment — interviews are sent from within the Assessment section in Workday. Continue with Option B — Assessment API Integration.

Click Save Changes.
Option A — Webhook Integration (Business Process)
Add Business Process: Interview
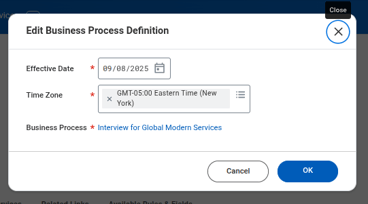
Use the search bar to search for bp: interview and click on the right Business Process, in our case Interview for Modern Global Services.
On the page that opens, click the three dots, hover over Business Process, and select Edit Definition.

Click OK in the window that pops up.
To add the step, click the + icon as shown in the image below.
In the new row, enter “b” in the Order field and select Integration as the Type. If a step labeled “b” already exists, insert the new step before it, shifting all subsequent steps forward (e.g., the existing b becomes c, c becomes d, and so on).

Next, click the three dots on the step you just created, hover over Business Process, and select Maintain Redirect.

Click OK in the window that pops up.
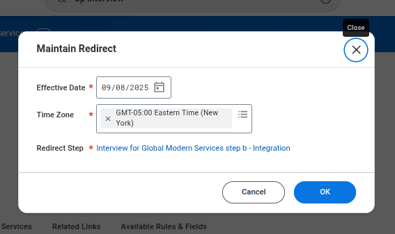
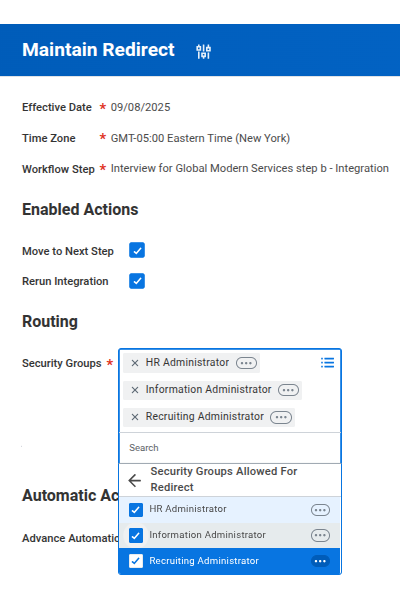
On the next page, in the Enabled Actions section, click Move to Next Steps and Rerun Integration. In the Security Groups section, select all three options: HR Administrator, Information Administrator, and Recruiting Administrator. Finally, click OK to save your changes.
Now, go to the three dots on the step once more, hover over Business Process, and select Configure Integration Step.
In the window that appears, choose the Integration System you created earlier.

On the next page, match each field as shown in the image below. To do this, select Determine Value at Runtime in the Value Type column, then search for each value by typing its name in the Value column.
- Candidate First Name: First Name
- Candidate Last Name: Last Name
- Candidate Email Address: Email
- Candidare Reference ID: Candidate ID
- Job Application Reference ID: Job Requisition as Text
- Assessment Test Reference ID: Position ID

It’s important to select the correct option when two fields with the same name appear. You must choose the one associated with the Job Application (this is usually the second option). To verify this, hover over the three dots next to the value and review the Description, as shown below.
Please note that for the Assessment Test Reference ID, the Position ID value will be associated with both the Position and the Job.

Finally, click OK.
Add Custom Fields to the Job Application View
Use the search bar to search for Create Custom Object. In the window that appears, complete the following fields:
- Workday Object: Job Application
- Custom Object Name: Custom Interview Results
Click OK.

Review the information on the next page and click Next.

Click Add to add the first field and complete it as follows:
- Field Label: Report URL
- Field Type: Text
Leave the Validation and Display Order fields blank and click the checkmark to save.


Click Add again to add a second field:
- Field Label: Status Comment
- Field Type: Text
Click the checkmark to save, then click Add again to add a third field:
- Field Label: Score
- Field Type: Decimal
Click the checkmark to save, then click Next.
In the Domain field, select Candidate Data: Job Application and click Next.

Review the information on the next page and click OK.
Finally, copy the Web Service Alias and navigate to Crosschq > Organization Settings > Connectors. Open the Workday connector settings and paste the alias into the Interview Results section codename field. Make sure the following field codenames match exactly:
- Report URL field codename: report URL
- Status updates field codename: Status Comment
- Interview score field codename: score


Create Interview Agents based on the existing jobs in Workday
Within Crosschq, access the Interview Agents section. Click Build New Interview Agent.

Complete your Agent settings and click Next.
 On the next page, click Import from your ATS. A list of your existing Jobs in Workday will be displayed.


Click Add on the job you're basing your Agent on. The position and description fields on the following page will be filled in automatically.

This is how the job description looks in Workday:


Creating an agent based on an existing job automatically links it to that job.
Sending a Crosschq Interview Agent from Workday
To create an Interview Agent, follow the steps outlined in this article: Crosschq Agent Management.
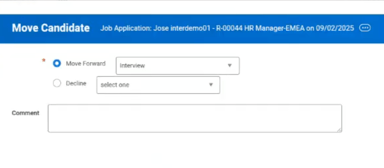
To send a Crosschq Interview Agent from Workday, type Find Candidate in the search bar and open the candidate’s profile. From the Summary tab, click Actions, then select Move Candidate.

In the window that appears, select Interview in the Move Forward field, then click OK.
The candidate's status updates, score, and report URL will be reflected in the Custom Interview Results field created in the previous step.
Note that the URL is not a hyperlink — to access the report, copy and paste it into your browser.

Viewing an interview Report
To access the interview report on Workday, go to the Attachments section on the candidate's profile.

Option B — Assessment API Integration
Option B1 — One agent per job
Create Interview Agents in Crosschq
Follow the steps described in Option A — Webhook Integration to create the agent. This creates a one-to-one relationship between each agent and its corresponding job in Workday.
Create Recruitment Assessment Test in Workday
- Use the search bar to search for Maintain Recruiting Assessment Tests and open the task.
- Click the + button to add a new row. Enter a name in the Test Name field (e.g. Interview) and leave all other fields empty.
- Click OK to save.

Option B2 — One agent for multiple jobs
Create Interview Agents in Crosschq
- Follow the steps in How to Set Up an Interview Agent (Step-by-Step) to create the agent.
- Once the agent is created, copy its Tag. You can find the tag in the Interview Agents list under the Tags column, or by clicking the three-dot menu on the agent and selecting Copy Tag.

Create Recruitment Assessment Test in Workday
- Use the search bar to search for Maintain Recruiting Assessment Tests and open the task.
- Click the + button to add a new row. Paste the agent's Tag into the Test Name field and leave all other fields empty. Click OK to save.
- In the list, locate the assessment test you just created and click the magnifying glass icon to open it.

- Click Related Actions (the three-dot icon next to the Assessment Test field), hover over Integration IDs, and select Edit Reference ID.

- In the Reference ID Value field, enter the agent's tag. This value must match the tag exactly.

- Click OK to save.
The Tag and the Reference ID Value must be identical. This is how Workday identifies which Crosschq agent to use when sending an interview from the Assessment section
Sending a Crosschq Interview Agent from Workday (For options B1 and B2)
To send a Crosschq Interview Agent from Workday, type Find Candidate in the search bar and open the candidate’s profile. From the Summary tab, click Actions, then select Move Candidate.
In the window that appears, select Assesment in the Move Forward field, then click OK.
Next, open Assess Candidate and complete the following fields:
- Overall Status: Crosschq Interview Send Invite
- Assessment Test: select the assessment test created in the previous step.
Once the interview is completed, the candidate's status updates, score, and report URL will be reflected in Workday's native Assessment section.
Viewing an interview Report
To access the interview report on Workday, go to the Attachments section on the candidate's profile.