Every 5 minutes, our system automatically reviews all incoming job applications to ensure the integrity of your hiring process. Each application is individually assessed by our fraud detection engine, which analyzes a comprehensive set of risk signals.
If any fraudulent indicators are found, the application is immediately flagged and updated with a detailed breakdown of the identified risks, ranked from most to least critical, so your team always knows where to focus first.
If no fraud is detected, you’ll still receive a transparent summary of the security checks performed, giving you full confidence that every application has been thoroughly reviewed.
Workday Required Configuration: Security/Permissions
Please complete the following steps in Workday. This will ensure the correct permissions are enabled to pull data from Workday into Crosschq.
Workday Required Configuration: Edit Tenant Setup – Recruiting
Workday Required Configuration: Fraud Alert Custom Object
-
Step 1: Create the Custom Object
Step 1: Create integration system user
-
Login to your Workday tenant.
-
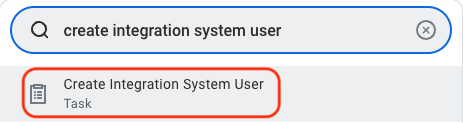
In the search bar, type Create Integration System User and select the task of the same name.
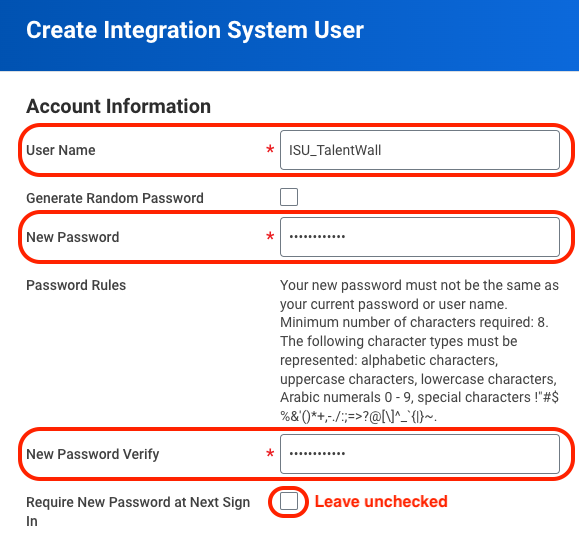
- A window will appear where you will create the credentials for a new ISU.
- Enter a user name and password (note: due to xml encoding, "&", "<", and ">" cannot be included in the password). Remember to store your credentials as they will be used at a later step to set up the connection between Workday and TalentWall!
- Leave unchecked the Require New Password at Next Sign In flag
 Click OK.
Step 2: Assign ISU to password expiry exemption list
To ensure uninterrupted syncing between Crosschq and Workday, we recommend adding this new ISU to the list of System Users exempt from password expiration.
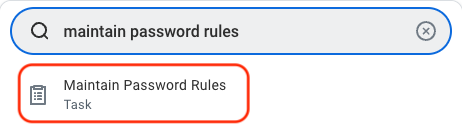
- In the search bar, type Maintain Password Rules and select the task of the same name.
- On the next screen, scroll down to the setting, System Users exempt from password expiration. Click the menu icon at the top-right corner, and search for the newly created ISU. Check the box for the ISU so that it gets added to the list of users exempt from password expiration.

- Click OK.
Step 3: Create and assign security group
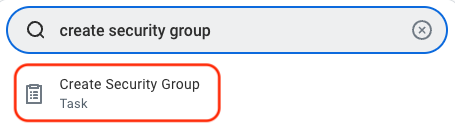
- In the search bar, type Create Security Group and select the task of the same name.
- A window will appear where you will create the security group.
- Under the Type of Tenanted Security Group dropdown, select Integration System Security Group (Unconstrained).
- Enter a name for the security group.
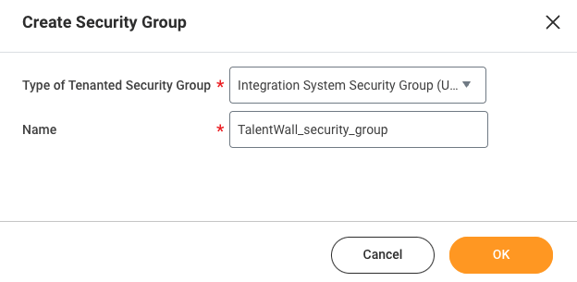
- Click OK.
- You will be taken to a new window where you will assign the ISU to the security group. Under the field for Integration System Users, click the menu icon to search for and select the ISU that you created from step 1.
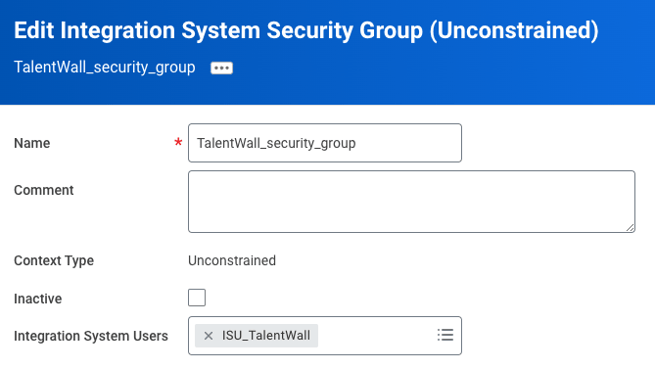
- Click OK.
Step 4: Enable domain security policy permissions
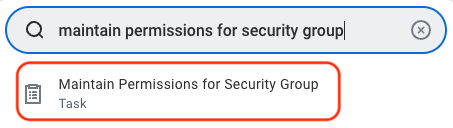
- In the search bar, type Maintain Permissions for Security Group and select the task of the same name.
- A window will appear where you will select what operation to perform on your previously created security group.
- Under the Operation field, select Maintain.
- Under the Source Security Group, click the menu icon to search for and select the security group you created in step 3.
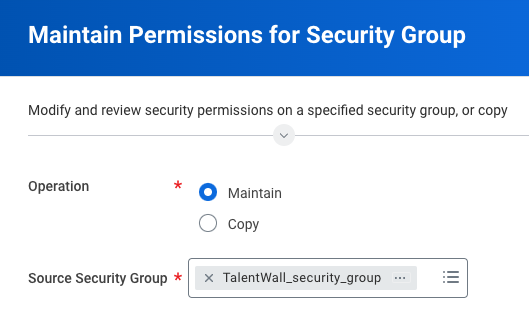
- Click OK.
- You will be taken to a new screen where you will add the required permissions for the Applicant X integration. To add a permission, click the plus icon to the left of the table.

- Once all permissions have been added, click OK.Below are the required domain security policies needed with the corresponding access level:
Worker
- Get Only | Worker Data: Current Staffing Information
- Get Only | Worker Data: Workers
- Get Only | Worker Data: Add Worker Documents
- Get Only | Public Worker Reports
- Get Only | Person Data: Work Contact Information
Candidate
- Get and Put | Candidate Data: Job Application
- Get Only | Candidate Data: Personal Information
- Get Only | Candidate Data: Other Information
- Get Only | Candidate Data: Interview Schedule
- Get and Put | Candidate Data: Attachments
- Get Only | Candidate Reporting
- Get Only | Candidate Tags
Job / Requisitions
- Get Only | Job Requisitions for Recruiting
- Get Only | Job Requisition Data
- Get Only | Indexed Data Source: Job Requisitions
- Get Only | Job Postings
- Get and Put | Move Candidate
- Get Only | Prospects
- Get Only | Manage: Evergreen Requisitions
- Get Only | Confidential Job Requisitions
- Get and Put | Set Up: Recruiting
Organization/Location
- Get Only | View: Supervisory Organization
- Get Only | Organization: Supervisory Organization
- Get Only | Manage: Supervisory Organization
- Get Only | Manage: Location
Integration/System
- Get Only | Integration Build
- View and Modify | Workday Query Language – View and Modify
- Once all permissions have been added, click OK.Below are the required domain security policies needed with the corresponding access level:
- Once all permissions have been added, click OK.
Step 5: Activate security policy changes
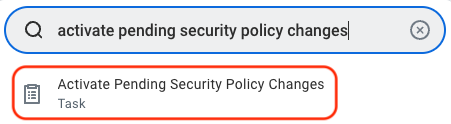
- In the search bar, type Activate Pending Security Policy Changes and select the task of the same name.
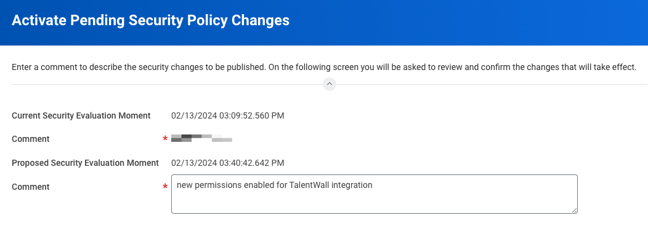
- In the next window, enter any comment to describe the recent security policy changes that you made from step 4.
- Click OK.
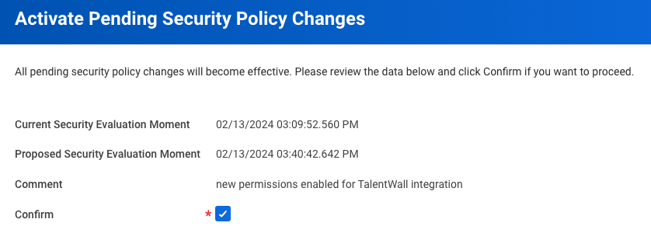
- On the next screen, check the Confirm box and select OK.
Step 6: Validate authentication policy is sufficient
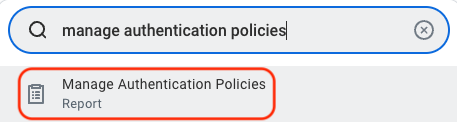
- In the search bar, type Manage Authentication Policies and select the report of the same name.
- Make sure that the ISU you created is added to a policy that can access the necessary domains. The policy should not be restricted to only the "SAML" Allowed Authentication Types – if this is the case, you can create or edit an Authentication Policy with a "User Name Password" Allowed Authentication Type. From the settings after you have created or edited an authentication policy:
-
-
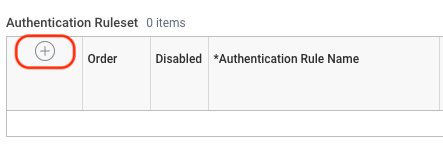
- Click the plus icon to add an authentication rule.
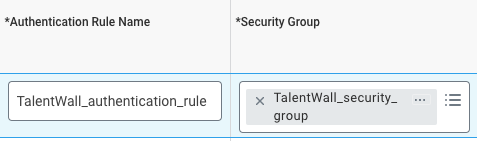
- Enter an Authentication Rule Name and select the security group that you created in step 3.
- Enter an Authentication Condition Name and make sure the Allowed Authentication Type is set to User Name Password or Any.
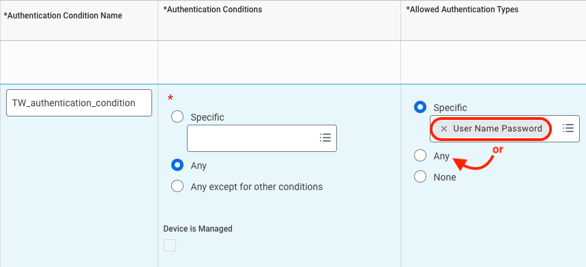
- Click OK.
- Click the plus icon to add an authentication rule.
-
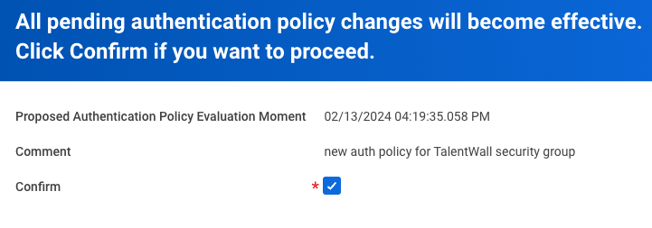
Step 7: Activate authentication policy changes
- In the search bar, type Activate All Pending Authentication Policy Changes and select the task of the same name.

- On the next screen, enter a comment to describe the previous authentication policy changes applied in step 6.
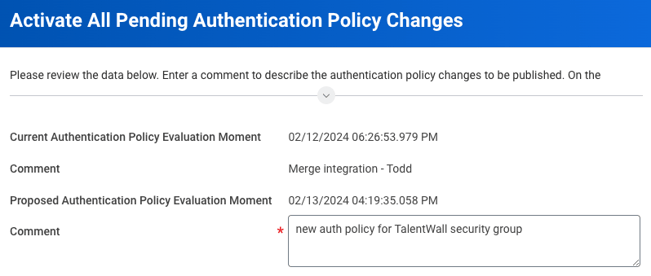
- Click OK.
- On the next screen, check the Confirm box and select OK.
Please complete the following steps in Workday. This will ensure the correct permissions are enabled to pull data from Workday into Crosschq.
Step 8: Retrieve Workday REST API endpoint and token endpoint
On new browser tab, login to Workday, and navigate to View API Clients.

Copy the REST API endpoint and token endpoint from the top of the page.

Step 9: Register a new Client ID and Client Secret
Toggle back to the Workday, and navigate to Register API Clients for Integrations.

Fill out the subsequent form using the following criteria:

- Client Name (something that can be recognized as being used for Crosschq/ApplicantX)
- Enable the flag for "Non-Expiring refresh tokens"
- Leave the "Disabled" flag unchecked
- Scope (Functional Areas): System AND Recruiting
- Enable the flag for "Include Workday Owned Scope"
Click OK. Afterward, you will be taken to a summary page of your newly registered API Client. The summary will include your Client ID and Client Secret. Copy these two fields as they will need to be entered in Crosschq.
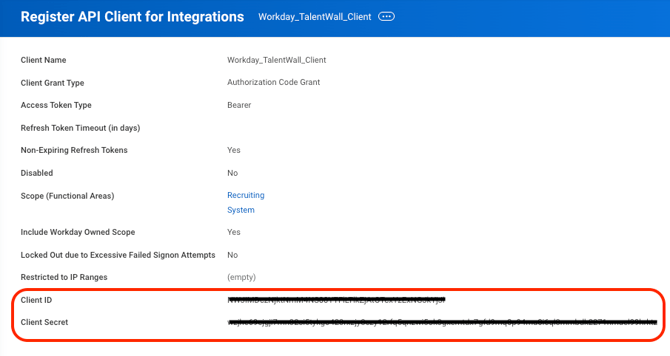
Client secrets can be viewed only when you register an API client or generate a new client secret. For security reasons, store your client secret securely and don't share it.
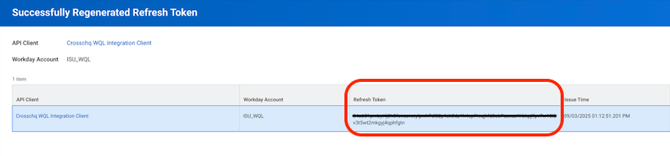
Step 10: Generate new refresh token
Toggle to your Workday browser tab, and navigate back to View API Clients. Click the API Clients for Integrations tab.
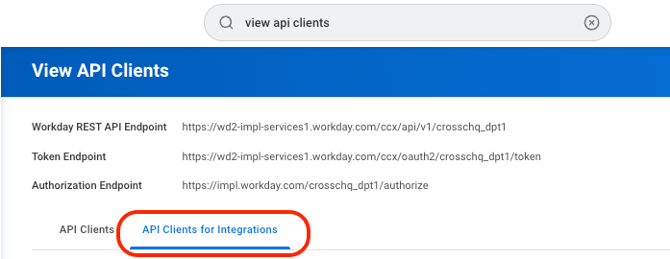
Search for the client that you registered in step 9. Click the ellipsis after the client name and select API Client > Manage Refresh Tokens for Integrations.

On the next window, enter the ISU that you created in step 1.

Click OK. On the next page, enable the flag for Generate Refresh Token.
 Click OK. A summary page will appear with the refresh token. Copy the token so it can be entered in Crosschq.
Workday Required Configuration: Edit Tenant Setup – Recruiting
Step 1: Edit Tenant Setup
In Workday, search for and open Edit Tenant Setup – Recruiting and configure the following settings:
Collect Candidate Signal Data Level 1: Check this checkbox to activate collection of the new signal data fields.
- Ensure your Privacy Policy or Terms and Conditions covers collection of these additional identifiers, or consult your legal team before enabling.
- Note: Network Security Signals will only be collected on job applications submitted after this setting is enabled — it will not populate on prior applications.
Disable Candidate Personal Information Editing on Candidate Home (Optional) Check this checkbox if you want to prevent candidates from updating their name and contact information via self-service. This setting applies to all External Career Sites.

Workday Required Configuration: Fraud Alert Custom Object
Step 1: Create the Custom Object
Log in to your Workday account and search for and open the task Create Custom Object.


In the Workday Object field, select Job Application. Set the Custom Object Name to Fraud Signals.

Step 2: Configure the Custom Object
Complete the required fields and click Next to proceed through each section:
General Settings
Configure as needed.

Field Definitions
Please note that the signal fields are a recommendation — your team has full flexibility to decide how many signals you'd like to display. If you'd prefer to see more, Crosschq can adjust the mapping accordingly. When no signals are detected, Crosschq will populate 7 fields to indicate the 7 modules that were analyzed and confirm that no fraud was found. Add the following required fields:


| Field Label | Field Type | Web Service Alias |
|---|---|---|
| Report URL | Text | fraudReportUrl |
| Risk Level | Text | fraudRiskLevel |
| Score | Decimal | fraudScore |
| Signal 01 | Text | fraudSignal |
| Signal 02 | Text | fraudSignal2 |
| Signal 03 | Text | fraudSignal3 |
| Signal 04 | Text | fraudSignal4 |
| Signal 05 | Text | fraudSignal5 |
| Signal 06 | Text | fraudSignal6 |
| Signal 07 | Text | fraudSignal7 |
| Signal 08 | Text | fraudSignal8 |
| Signal 09 | Text | fraudSignal9 |
| Signal 10 | Text | fraudSignal10 |
| Fraud Feedback URL | Text | fraudFeedbackUrl |
Permissions
- Domain Setup: Recruiting

Review
Review the summary and make any necessary edits, then click OK.

On the optional next screen, click OK again.

Review the resulting view and click Done.

Step 3: Verify the Custom Object
Open a candidate profile and navigate to the Additional Data tab.


Confirm that the custom object appears correctly.
Step 4: Add Custom Fields to the Job Application View
Search for and open the task View Grid Configuration.

Select your Job Application view (e.g., Default Candidate List for Global Modern Services) and click OK.

Step 5: Configure Columns
Click Configure.

Under Individual Columns, add the custom fields you want to display:
- Report URL
- Risk Level
- Any other required fields

Click OK, then Done.

Step 6: Validate the Configuration
Open a Job Application or Candidate list and confirm that the new columns are visible. Adjust column order or visibility at any time via View/Edit Grid Preferences.

Crosschq ATS Hub interactions
What data will Workday receive from Crosschq on Fraud analysis?
When a job application is flagged as potentially fraudulent, the relevant signal fields will be automatically populated with all identified risk indicators, prioritized by severity — from the most critical to the least. In cases where no fraud is detected, a summary of the security checks and modules evaluated during the analysis will be provided for full transparency.

What is the Fraud Feedback URL for?
In case the user finds some inaccurate fraud risk evaluation, we provide this URL to submit feedback about it.