Building a custom recruiter report in Workday will allow Crosschq to pull relevant recruiting data into the TalentWall and/or Insights applications.
Before you read further, make sure you have completed the ISU configuration steps to integrate Workday with TalentWall.
Once a Workday ISU has been created an connected to Crosschq, you can follow the instructions below to build a job recruiters report in Workday:
- Login to Workday with your regular user credentials. We recommend the user that builds this report has the highest level of permissions available in order to avoid potential field limitations on the report. Please make sure at a minimum, the logged in user has access to the Job Requisitions - Indexed data source. Note that at the end of this process, we will transfer the ownership of the custom report to the ISU assigned with the TalentWall integration.
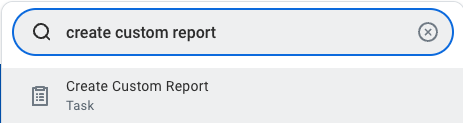
- Once logged in, from the search bar, type Create custom report and select the task of the same name.
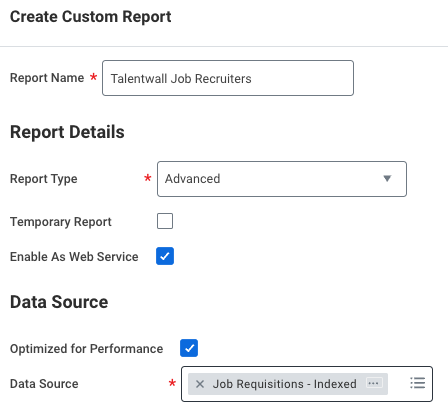
- A window will appear where you will input additional information for the report.
- Under Report Name, enter Talentwall Job Recruiters. Note: the report name must match exactly, including the letter casing.
- Under Report Type, select Advanced.
- Enable the Enable As Web Service flag.
- Enable the Optimized for Performance flag.
- Under Data Source, search for and select Job Requisitions - Indexed. Note: if you cannot find Job Requisitions - Indexed, you can try disabling the Optimized for Performance flag and search again.
 Click OK.
 - Add the following columns to the report:
Business Object Field Column Heading Override XML Alias Job Requisition Hiring Manager(s) Hiring_Manager_s_ Job Requisition Non-Primary Recruiters for Job Requisition Non-Primary_Recruiters_for_Job_Requisition Job Requisition Primary Recruiter Primary_Recruiter Job Requisition Employee Type Employee_Type Job Requisition Workday ID workdayID Job Requisition Last Functionally Updated Last_Functionally_Updated Job Requisition Date Request Entered Date_Request_Entered Job Requisition Close Date Close_Date Job Requisition Job Requisition Freeze Date Job_Requisition_Freeze_Date Job Requisition Job Requisition Fill Date Job_Requisition_Fill_Date Note: if you would like to store additional fields in Crosschq, they may also be added as columns to this report.
You will be prompted with an alert recommending that your web service aliases are 16 characters or fewer. Please ignore this alert and follow the exact aliases outlined in the table above.
-
Toggle to the Filter tab and enter the following "filter on instances" query to the report:
And/Or ( *Field *Operator Comparison Type Comparison Value ) And Date Request Entered greater than Prompt the user for the value Prompt #1 And Date Request Entered less than or equal to Prompt the user for the value Prompt #2 The query should resemble the conditions below in Workday.

- Toggle to the Prompts tab and enter the following:
*Field Prompt Qualifier Label for Prompt Label for Prompt XML Alias *Default Type Required Date Request Entered Prompt #1 Created From Created_From No default value ✔️ Date Request Entered Prompt #2 Created To Created_To No default value ✔️ The prompts should resemble the entries below in Workday. Please note that the XML aliases are custom. Make sure they are updated to match the corresponding values from the table above.

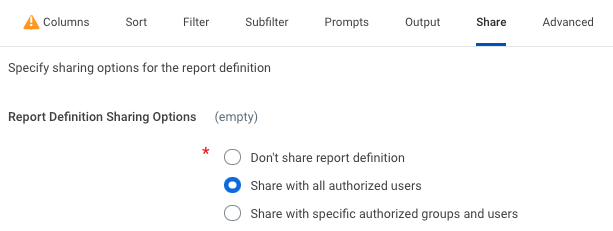
- Toggle to the Share tab. We recommend sharing this report with all authorized users; this will help debug any potential issues more easily.
- Once all columns, filters, prompts, and share settings have been configured, click OK. You may need to click OK a second time to acknowledge the character alerts in the columns tab.
- Once saved, from the main search bar, type view custom report and select the report of the same name. On the next window, find the custom report you just built (should be named "Talentwall Job Recruiters").
From this screen, click the ellipsis beside the report name, and select Custom Report > Transfer Ownership.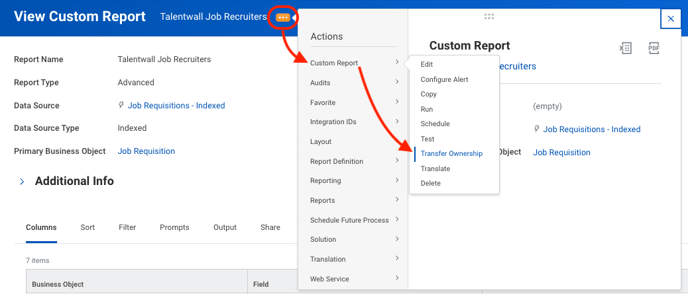
- On the next window, assign the new owner as the ISU that you configured for TalentWall in this article.
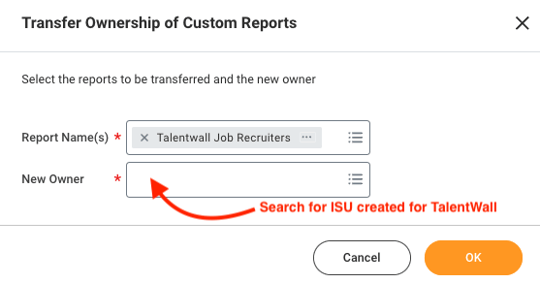
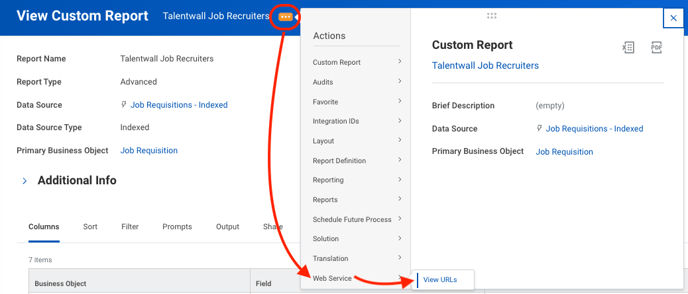
Once the correct owner has been assigned, click OK. Make sure there are no errors once you click OK. If there are errors, then the ISU may be missing permissions for this report. We would recommend reviewing this article to make sure the correct permissions have been assigned to the ISU. - Lastly, we recommend testing that the report is working. On the same View Custom Report page, click the ellipsis by the report name and select Web Service > View URLs.
On the next window, enter a created from/to date range for the last 12 months, and click OK.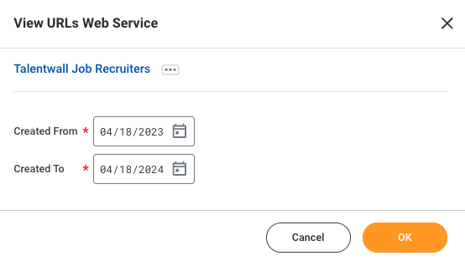
You will be taken to a page titled View URLs Web Service. Alongside the REST label, click Workday XML.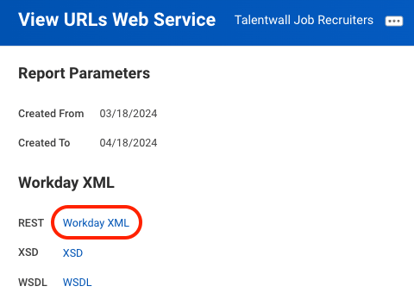
You will be prompted to enter credentials to view the XML data. Afterward, the XML should be similar to the following: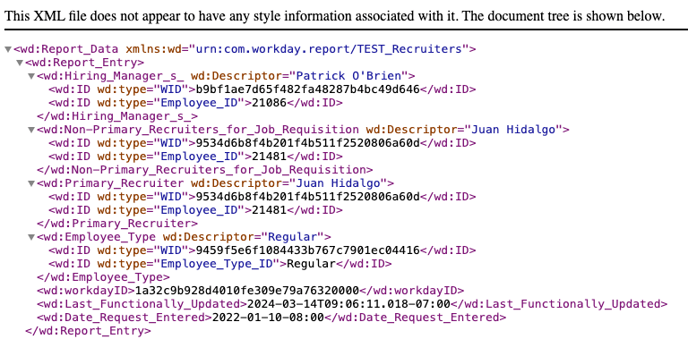
If data appears to be missing or you are prompted with any errors from Workday when initiating this test, please contact support@crosschq.com with a description of the error you are receiving.
If the data looks similar to the above screenshot, then the report has been created successfully. Please let your Crosschq implementation lead know that the job recruiters report was built.