Prior to integrating with Crosschq's Workday connector for TalentWall, Voice, and/or Insights (recruiting analytics), please complete the following steps in Workday. This will ensure the correct permissions are enabled to pull data from Workday into Crosschq.
- Step 1: Create integration system user
- Step 2: Assign ISU to password expiry exemption list
- Step 3: Create and assign security group
- Step 4: Enable domain security policy permissions
- Step 5: Activate security policy changes
- Step 6: Validate authentication policy is sufficient
- Step 7: Activate authentication policy changes
- Step 8: Copy web services endpoint for Workday tenant
Step 1: Create integration system user
-
Login to your Workday tenant.
-
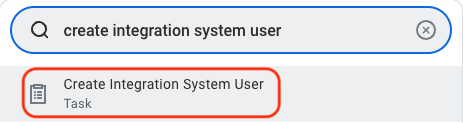
In the search bar, type Create Integration System User and select the task of the same name.
- A window will appear where you will create the credentials for a new ISU.
- Enter a user name and password (note: due to xml encoding, "&", "<", and ">" cannot be included in the password). Remember to store your credentials as they will be used at a later step to set up the connection between Workday and TalentWall!
- Leave unchecked the Require New Password at Next Sign In flag
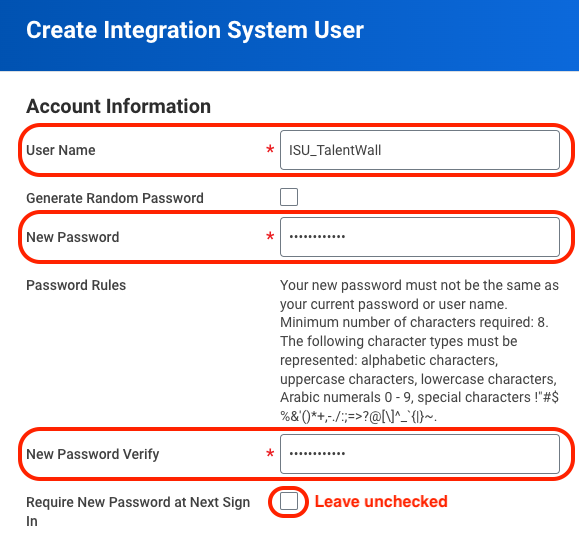 Click OK.
Step 2: Assign ISU to password expiry exemption list
To ensure uninterrupted syncing between Crosschq and Workday, we recommend adding this new ISU to the list of System Users exempt from password expiration.
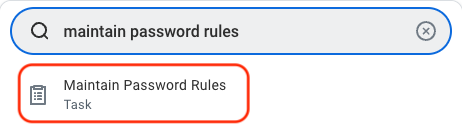
- In the search bar, type Maintain Password Rules and select the task of the same name.
- On the next screen, scroll down to the setting, System Users exempt from password expiration. Click the menu icon at the top-right corner, and search for the newly created ISU. Check the box for the ISU so that it gets added to the list of users exempt from password expiration.

- Click OK.
Step 3: Create and assign security group
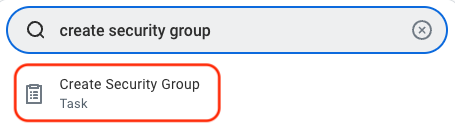
- In the search bar, type Create Security Group and select the task of the same name.
- A window will appear where you will create the security group.
- Under the Type of Tenanted Security Group dropdown, select Integration System Security Group (Unconstrained).
- Enter a name for the security group.
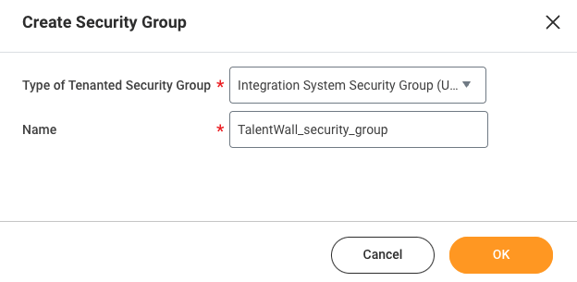
- Click OK.
- You will be taken to a new window where you will assign the ISU to the security group. Under the field for Integration System Users, click the menu icon to search for and select the ISU that you created from step 1.
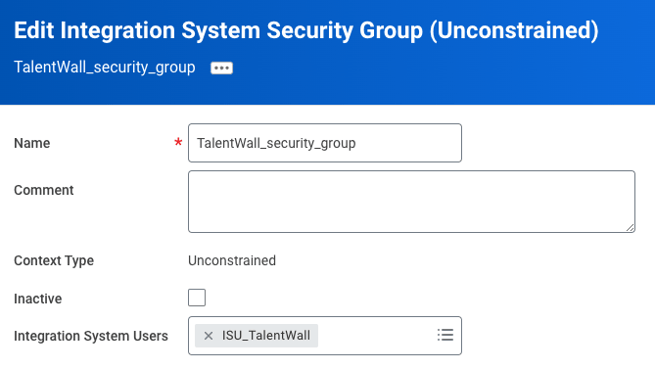
- Click OK.
Step 4: Enable domain security policy permissions
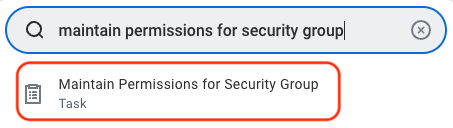
- In the search bar, type Maintain Permissions for Security Group and select the task of the same name.
- A window will appear where you will select what operation to perform on your previously created security group.
- Under the Operation field, select Maintain.
- Under the Source Security Group, click the menu icon to search for and select the security group you created in step 3.
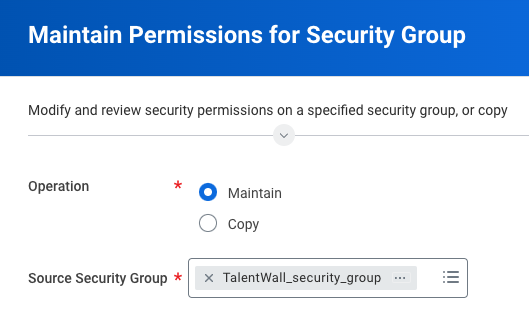
- Click OK.
- You will be taken to a new screen where you will add the required permissions for the TalentWall integration. To add a permission, click the plus icon to the left of the table.

- Below are the required domain security policies needed with the corresponding access level:
- Get Only | Candidate Data: Job Application
- Get Only | Job Requisition Data
- Get Only | Job Requisitions for Recruiting
- Get Only | Job Postings
- Get Only | Manage: Evergreen Requisitions
- Get Only | Candidate Data: Interview Schedule
- Get Only | Candidate Data: Interview Feedback Results
- Get Only | Candidate Data: Personal Information
- Get Only | Candidate Data: Attachments
- Get Only | Candidate Data: Other Information
- Get Only | Prospects
- Get Only | Manage: Location
- Get Only | Worker Data: Public Worker Reports
- Get Only | Worker Data: All Positions
- Get Only | Worker Data: Add Worker Documents
- Get Only | Integration Build
- View and Modify | Custom Report Creation
- Get and Put | Move Candidate
- Once all permissions have been added, click OK.
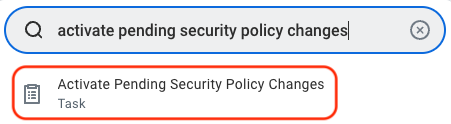
Step 5: Activate security policy changes
- In the search bar, type Activate Pending Security Policy Changes and select the task of the same name.
- In the next window, enter any comment to describe the recent security policy changes that you made from step 4.
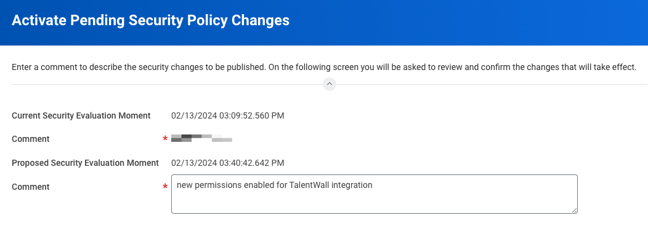
- Click OK.
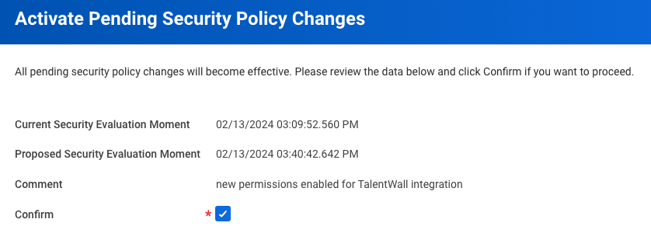
- On the next screen, check the Confirm box and select OK.
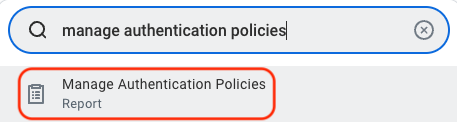
Step 6: Validate authentication policy is sufficient
- In the search bar, type Manage Authentication Policies and select the report of the same name.
- Make sure that the ISU you created is added to a policy that can access the necessary domains. The policy should not be restricted to only the "SAML" Allowed Authentication Types – if this is the case, you can create or edit an Authentication Policy with a "User Name Password" Allowed Authentication Type. From the settings after you have created or edited an authentication policy:
-
-
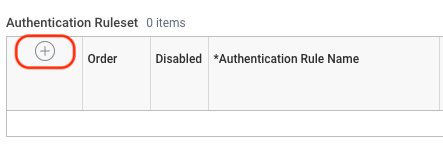
- Click the plus icon to add an authentication rule.
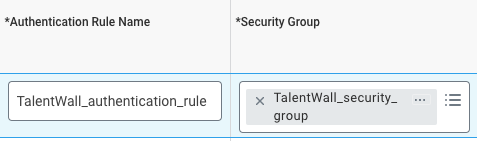
- Enter an Authentication Rule Name and select the security group that you created in step 3.
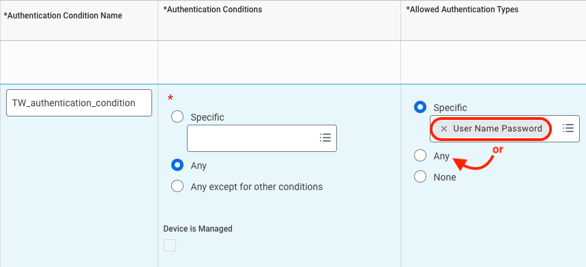
- Enter an Authentication Condition Name and make sure the Allowed Authentication Type is set to User Name Password or Any.
- Click OK.
- Click the plus icon to add an authentication rule.
-
Step 7: Activate authentication policy changes
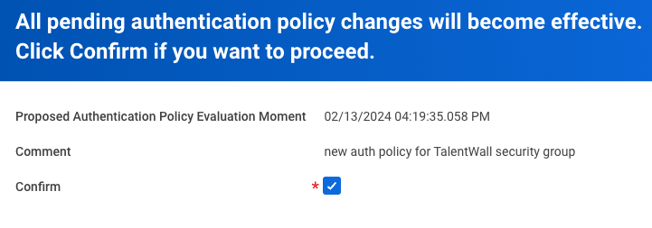
- In the search bar, type Activate All Pending Authentication Policy Changes and select the task of the same name.

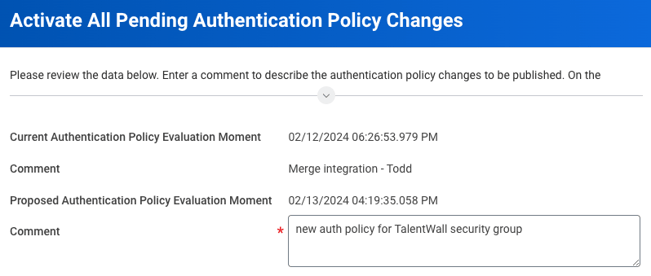
- On the next screen, enter a comment to describe the previous authentication policy changes applied in step 6.
- Click OK.
- On the next screen, check the Confirm box and select OK.
Step 8: Copy web services endpoint for Workday tenant
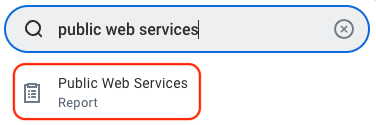
- In the search bar, type Public Web Services and select the report of the same name.
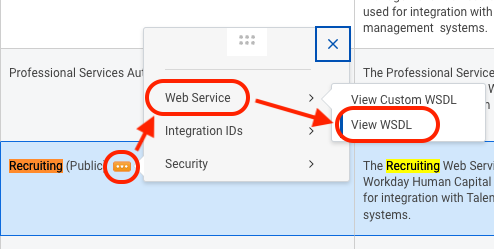
- On the next page, search for the web service called, Recruiting (Public).
- Hover over the web service name, click the corresponding ellipsis, and select Web Service > View WSDL.
- An XML file will load on your browser. Within this XML, navigate to the very bottom of the page.
- Within the "soapbind:address" tag, copy the entire location URL minus the quotes. The URL should resemble something similar to https://wd2-impl-services1.workday.com/ccx/service/crosschq_dpt1/Recruiting/v44.0.

- Store this URL as it will be used to set up the connection between Workday and TalentWall.
Once all steps have been completed, retrieve the following:
- The URL that you copied from step 8 (this is also called the web services endpoint URL).
- The ISU username that you created in step 1.
- The ISU password that you created in step 1.
Now, follow this article to input the above credentials in Crosschq.