Sharing Reports
Within Crosschq, there are two ways to share reports with others in your organization. The first is Securing Sharing.
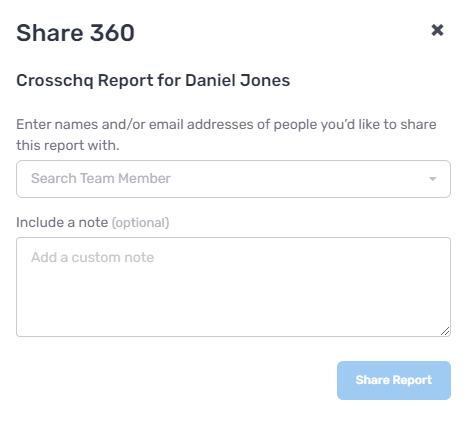
Securing Sharing allows users to securely share Crosschq reports within the platform, while also allowing the ability to track who has accessed and reviewed the report. Additionally, users can add notes to a report in order to provide comments or additional information.
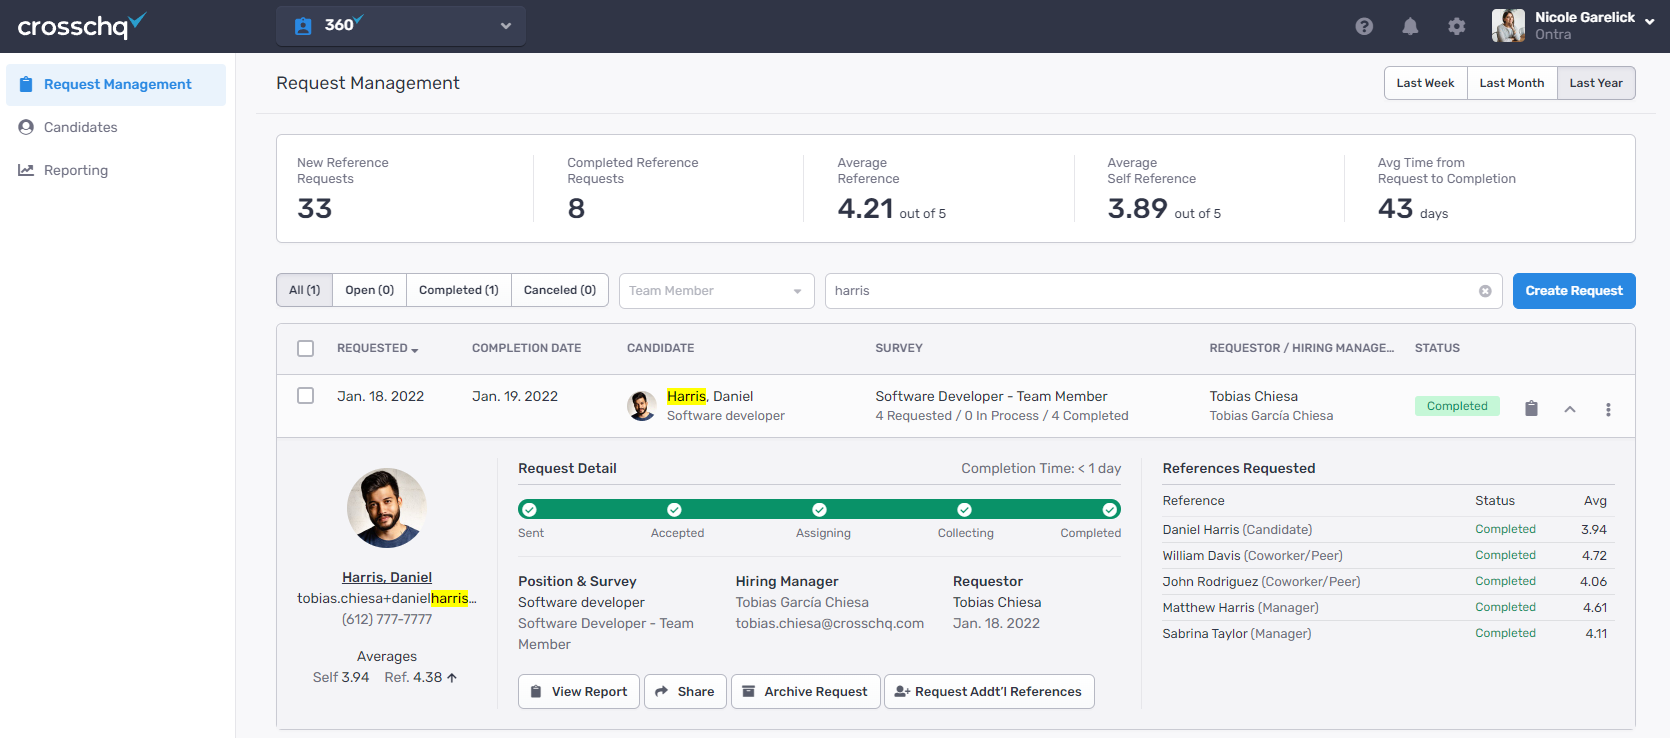
To share a report within Crosschq, users select the share button and enter the email address of the person they want to share the report with. If the person they are sharing the report with doesn’t have a Crosschq account, they are invited to create a Viewer account upon receiving the report. When a report has been shared, they'll be able to see who the report has been shared with and who has viewed the report.
The second method of sharing is utilizing the download PDF feature. This feature is automatically enabled for your account and allows users to share reports with others by downloading the candidate’s report and sharing via pdf.
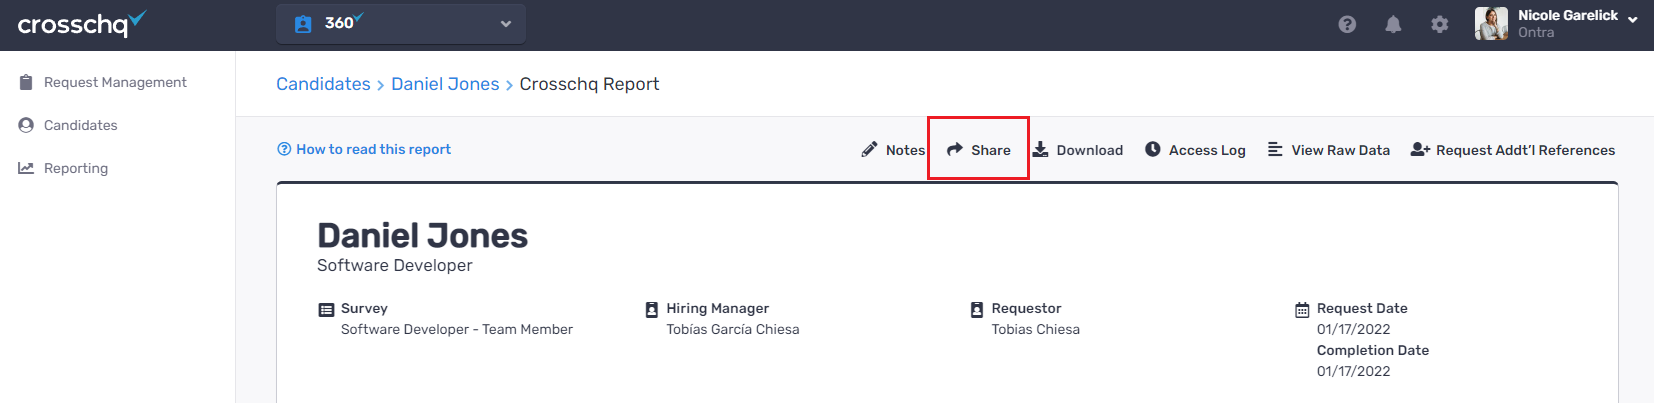
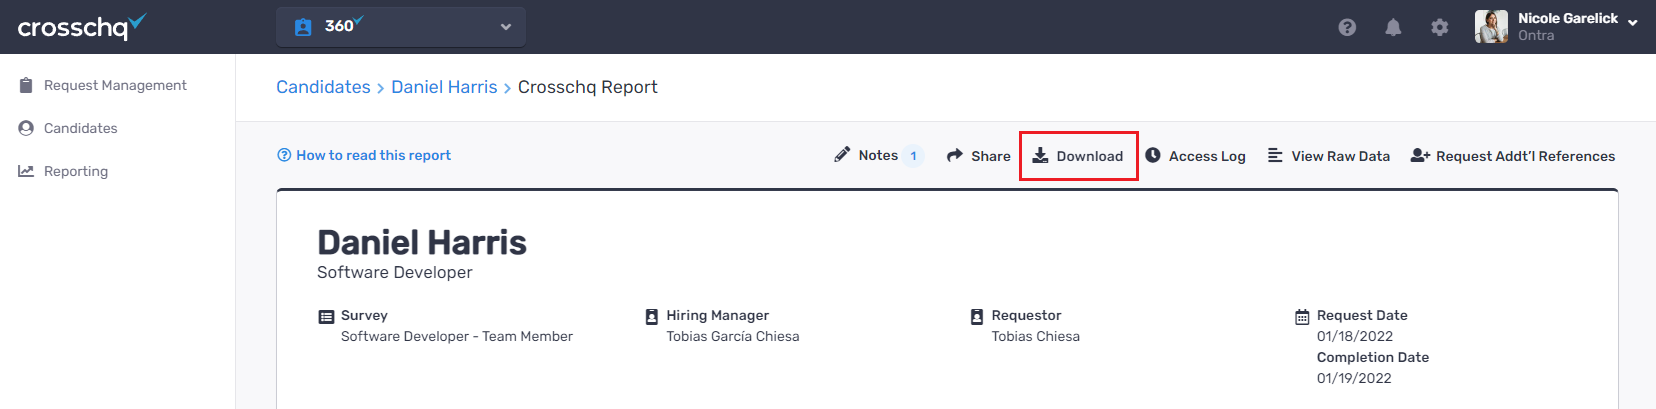
To download a PDF report, select the candidate in question, click the View Report button, and select download report. There are two types of reports available, a summary report and a full report that includes all of the raw data.
This way of sharing reports does come with a security risk, as users are unable to track how PDFs are distributed. It is for this reason that we recommend organizations utilize our secure sharing feature.
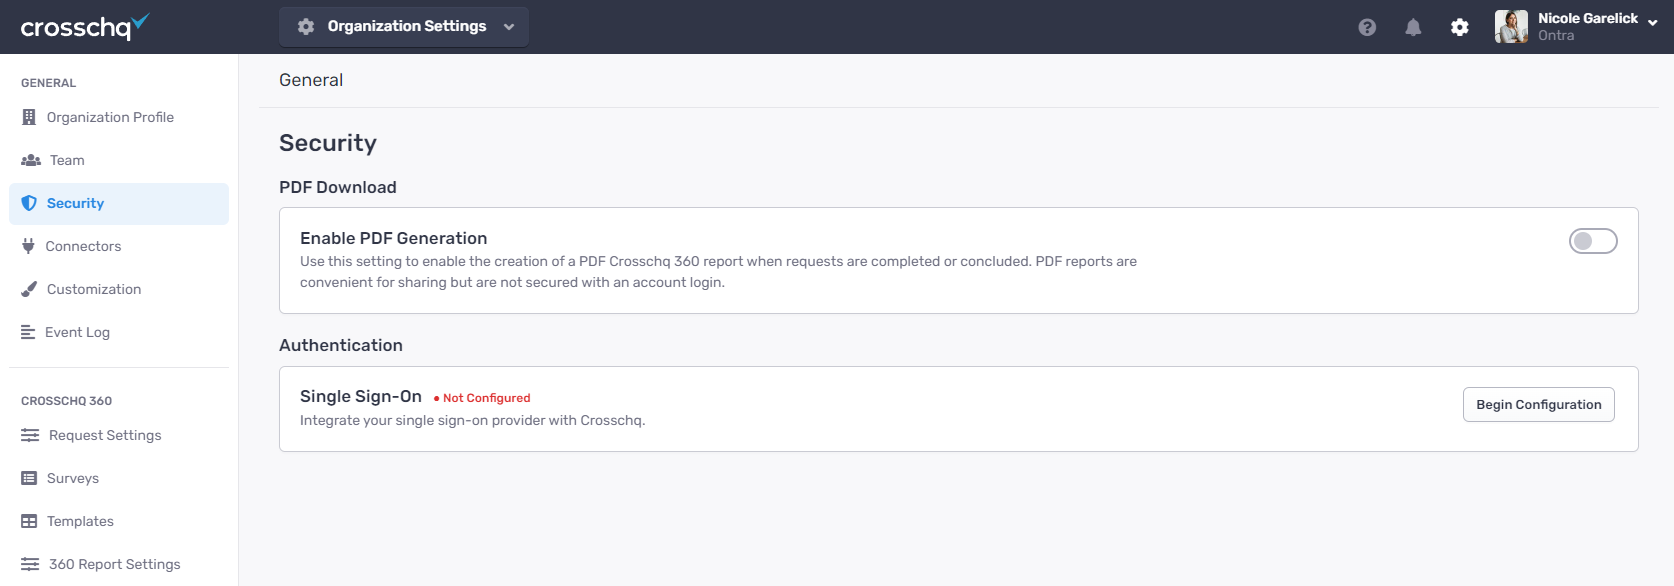
If your organization does decide to use secure sharing, we recommend turning off the PDF generation feature to reduce security/sharing issues and security risks for your organization. In order to turn off PDF generation, select Security with the Organization Settings, then disable the toggle next to the PDF generation section.
User ID Permissions
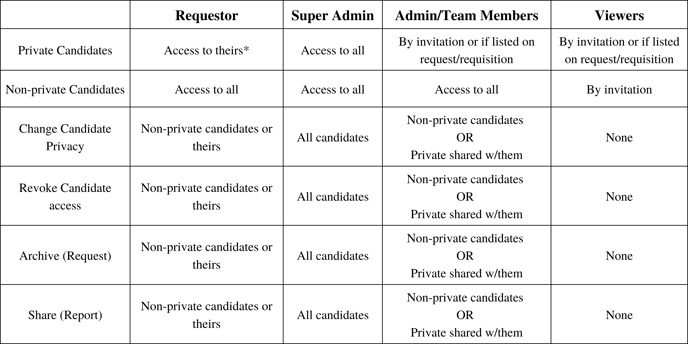
Crosschq offers four different types of user permissions within the platform: Super Administrators, Administrators, Team Members, and Viewers.
- Super Administrators: complete access to all settings, reports, and modules.
- Administrators: can invite/manage other users, can grant users access to other modules, can manage account settings, can make requests to candidates, and can view reports that they have permission to view.
- Team Members: can invite Viewer users, can make requests to candidates, can view all non-private reports. Team members can also access all modules they have permission to access such as 360, NHA, and/or Recruit.
- Viewers: can view all reports that are shared with them. Viewers can only view reports that have their name associated with the request, meaning they are a hiring manager or the report has been shared with them.
To review how to invite team members to your organization, refer to this article.
Making Candidates Private
For those organizations that want to ensure certain team members can only see reports they have access to, it is important to utilize the privacy setting on the candidate page.
By marking a candidate private, users make sure that only admins and the owner of the candidate and hiring manager can access the candidate’s report. Additionally, when a report is marked as private the secure sharing feature is disabled to make sure the information is shared only with those who have access to the report.
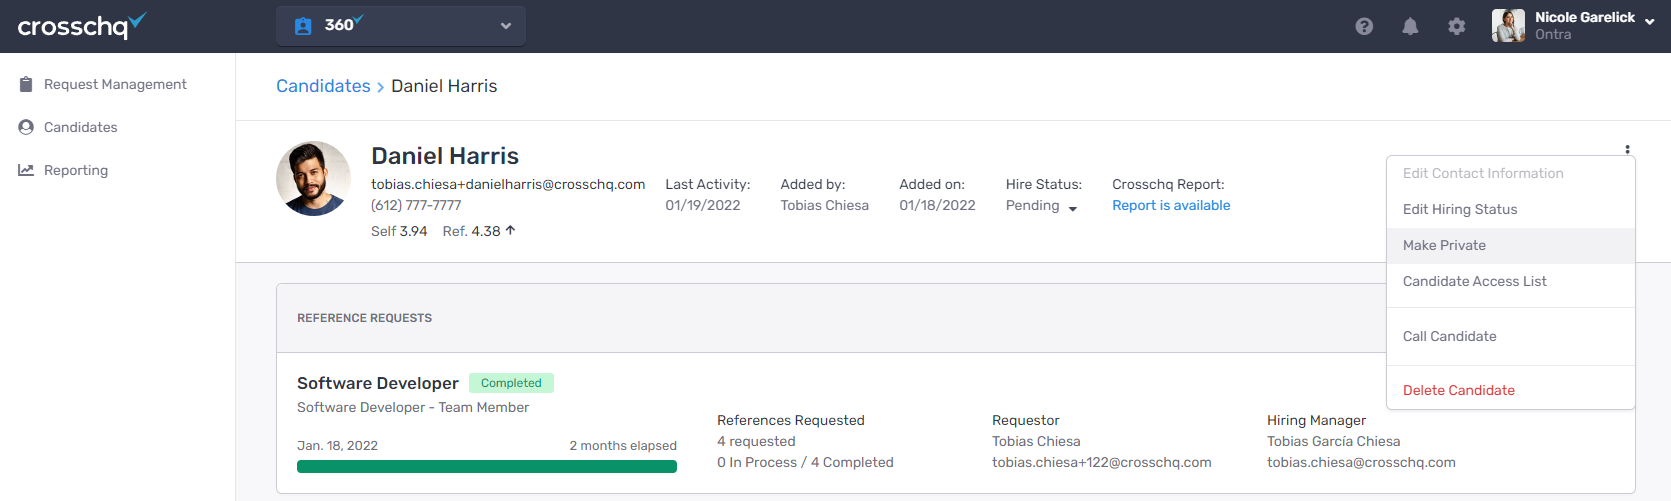
To mark a candidate as private, select the candidate in question. Select the three vertical dots next to the candidate’s name, and click Mark Private.
Overview on what account types can access/view: