The instructions below allows Crosschq to map your stage workflows from Workday. This set up requires uploading to TalentWall the Workday dynamic business process report that defines your recruiting steps and stages. Currently, TalentWall supports a single business process definition to be synced with the app. If you leverage multiple business process definitions to handle your recruiting pipeline, please contact your Customer Success Manager or support@crosschq.com.
Before reading further, make sure you have already connected Workday with your Crosschq account by following these steps:
- Login to your Workday tenant.
-
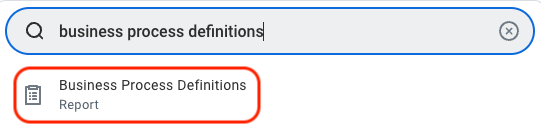
In the search bar, type business process definitions and select the report of the same name.
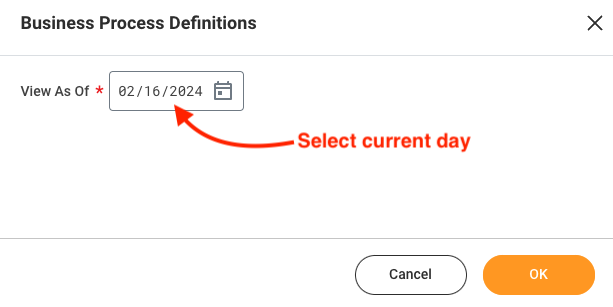
- In the pop-up window, select the current day to view your business process definitions, and click OK.
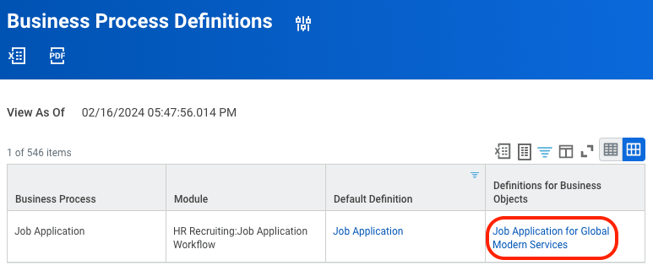
- On the next screen, click the column title, Default Definition. Afterward, search for and select the value named Job Application. Click Filter.

- The resulting business process(es) will be those that are leveraged for Workday Recruiting. If there is only one business process that is returned, click the link corresponding to the Definitions for Business Objects column. If multiple business processes are returned, locate the one that should be synced with TalentWall (currently TalentWall only supports a single business process definition), and click the link corresponding to the Definitions for Business Objects column.
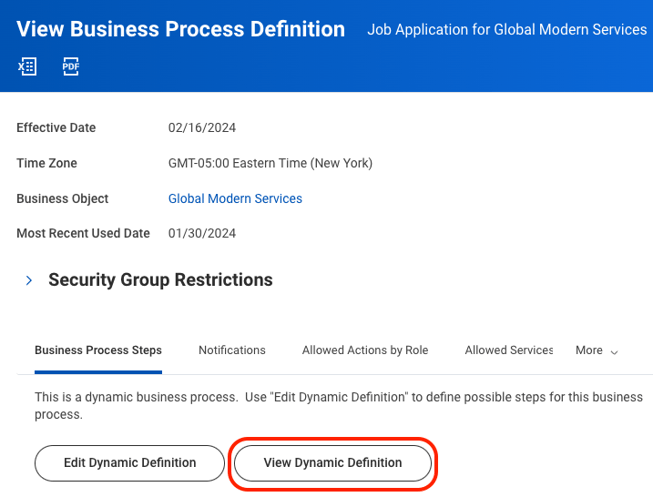
- On the next screen, click View Dynamic Definition.
A pop-up window will appear, where you can select the current day as the Effective Date. Click OK.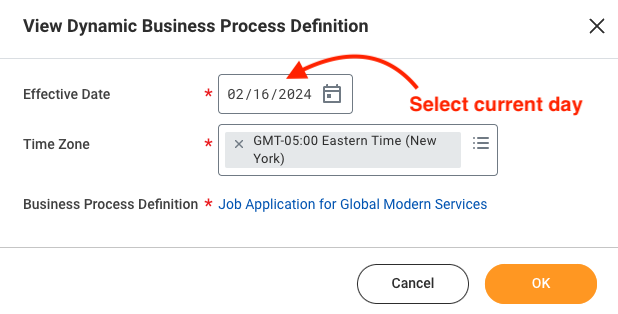
- The next page will show you all steps corresponding with each pipeline stage in Workday. Beside the blue banner title that says View Dynamic Business Process Definition, click the spreadsheet icon to download this report.
 Click Download from the next pop-up window that appears.
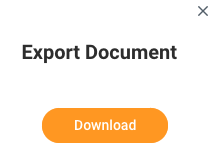
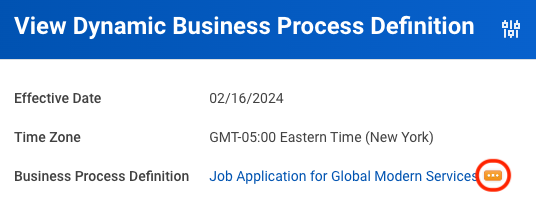
Save this file as it will need to be uploaded to TalentWall! - You will also need to store the ID for this business process. To locate the ID, from the previous View Dynamic Business Process Definition page (where you saw all of your recruiting steps), click the ellipsis beside the Business Process Definition name.
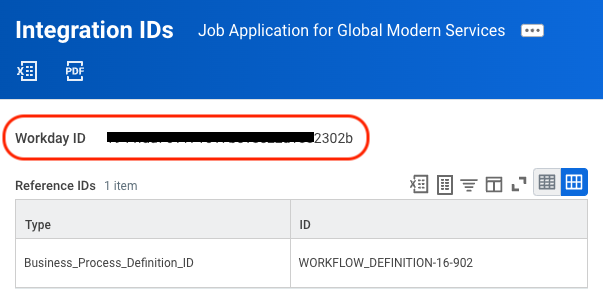
After clicking the ellipsis, navigate to Integration IDs > View IDs.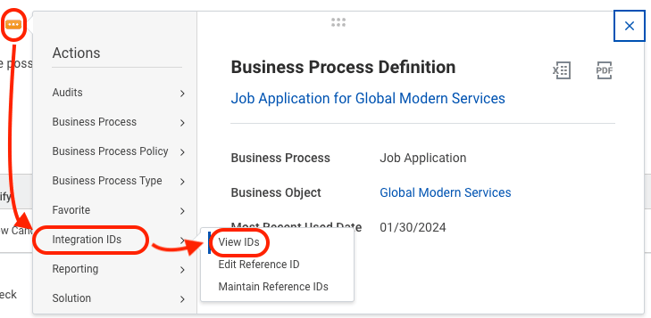
- Copy the Workday ID on the next page.
Once all steps have been completed, make sure you have the following handy:
- The xlsx file that you downloaded from step 8.
- The Workday ID that you copied from step 9.
Now, login to Crosschq and add these items in the settings below:
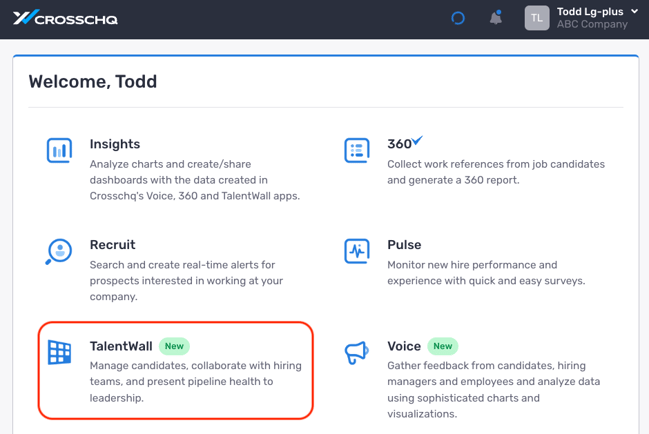
- From the Crosschq homepage, navigate to the TalentWall app.
- Click on your name from the top-right corner, and select Account Settings.

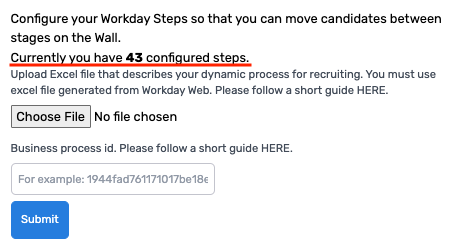
- Under the ATS Connection tab, upload the xlsx file and input the Workday ID under the field that asks for your business process ID.
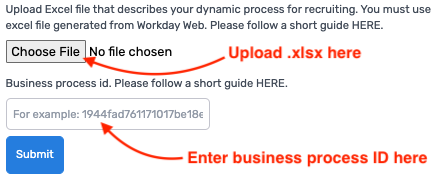
- Click Submit. If your file and ID are accepted, you should see the number of steps configured from your file in the same window.
 If you run into any errors or do not see the number of configured steps listed, please contact support@crosschq.com.